
HOME TRAVEL LOG MOUNTAIN BIKING WINDSURFING STORY ARCHIVES RV INFO PHOTOS CONTACT US
HOME
TRAVEL LOG
MOUNTAIN BIKING
WINDSURFING
STORY ARCHIVES
RV INFO
PHOTOS
CONTACT US
< previous story home next story >
(click thumbnails below to enlarge photos)
INTRODUCTION
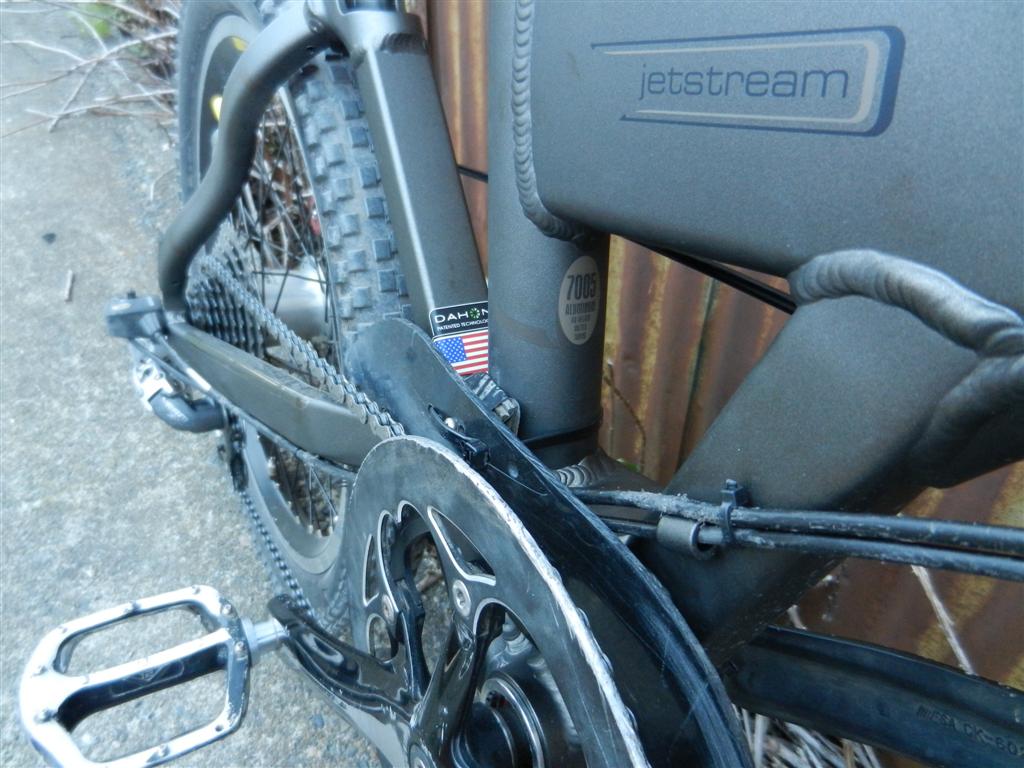
This is an ongoing reference page, showing all the gory details involved with upgrading my 2008 Dahon Jetstream XP folding bike for serious off-road riding, and what's been required to keep it rolling through thousands of miles of such abuse over the years.
When reading this page, please keep in mind that I have ridden this bike much, much harder than it was ever intended for.
I essentially use the Jetstream in place of a conventional mountain bike. I've ridden hundreds of long, technical, steep, and often downright nasty mountain bike trails in 35+ US states (plus a few in Canada), on a folding 20er bike. While I am a bit slower (5% to 20% depending on roughness) and I don't make quite as many tough moves as I would on a conventional bike, I nonetheless ride most of the same trails as other serious mountain bikers do on 26ers or 29ers, and I have a fantastic time doing so.
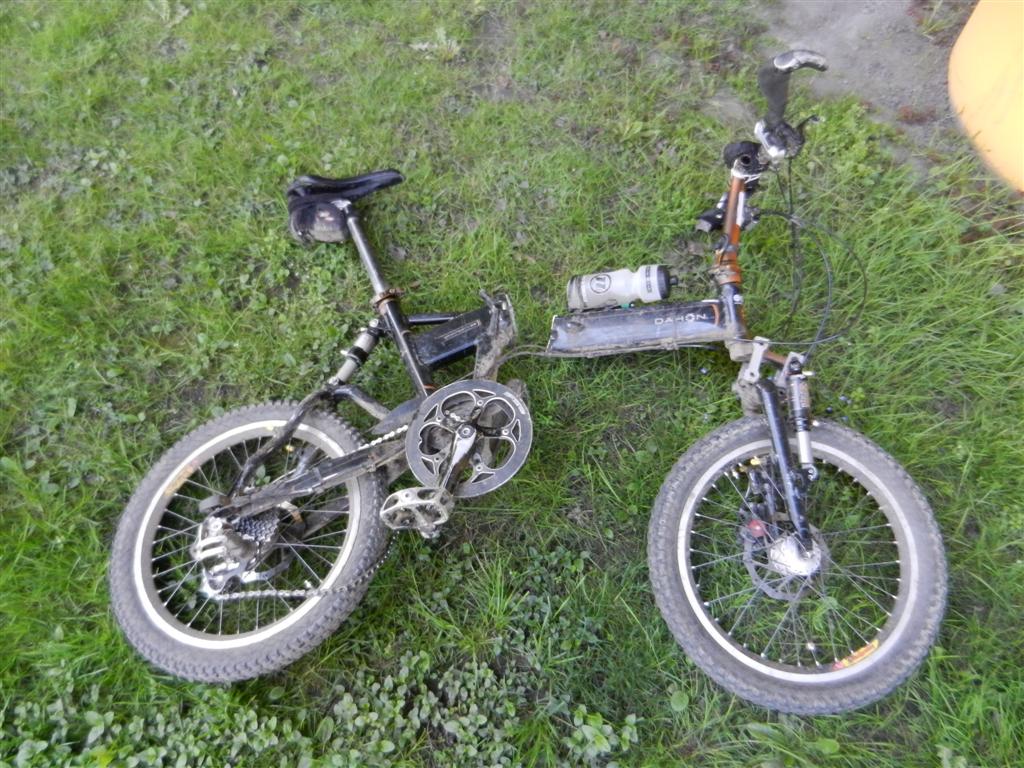
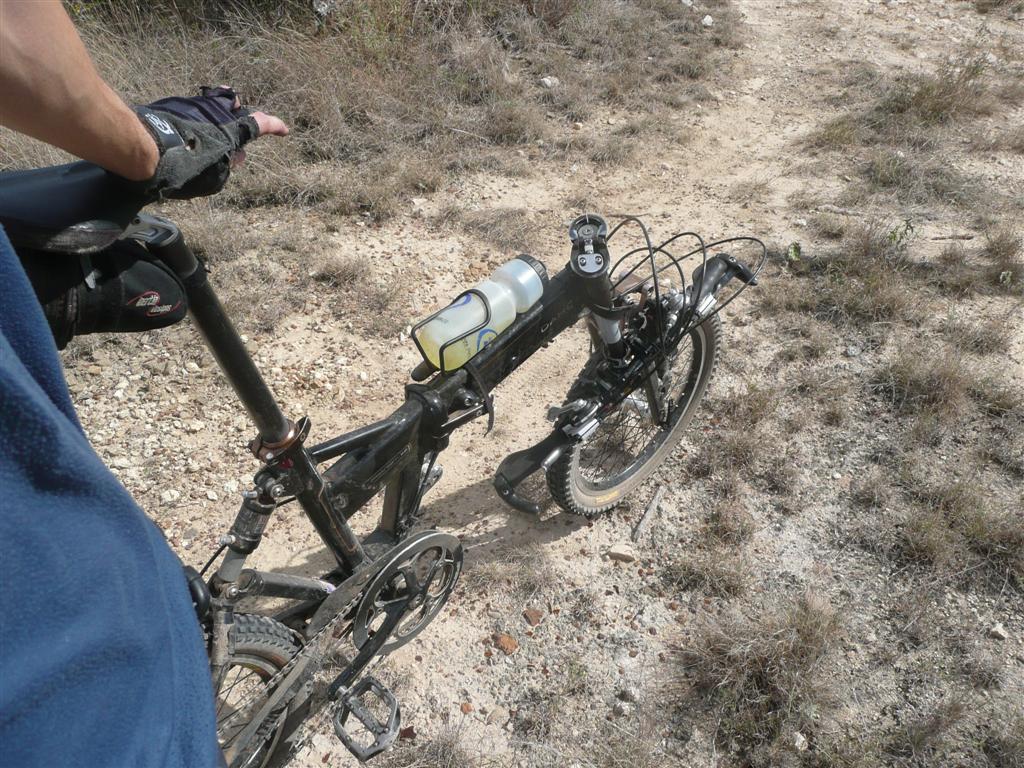
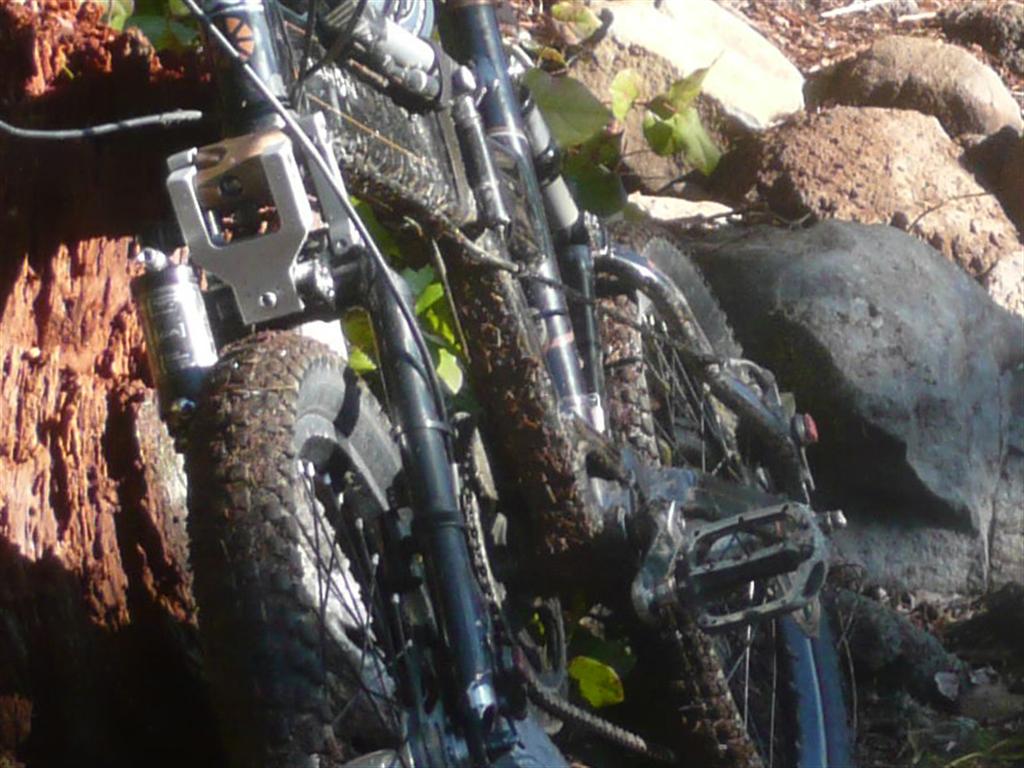
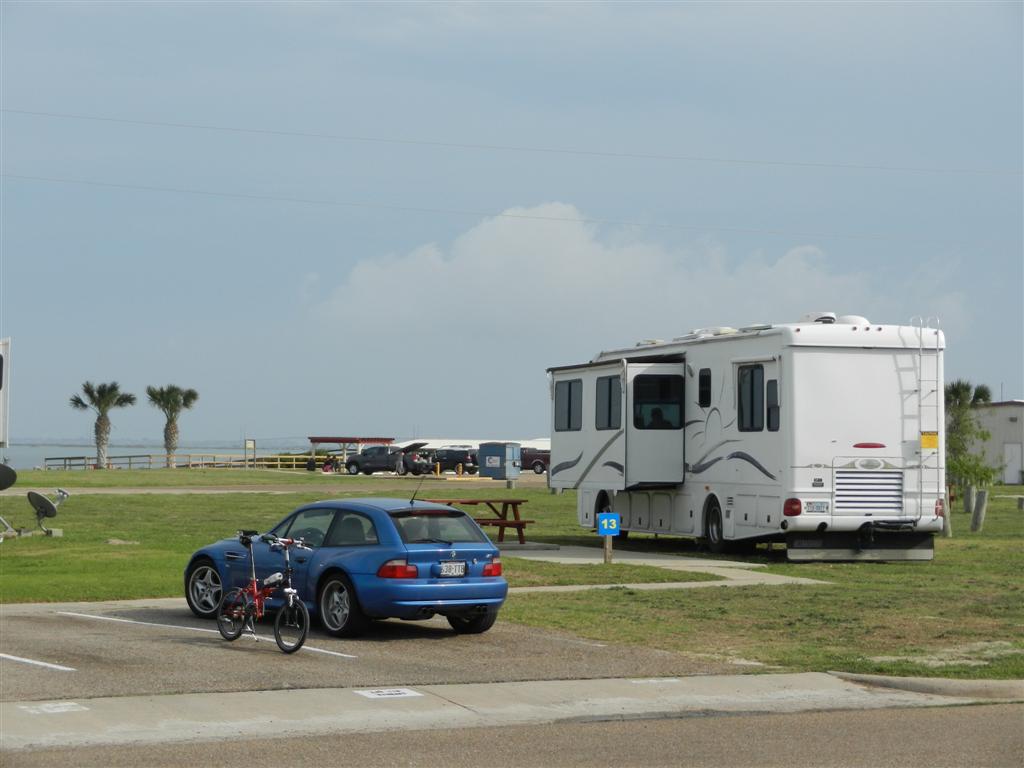
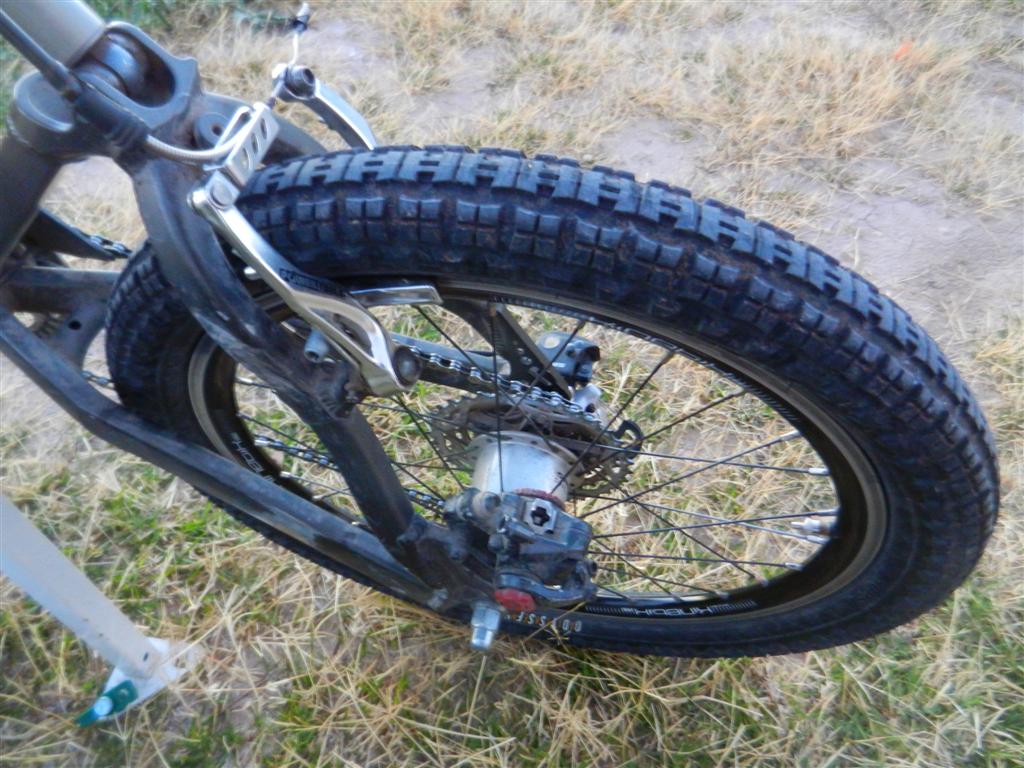
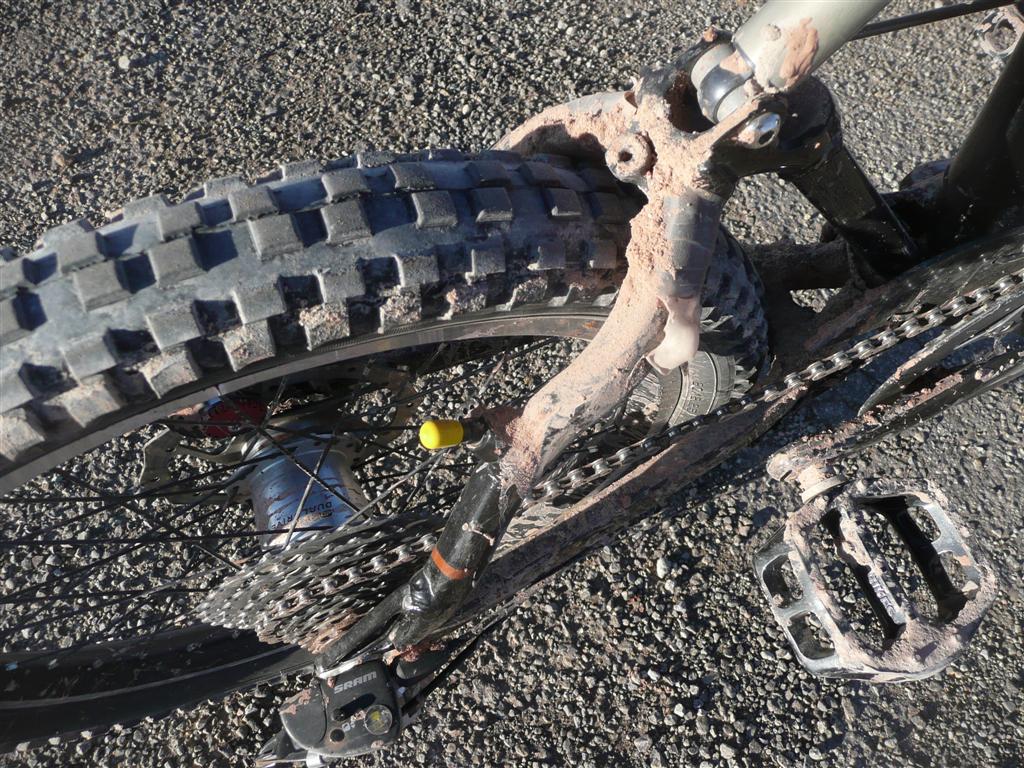
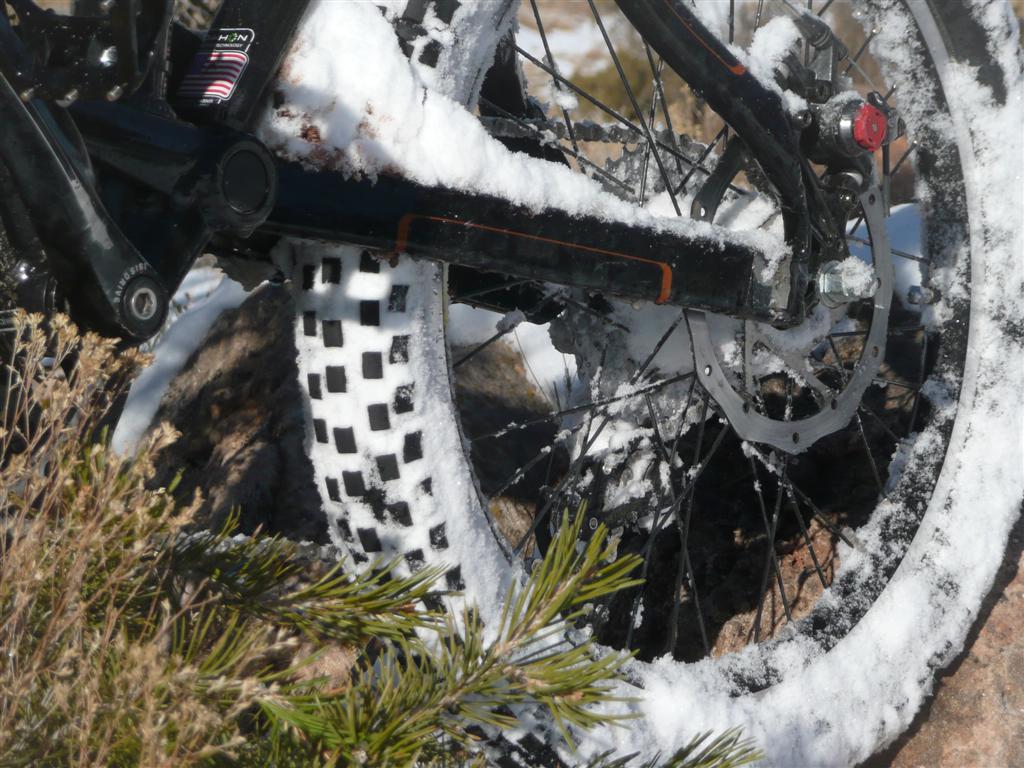
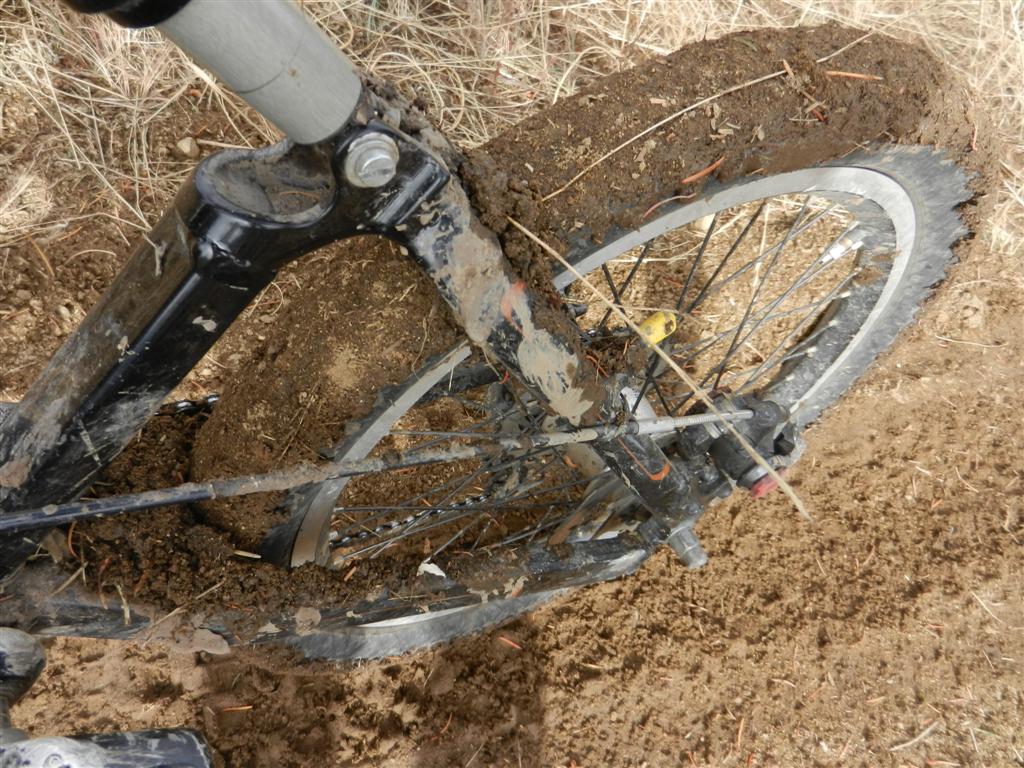
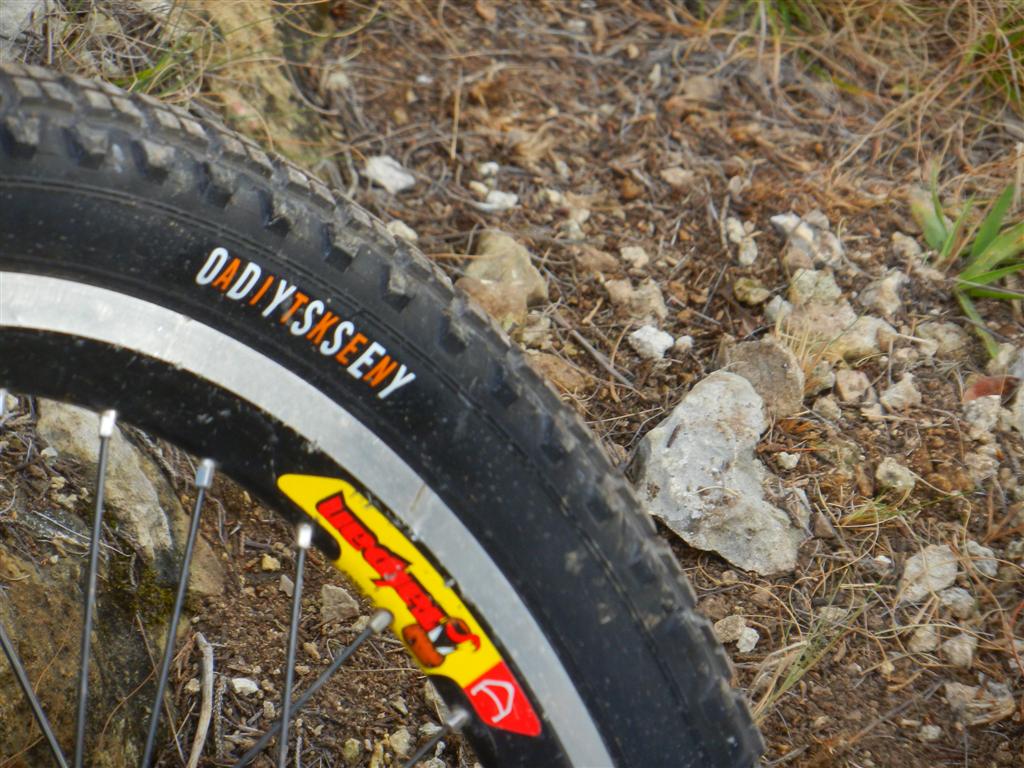
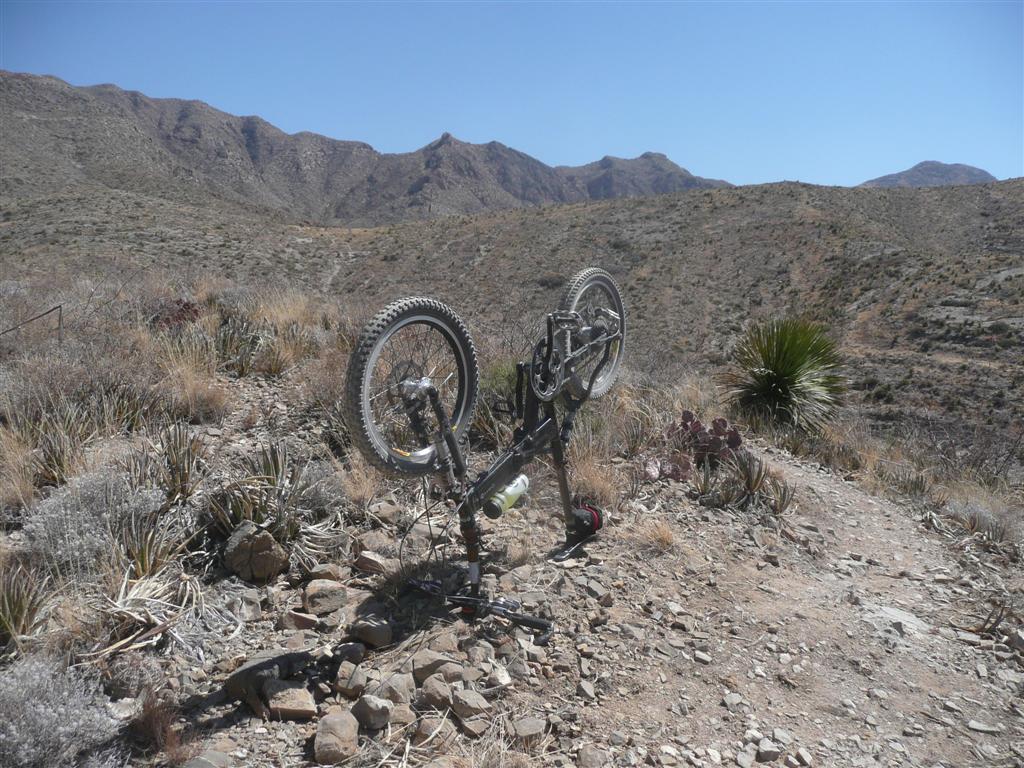
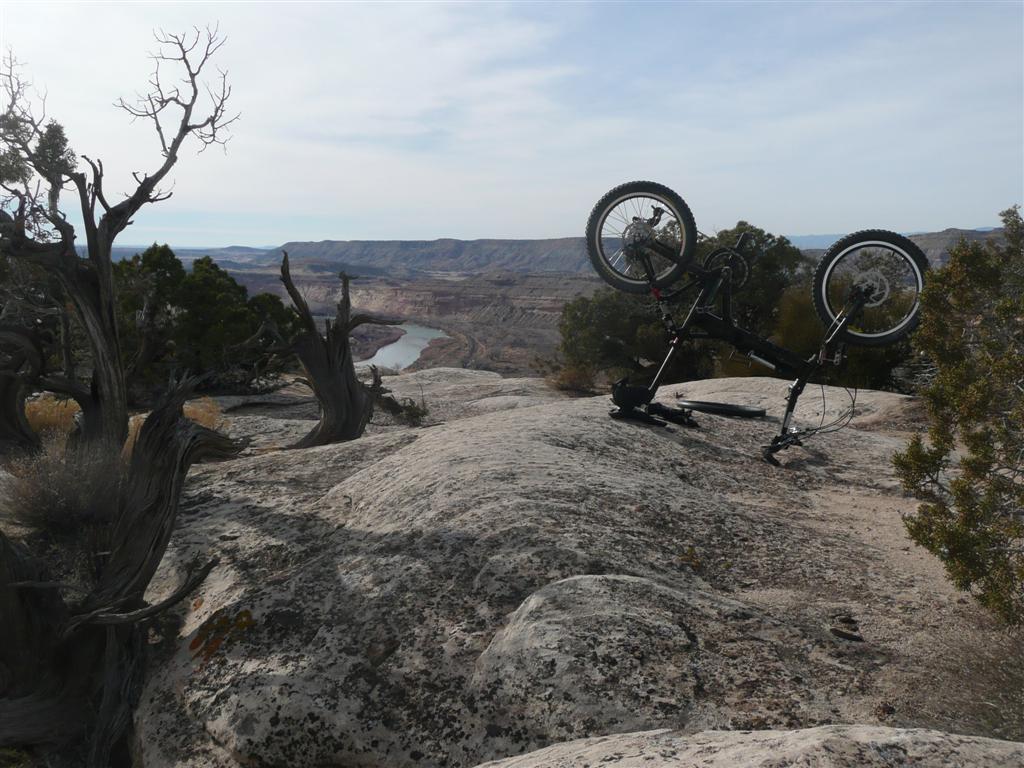
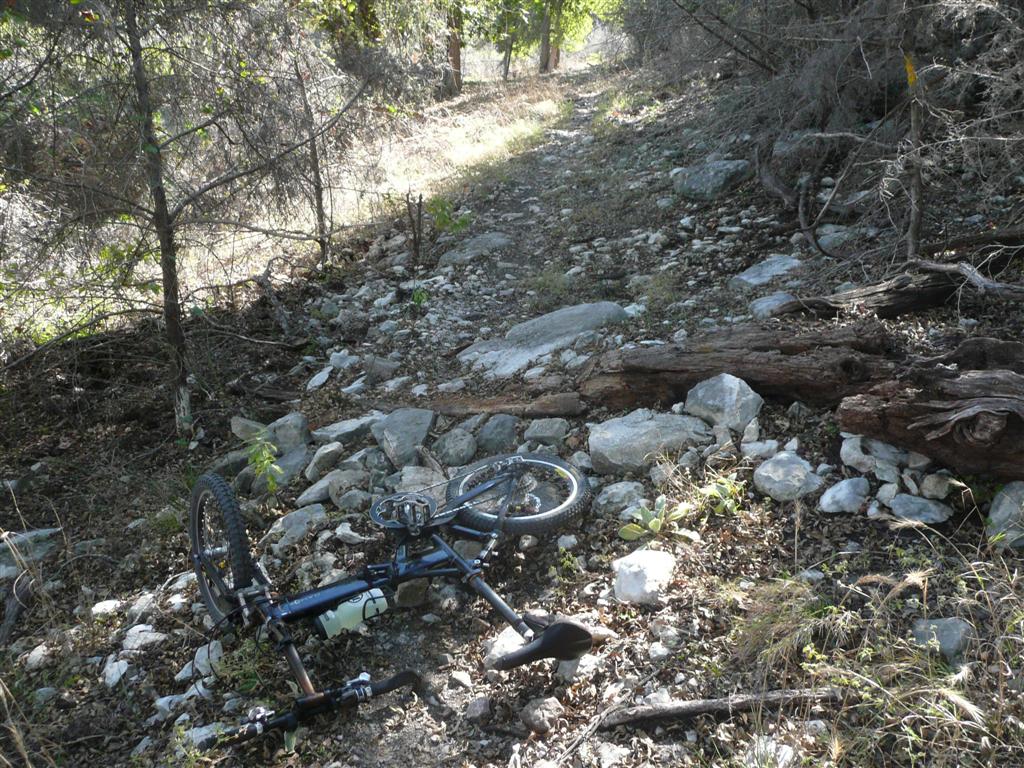
If you haven't already, check out my main biking page (click here) to see my ride log and numerous photo-heavy reports to get a better idea of just how hard this poor little bike gets flogged. Here's a few pics to give you a taste:
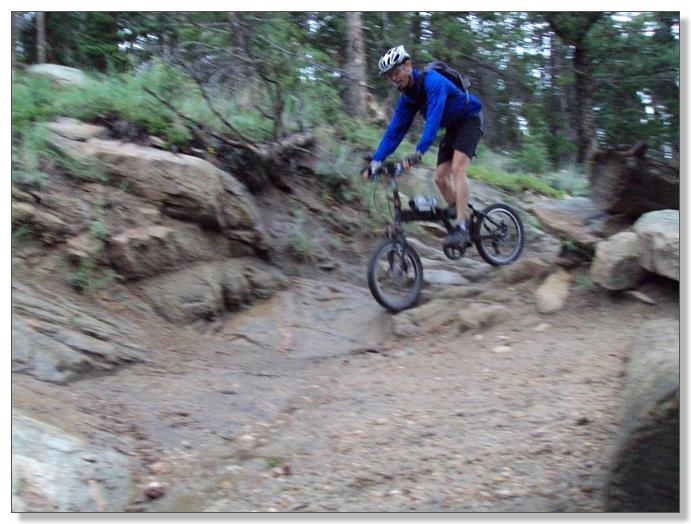
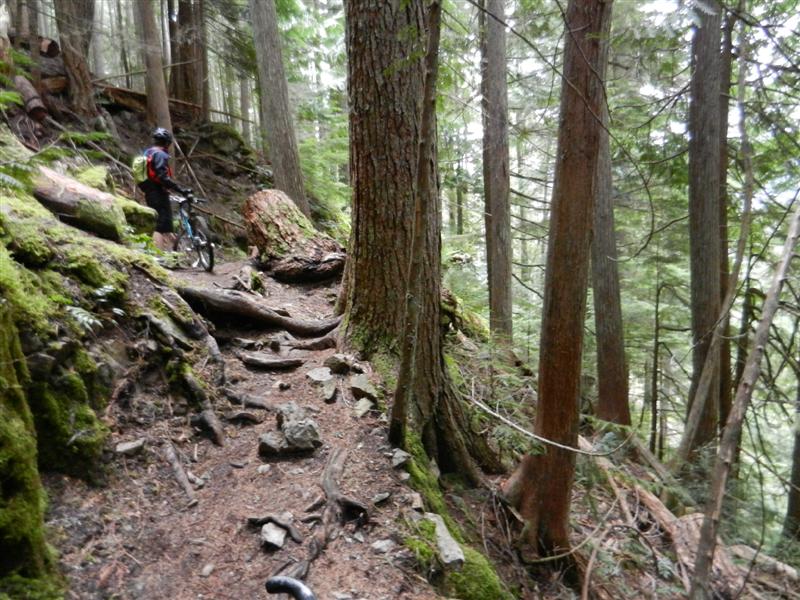
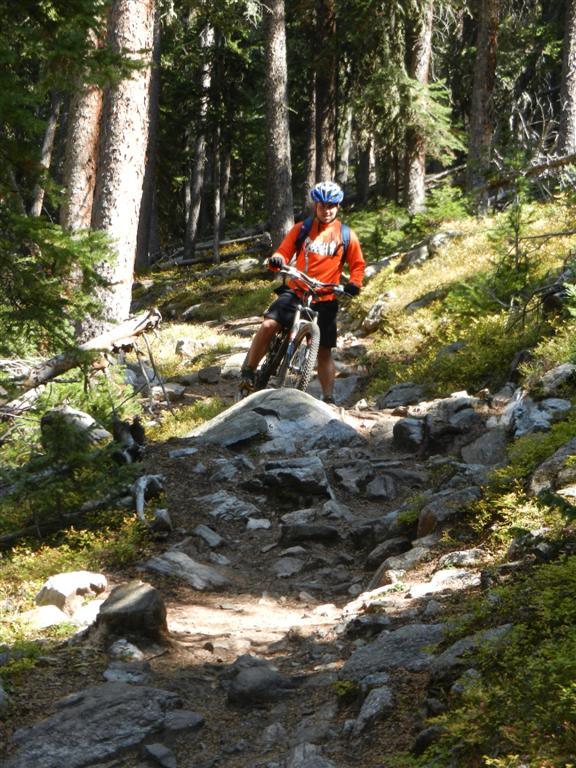
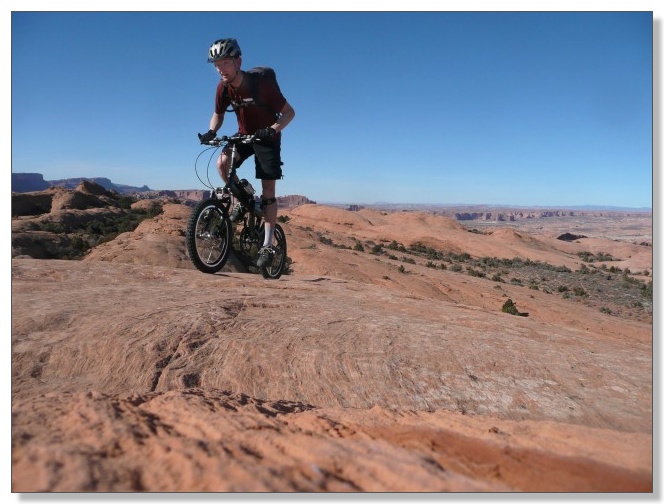
You'll find that my log includes about half of the 60 IMBA Epic Rides. But frankly, most of those aren't really all that abusive... it's the "Other Epic" rides way up in the mountains... and the shorter but highly-technical rides closer to towns... and the innumerable little jumps... and the inevitable crashes... that really inflict the damage. ;)
During one recent ride I thought of something that might help put things into perspective to folks who stumble upon this page...
That ride involved two laps of a relatively-flat 8 mile trail, but one strewn with loose rocks (aka "chunder"), numerous small to medium limestone ledge drops, and plenty of random roots. Not super-gnarly terrain or anything, but pretty rough, and typical of what I like to ride. I counted at least 10 times where I "bottomed out" the suspension, and estimated there were probably 100+ times where I used more than half of the available travel. Multiplying that one ride by hundreds of such implies 1000s of full-travel strokes, and 10,000s of nearly-full-travel strokes over the years...
On the other hand, I'd be surprised if most Jetstreams will experience even 1 full stroke ("bottoming out") of their suspension during their entire lifetime if ridden normally, or more than a handful of times even if ridden quite aggressively.
So the sort of carnage depicted below should not be expected by a typical Dahon owner who occasionally rides over cobblestones, dirt roads, gravel roads, or even hops an occasional curb. For those uses, I'd reckon the stock Jetstream will perform better and hold up better than almost any other folding bike, while still having a true 15-second fold.
Pretty cool little bike.
While I personally wish that Dahon had built certain things differently than they did, I understood from the start that I would be on my own doing this and have been quite satisfied with the results overall. Luckily I'm an engineer who (at least sort-of) enjoys fixing stuff, and I'm the type of mountain biker who relishes an challenging adventure over being fastest.
So only attempt this kind of nonsense if you have both solid mechanical abilities and an adventuresome riding temperament. Real mountain biking is definitely beyond the scope of Dahon's intentions (and warranty) for these bikes so plan on being almost entirely self-sufficient and learning a lot, usually the hard way!
One more point of perspective on the amount of shown carnage below. If you compare what's broken on my bike to what happens to "real" mountain bikes, you'll actually find a lot of similarities. For example, check out what you get with a quick Google Image search for "broken mountain bike frame". A bunch of pictures that look awfully similar to my scary pictures below, just without the ability to fold, ha!
I always like to hear from others who do take the offroad plunge with their folders, so feel-free to drop me an email if you do so and survive. ;)
With all that out of the way... let's get on with the extravaganza!
MAINTENANCE SHORTCUTS:
HINGE FRAME SHOCKS FORK-BUSHINGS FORK-STEERER FORK-LINKAGE DUALDRIVE CRANKS DERAILLEUR HEADSET WHEEL OTHER
UPGRADE SHORTCUTS:
STOCK BIKE WHEELS TIRES BRAKES DRIVETRAIN PEDALS CHAINGUARDS SADDLE ACCESSORIES TOURING
BEFORE AND AFTER
First, just for fun, mouse-over the image below to compare the stock bike as it looked brand-new in September 2008, to the highly-modified bike after a frame-up rebuild in May 2012. Kinda hard to believe that's the same bike!

STUFF THAT HAS BROKEN AND MY REPAIRS THEREOF
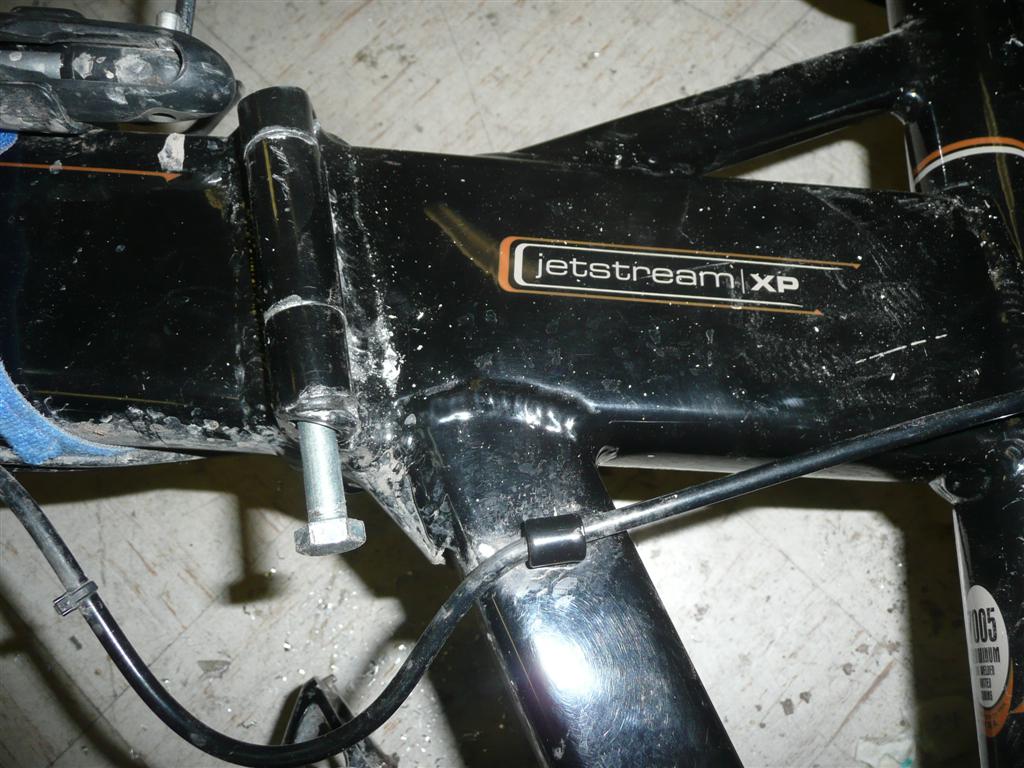
The original hinge design from Dahon was based on a hollow pin. Over time the holes in the frame wallowed out a bit and the frame, causing the frame to become increasingly sloppy on the hinged side. To some extent this could be compensated for by adjusting the latch side, but eventually the movement became excessive and the pin cracked.
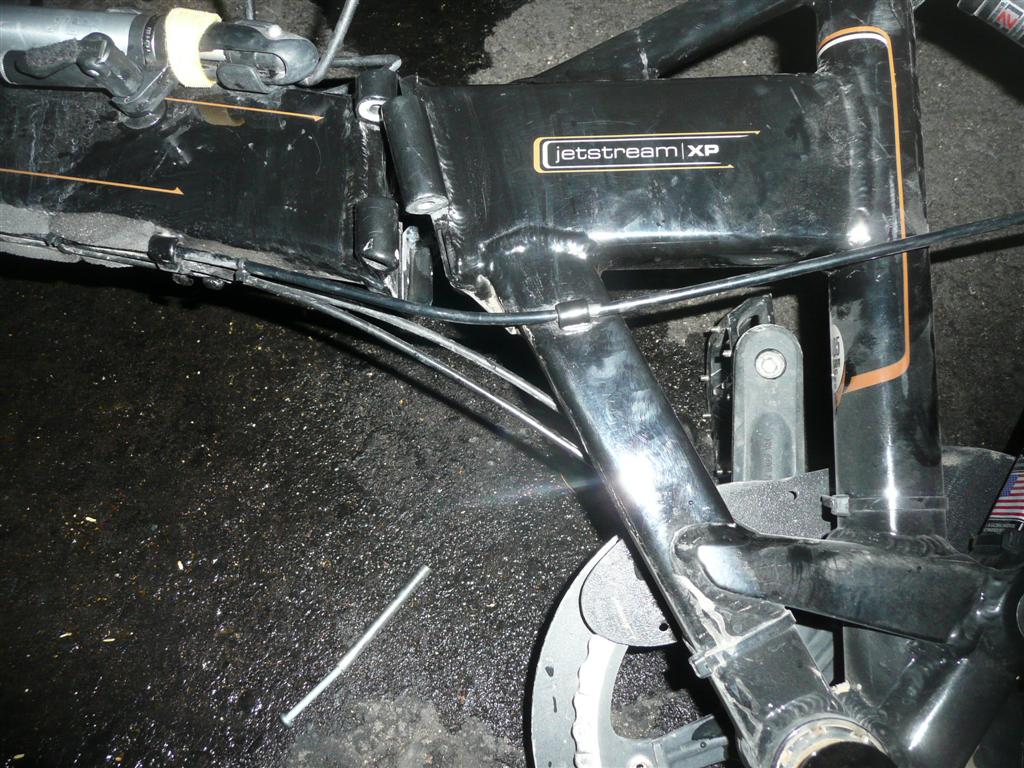
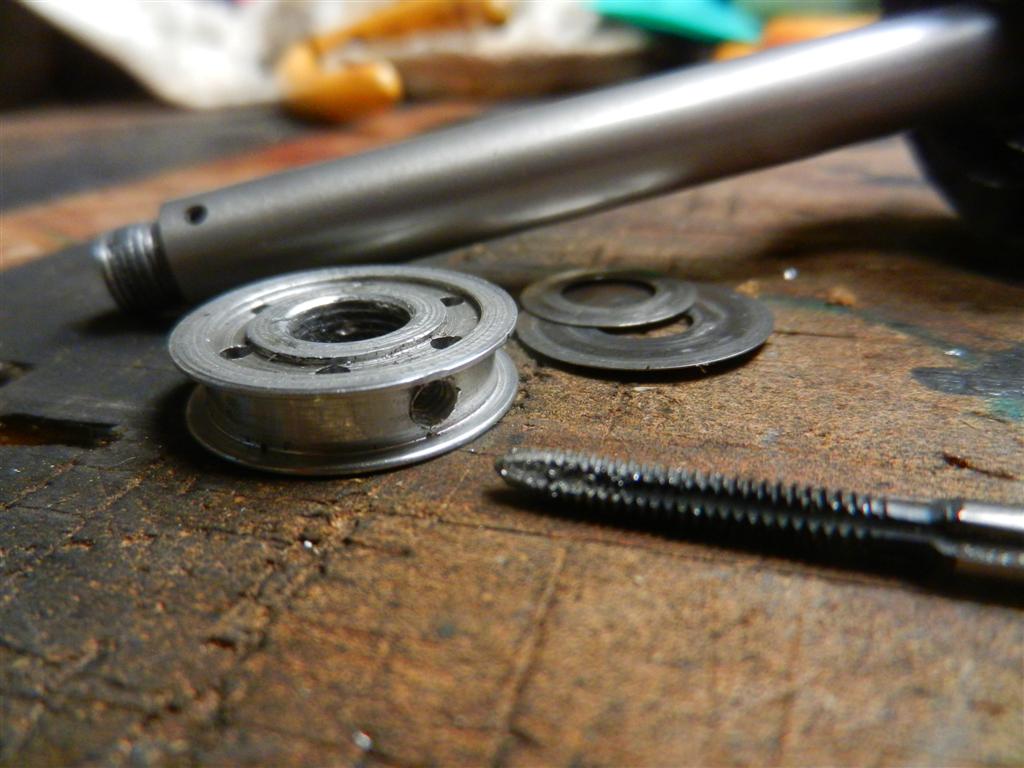
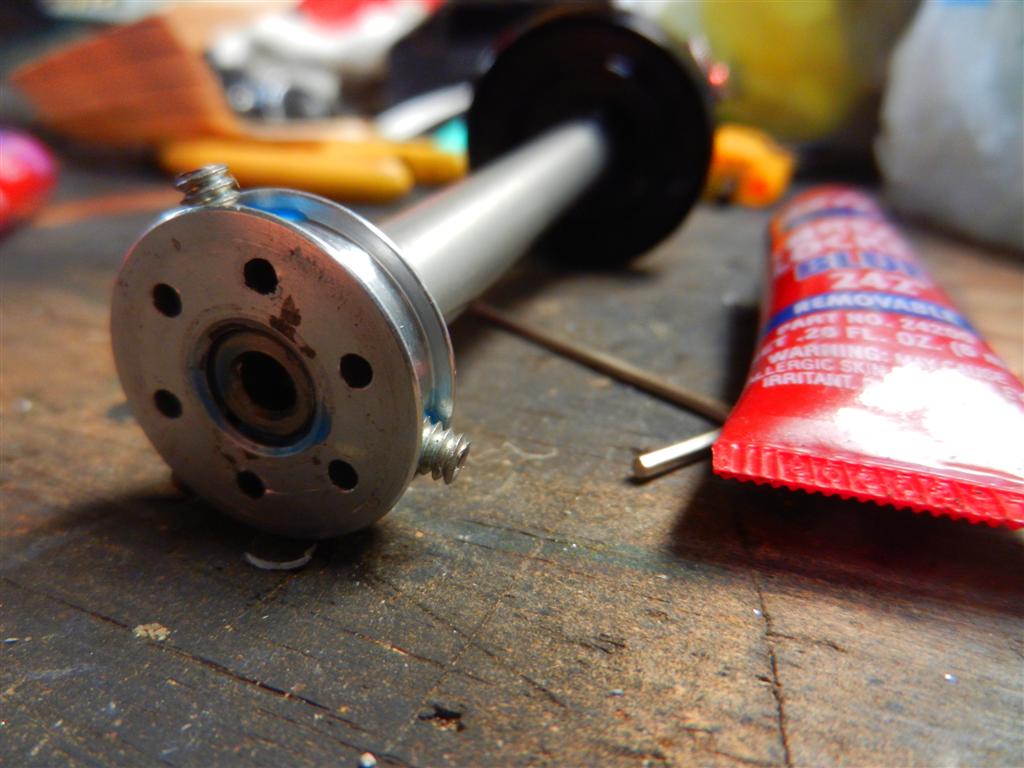
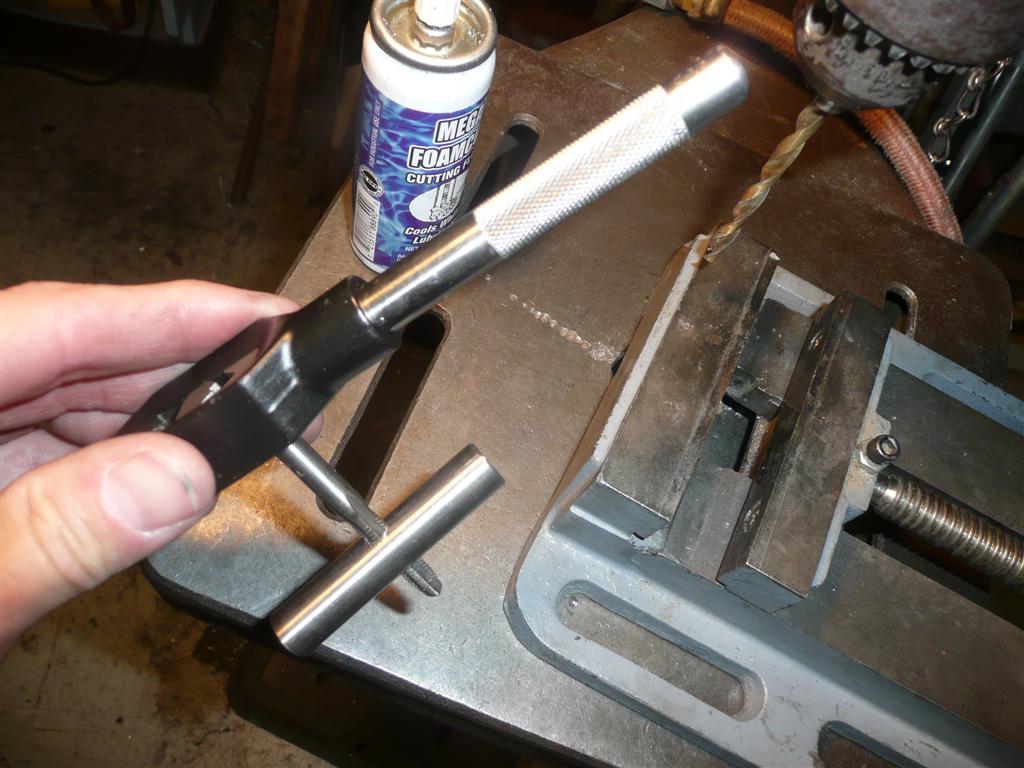
My initial solution was to replace the 5/16 pin with a slightly larger 8mm bolt. This required drilling out the frame holes slightly to just clear the bolt, and tapping the top.
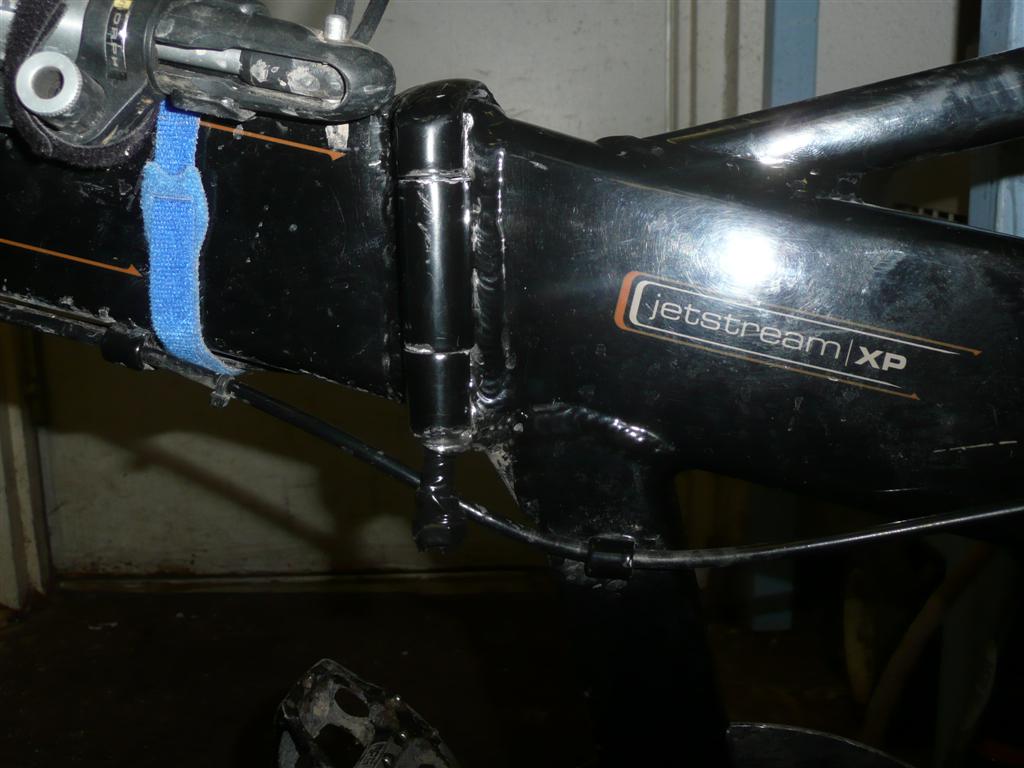
That worked quite well for a year or so, but eventually it developed enough slop to start bugging me...
So I thought about it some more and decided to go up one more size of bolt (to 3/8"). But this time, I tapped the center part of the frame, cut off the heads of two 3/8 bolts, cut slots in them so I could turn them with a screwdriver, and installed them with loctite as "studs". This way the pins in the center part of the frame never move, and therefore don't wear. After more than a year now, this approach is proving to be very solid indeed.

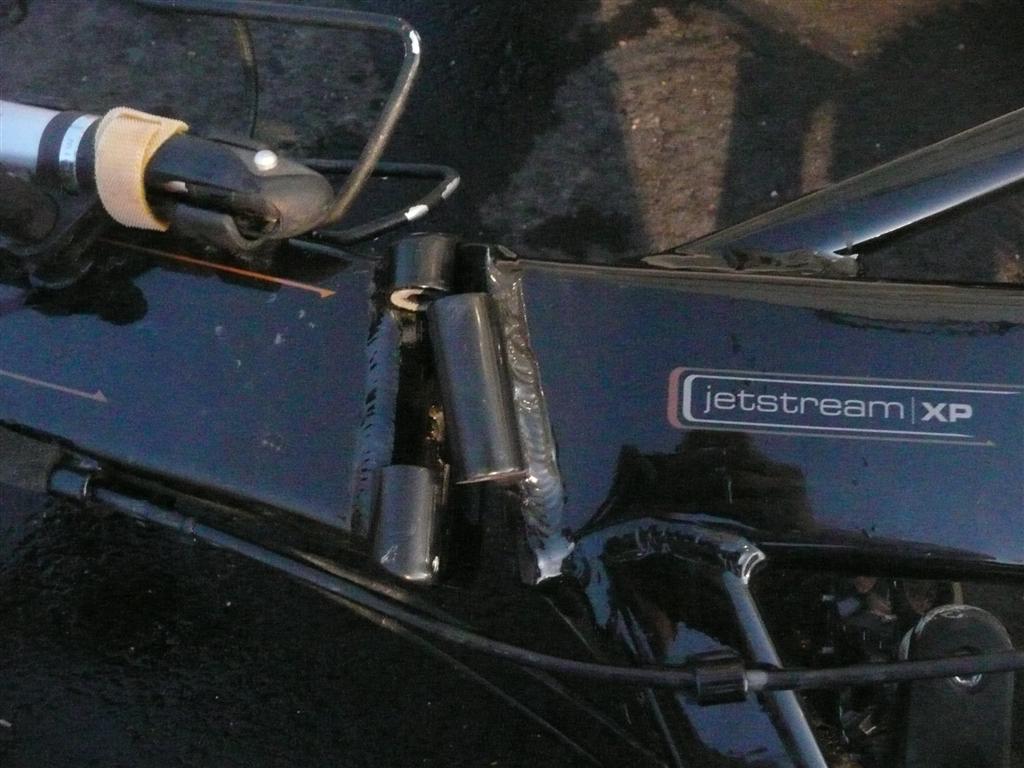
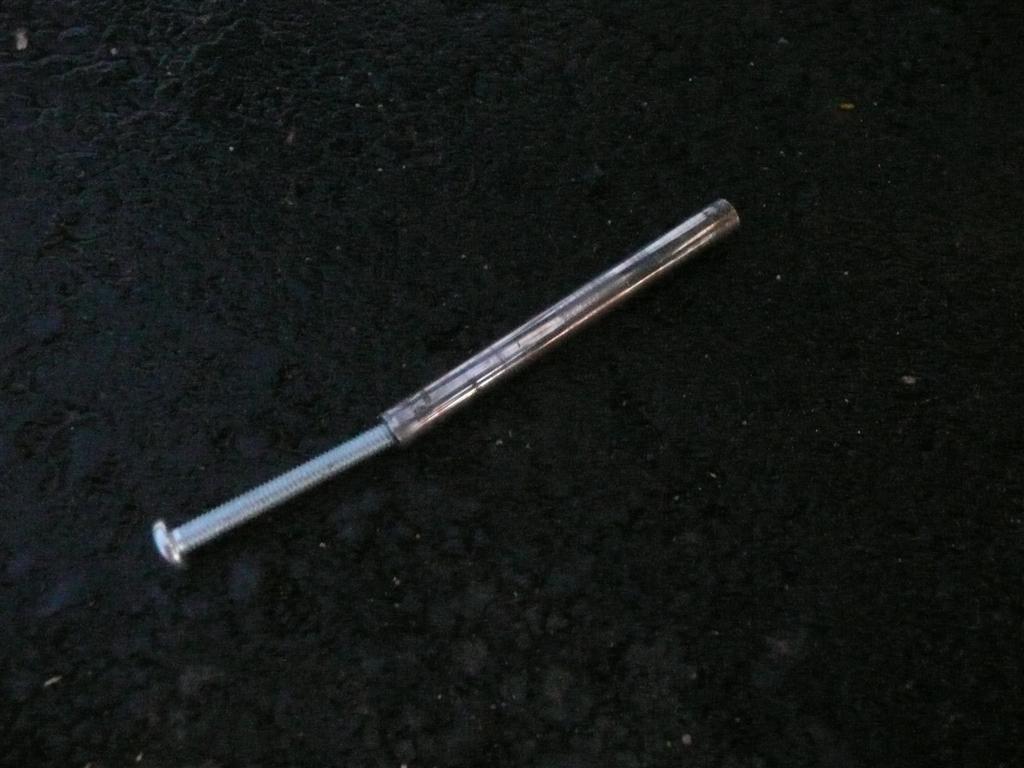
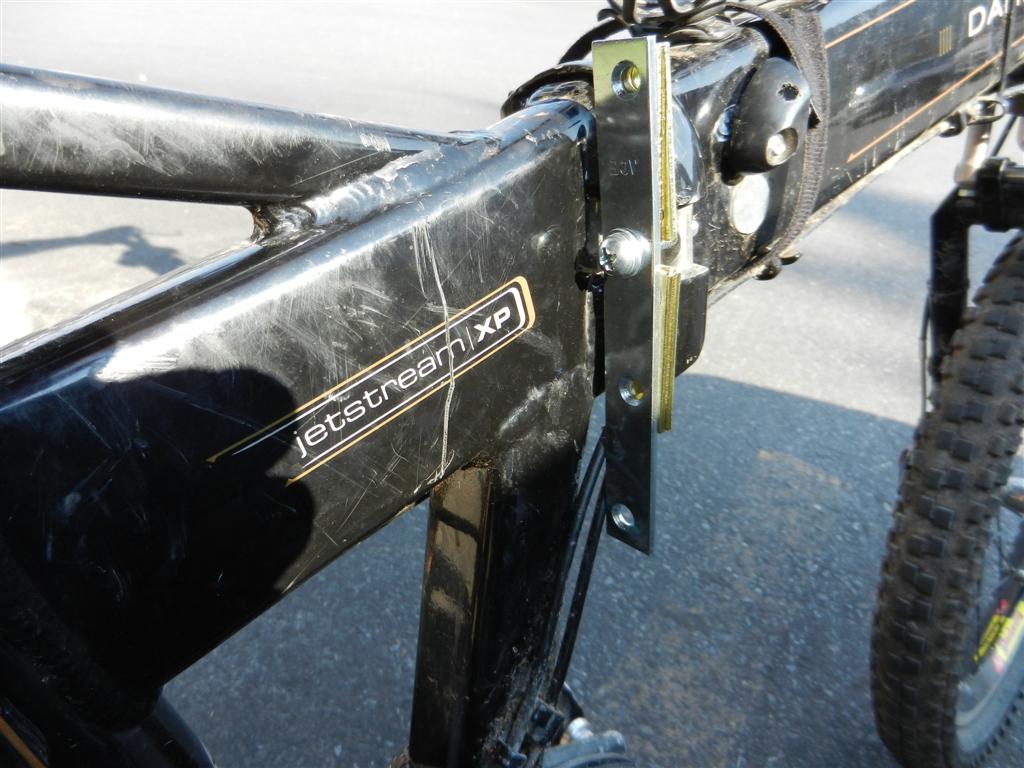
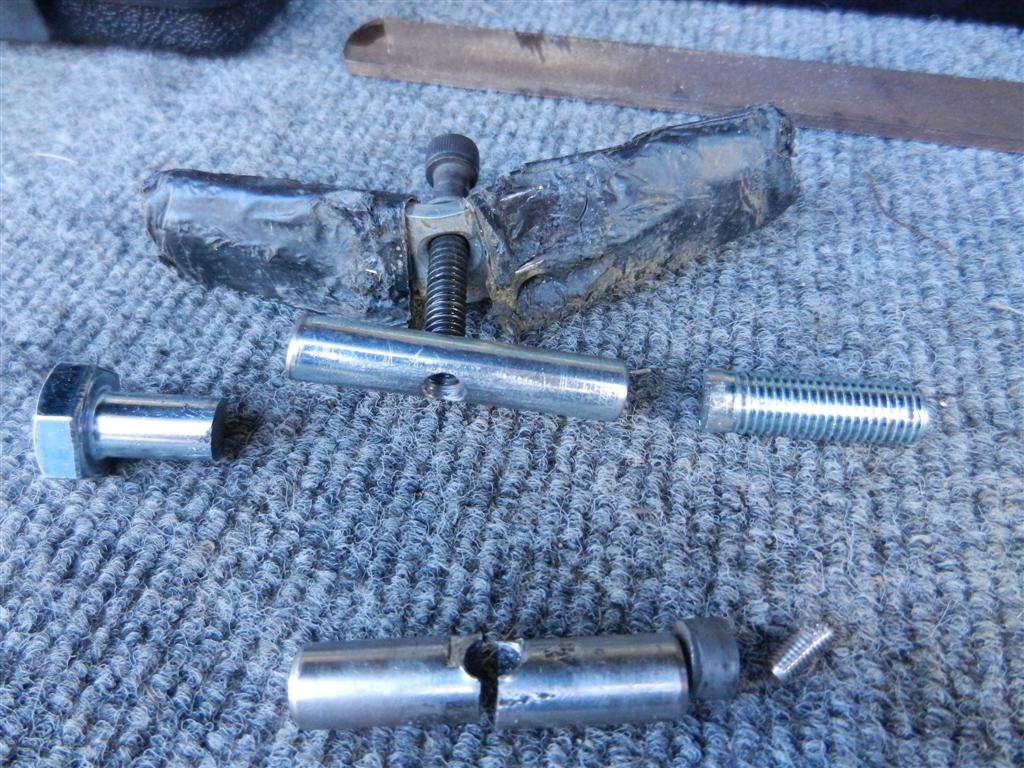
The over-center latch design from Dahon is pretty clever, but not very robust. The original design had a "pusher" rod inside the latch that attached with a tiny screw to a vertical rod, and that tiny screw was a weak link that broke several times. So I devised a much more robust "pusher" rod that solved that problem. But later the latch itself cracked from the stress, so I had to figure out an altogether different approach.

After about an hour wandering around the Jackson Hole hardware store, I came out with a collection of parts to implement a field fix. My "temporary" latch mechanism required using a Allen wrench to tighten a Grade 8 bolt and looked a little funny, but it was very solid and only took about 30 sec to use, so I have since decided to not bother trying to get replacement parts from Dahon and just keep this solution.
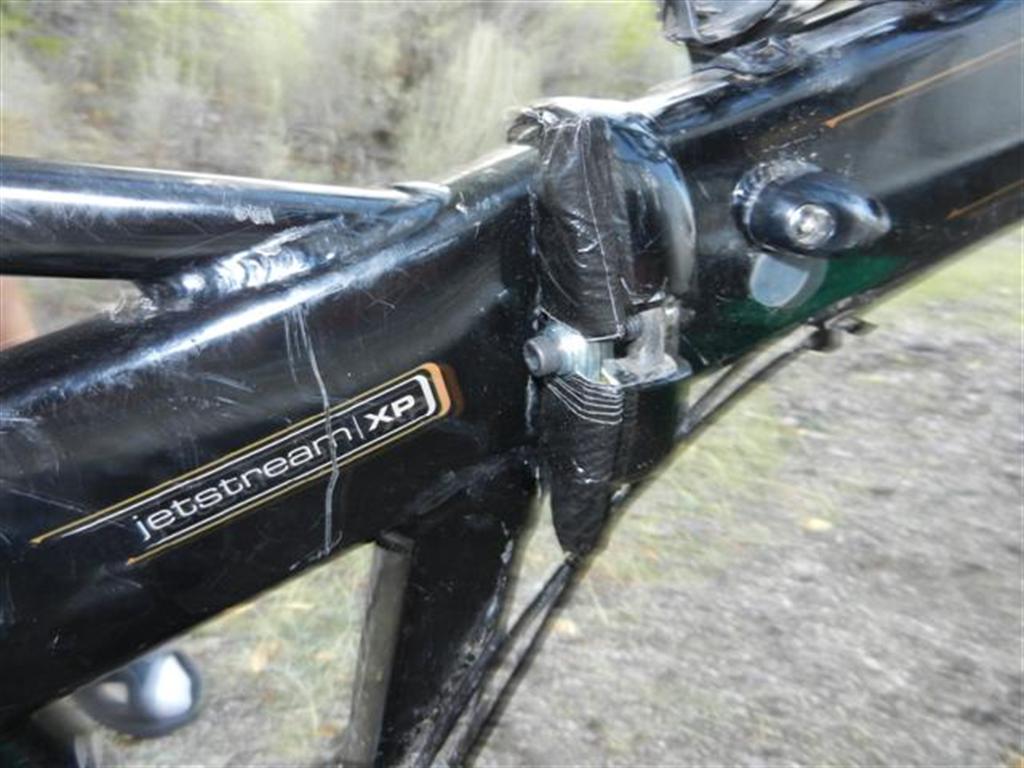
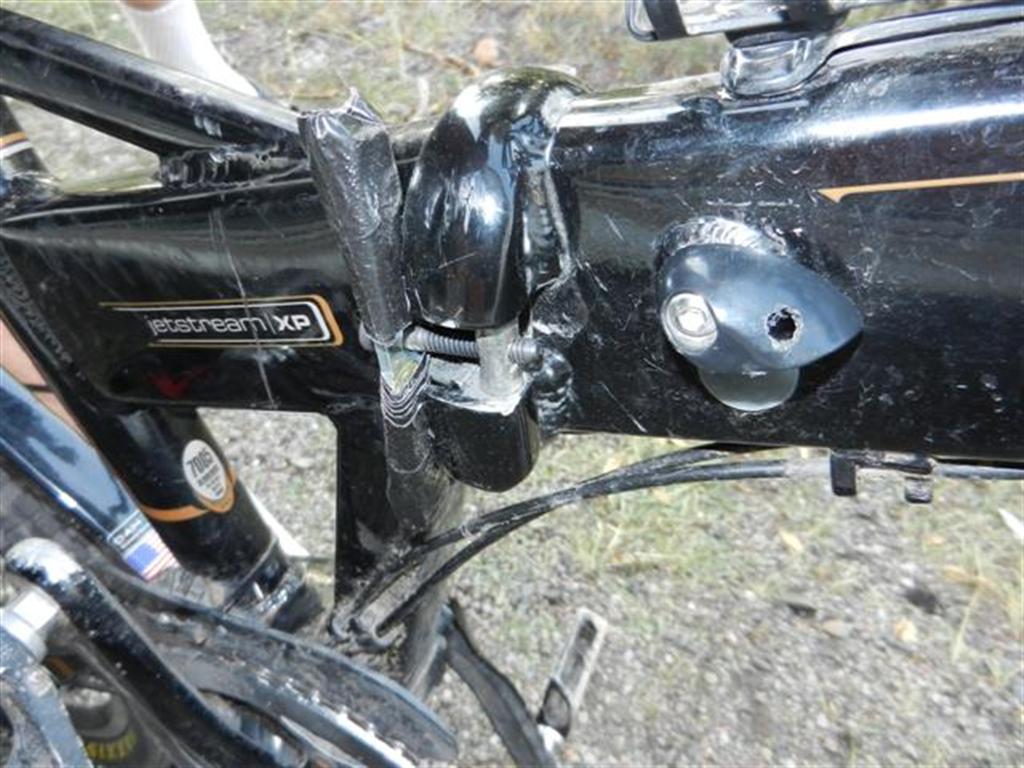
A few months later, the pin this clamp piece screws into started showing a crack, so before it broke (what a concept!), I fabricated a replacement pin from a 10mm bolt, taking advantage of the drill press at the shop at the Tacoma Fire Truck Garage where I was working on a simulator project. Good as new, again.
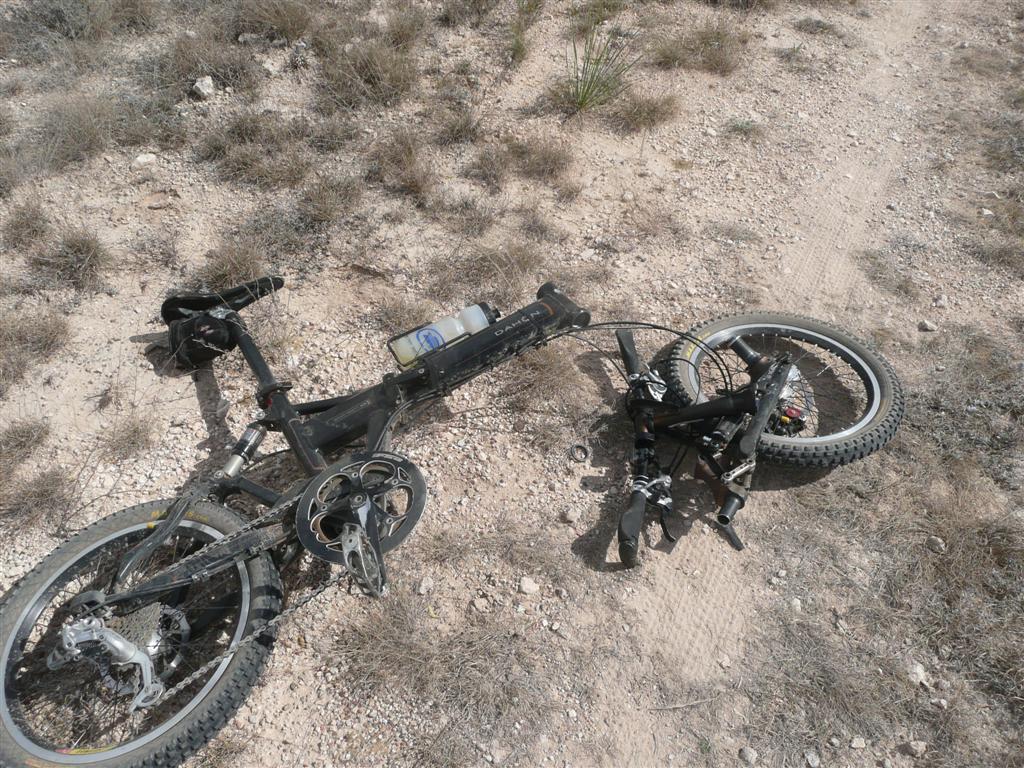
During an easy urban ride in Seattle in April 2012, I hopped the bike up a curb and it came down in two pieces. The main tube snapped just in front of the hinge. This bike was clearly destined to break in half eventually given my warranty-voiding riding style; the only question was when...
Well, we now know the answer. It had about 7000 miles on it, including about 4500 of mountain-biking (innumerable rocks and roots, some smallish jumps, and a few good crashes), and 2500 of pavement (relatively gentle riding, except for frequent curb hops and a few staircases).
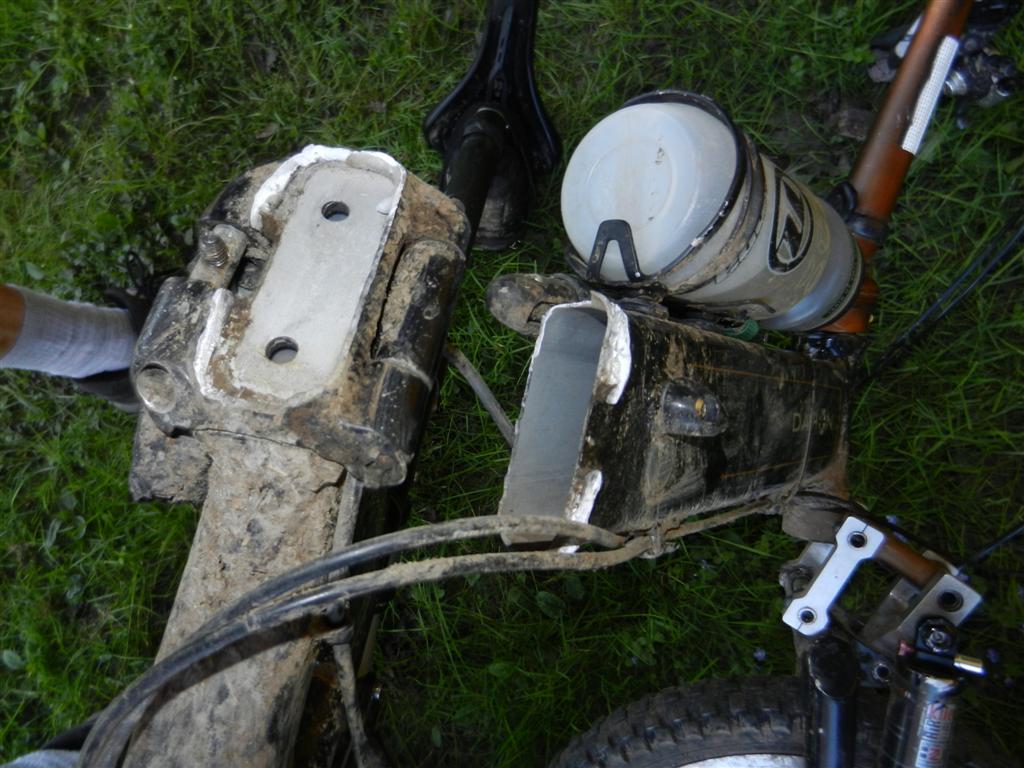
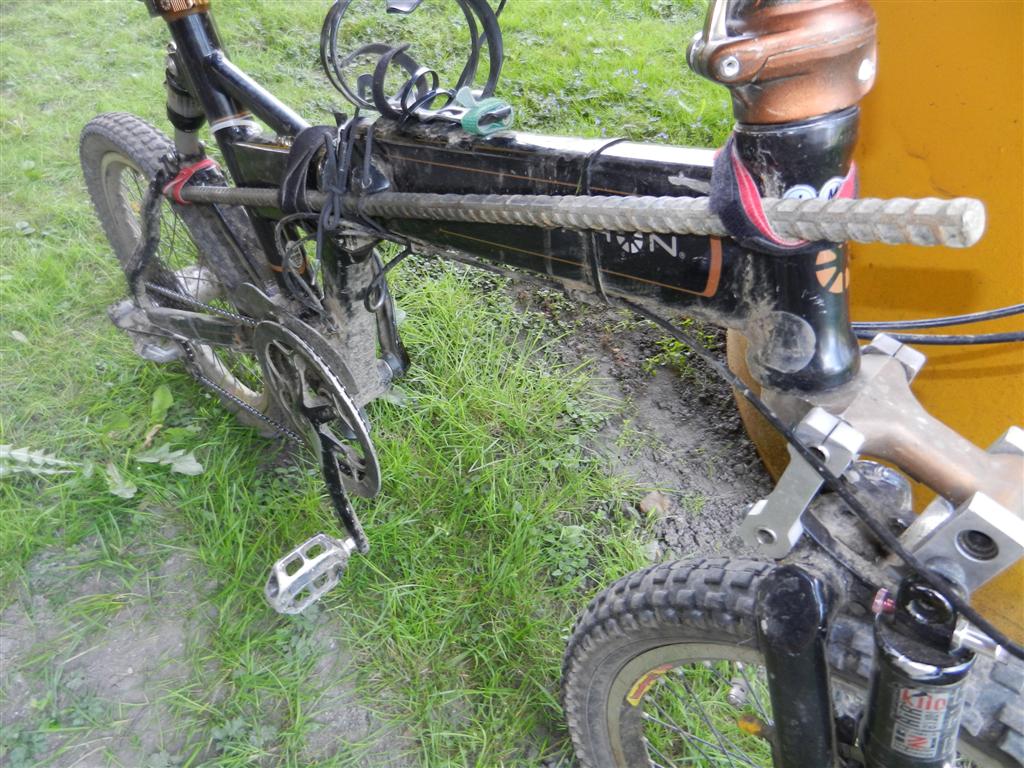
While waiting for Debbie to drive over and pick me up, I found a piece of rebar and fashioned a splint so I could at least walk the darn thing. The two pieces were amazingly unwieldy to wrangle otherwise.
I got in touch with everyone's favorite internet-based folding-bike dealer in the USA, ThorUSA, who lobbied Dahon corporate on my behalf and managed to convince then to ship me a new frame. I was expecting to pay at least a wholesale price for a replacement since my bike was a gray market import after all, but Thor dropped his hammer on the suits at Dahon and convinced them to replace it under warranty. This was unexpected but a very much appreciated gesture. Thanks, guys!
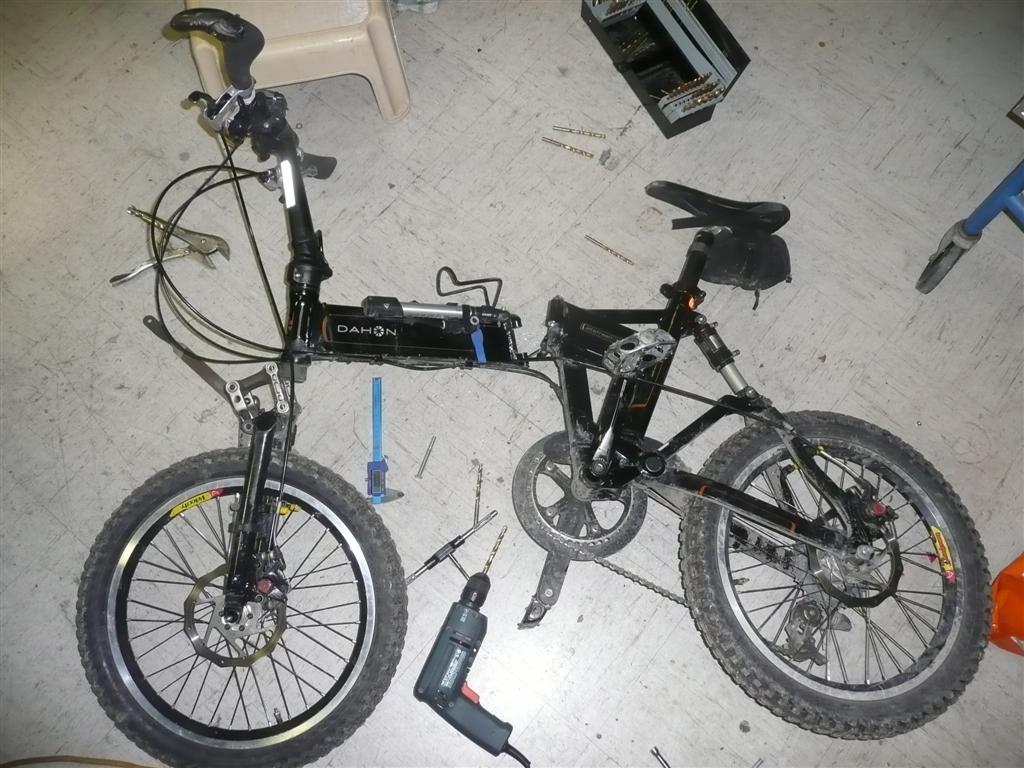
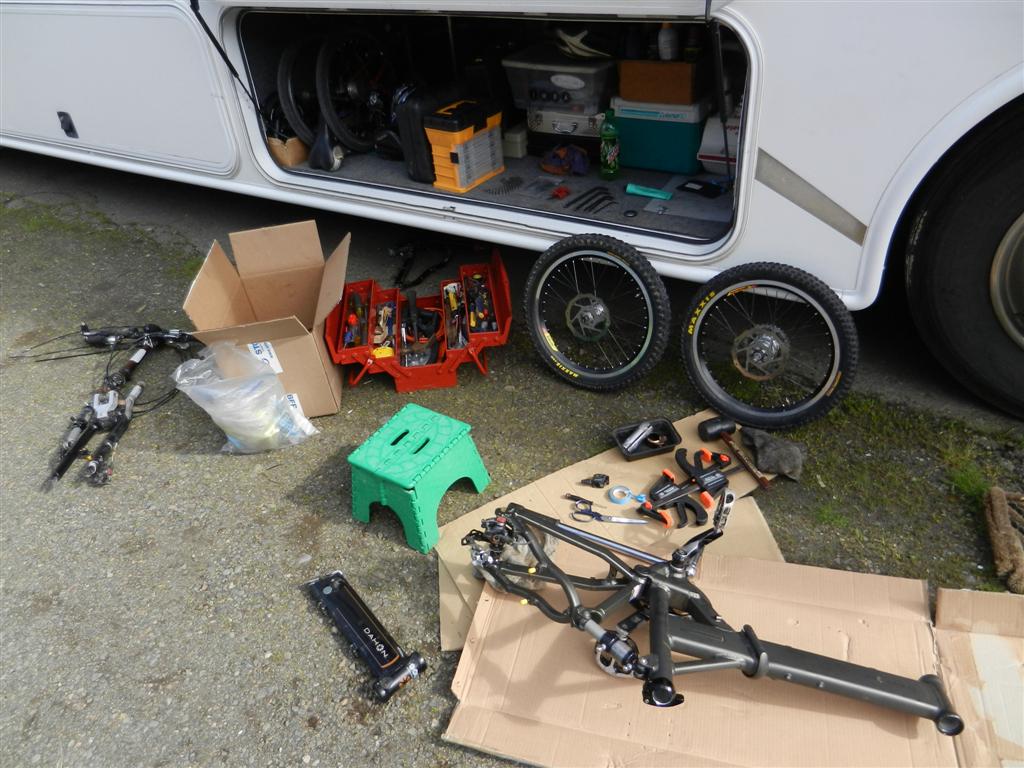
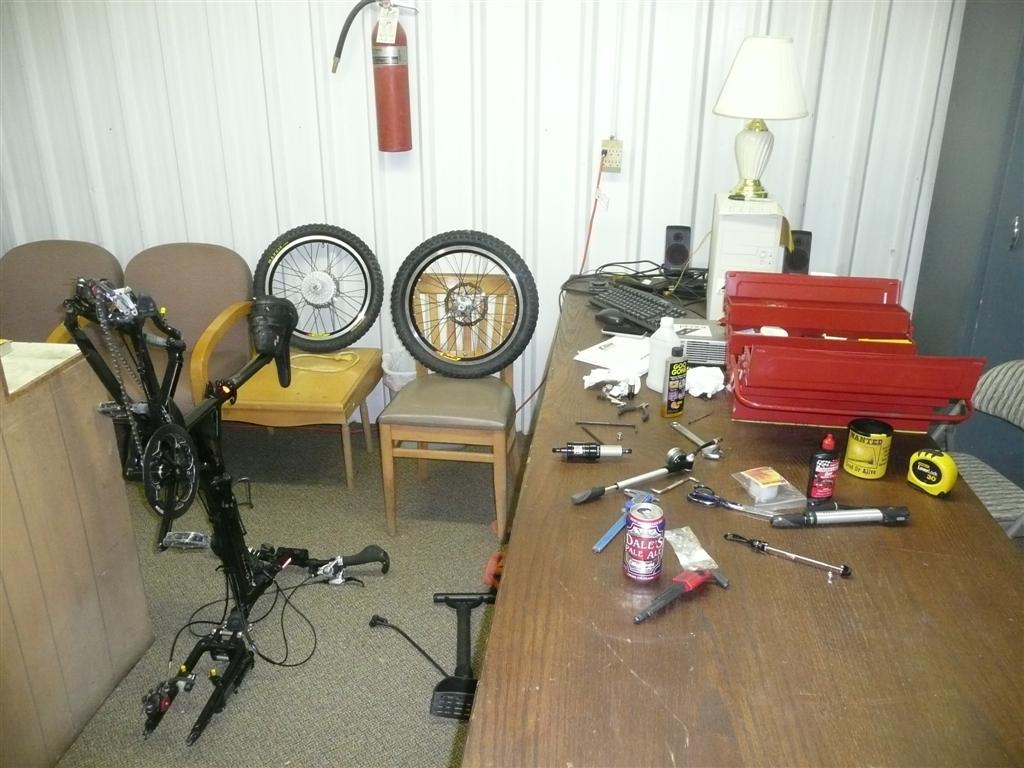
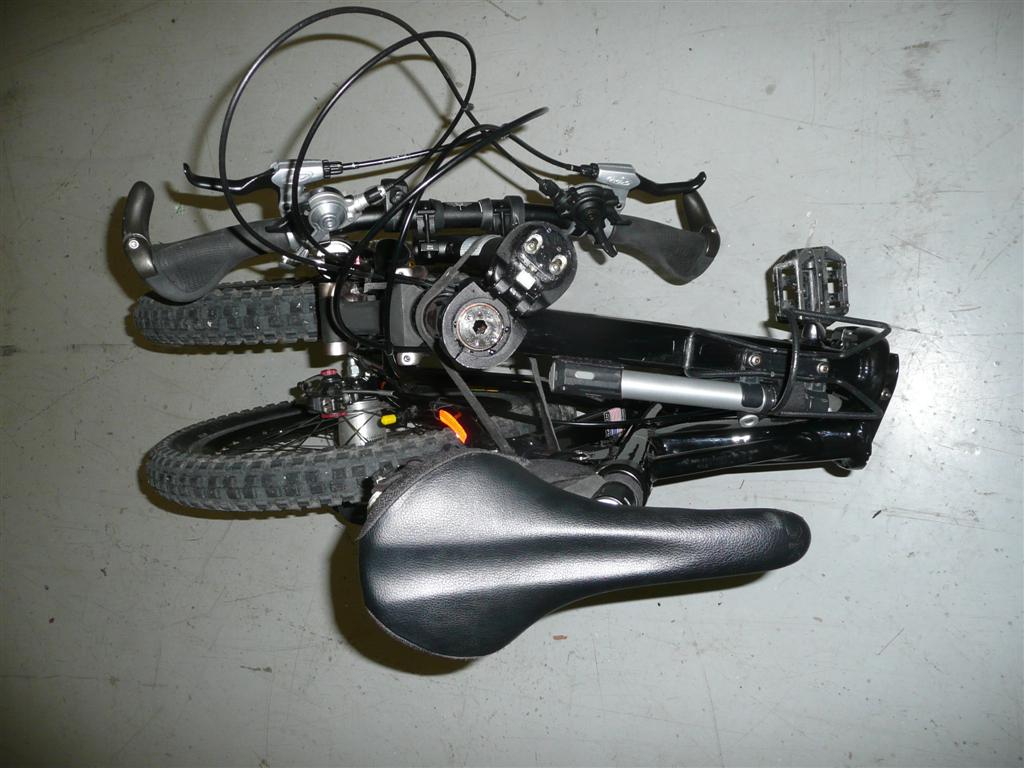
While waiting for the new frame, I dismantled the old one and gave all the components a much-needed thorough cleaning.

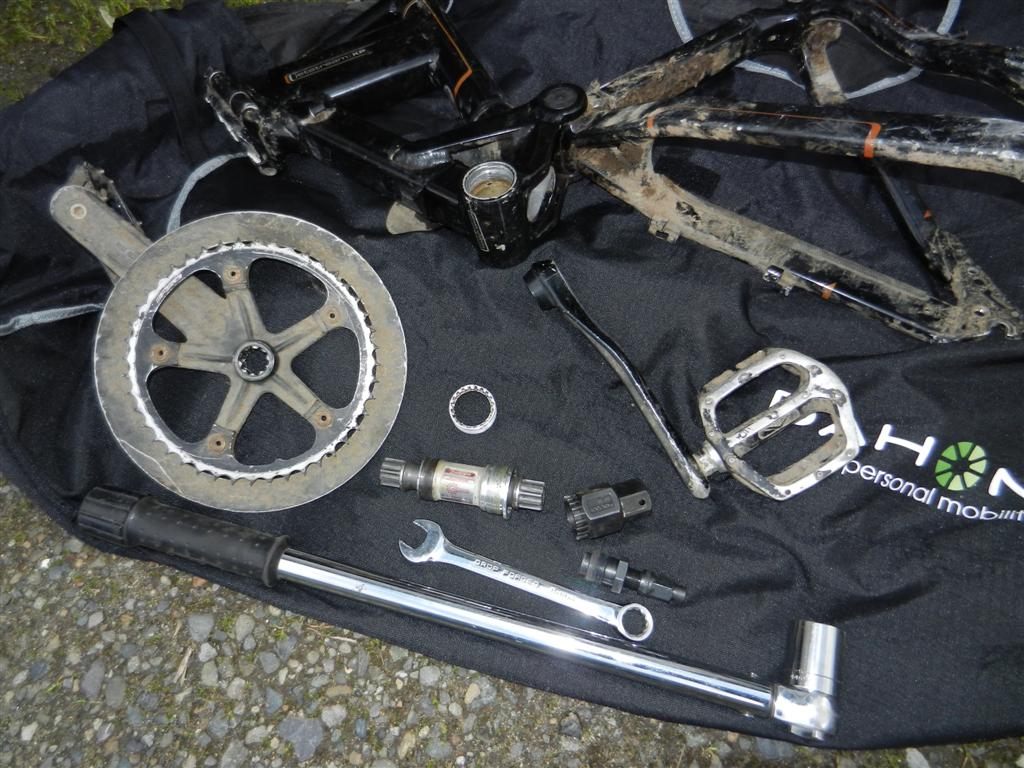


The replacement frame is from a 2008 Jetstream P8, and is identical to my XP frame except for the oddly matte gray color, and it has only two rather than three cable stays going to the back. No problem, I just zip tied the "extra" DualDrive cable to the der cable. Main thing is that it did have disc brake mounts, even though the P8 never came with discs.
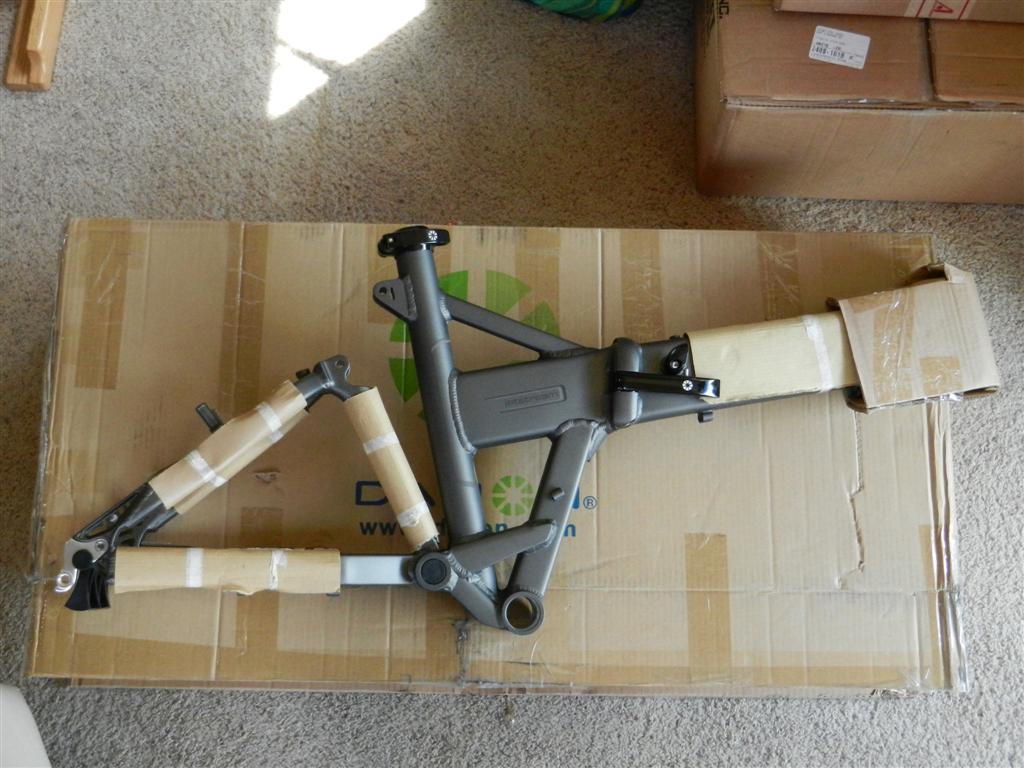

A little over two weeks after after snapping the frame, the new one arrived and I spent a very pleasant afternoon reassembling the bike.
Behold, good as new! Interesting contrast of clean, but thoroughly beat-up-looking components against the brand-new frame.


I'm really glad to have been able to resurrect this thing, and am looking forward to at least a few more years of fun with the little devil.
PS: Later on the same day my frame broke, my car got broken into and my camelbak was stolen. So, while waiting for the new frame, I also got to try and remember all the little tools, spares, and emergency supplies I had accumulated over the years. I created a spreadsheet totaling up everything I needed to replace, and was frankly shocked to realize that I had been toting around over $300 worth of miscellaneous crap. Sheesh. Luckily my comprehensive auto insurance covered most of the cost of the replacement glass and replacing the stolen pack and contents, but still, it was a real pain just to get things back to where I had been. Thieves suck.

Over the years I've done a variety of repairs and rebuilds of the two German A shock units, including:
New Air Seals (imported from German A)
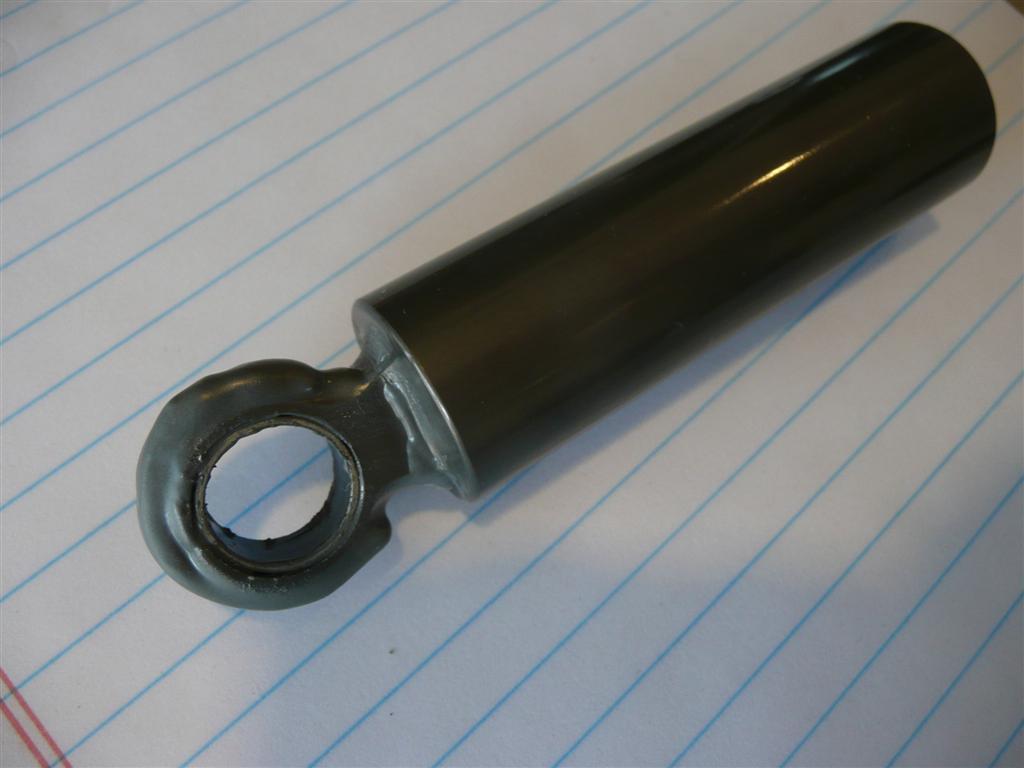
JB Weld to repair broken front shock eyelet (eventually got a new, and factory reinforced, one from German A)
Homemade replacement plastic internal shock guide bushings (various materials, from McMaster Carr, sheared to size and hand bent to shape)
New floater O-rings (16mm x 2 mm from McMaster Carr)
Changes of silicone shock oil (various weights, from hobby shops)
3 mil and 10 mil thick UHMW tape used to shim worn shock mount eyelets and eliminate slop.


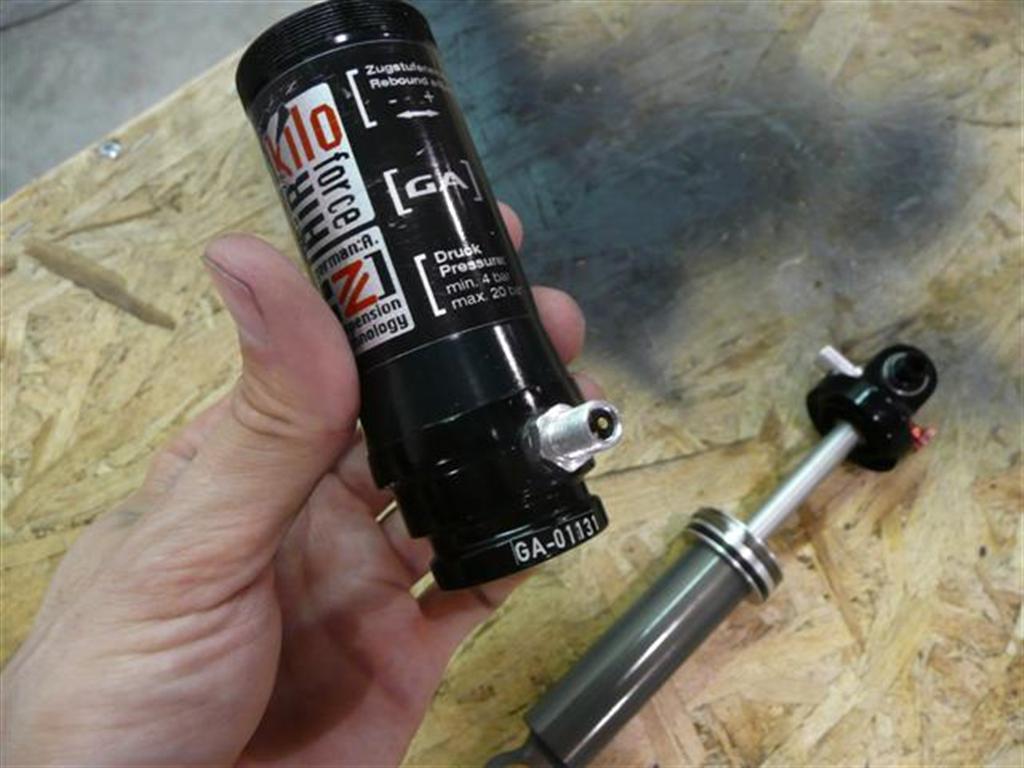


Plunger thread eventually stripped on the front shock causing it to fall off and resulting in zero damping and an over-center return. Fix was to drill and tap three small holes and add setscrews to secure it, hopefully for good.
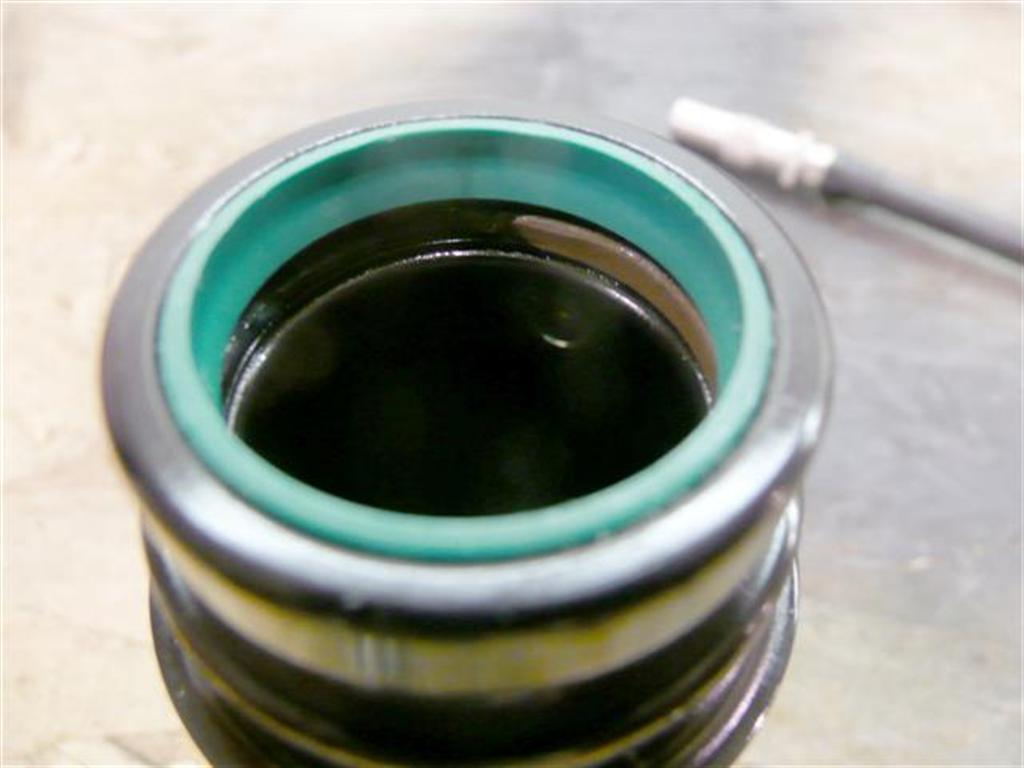
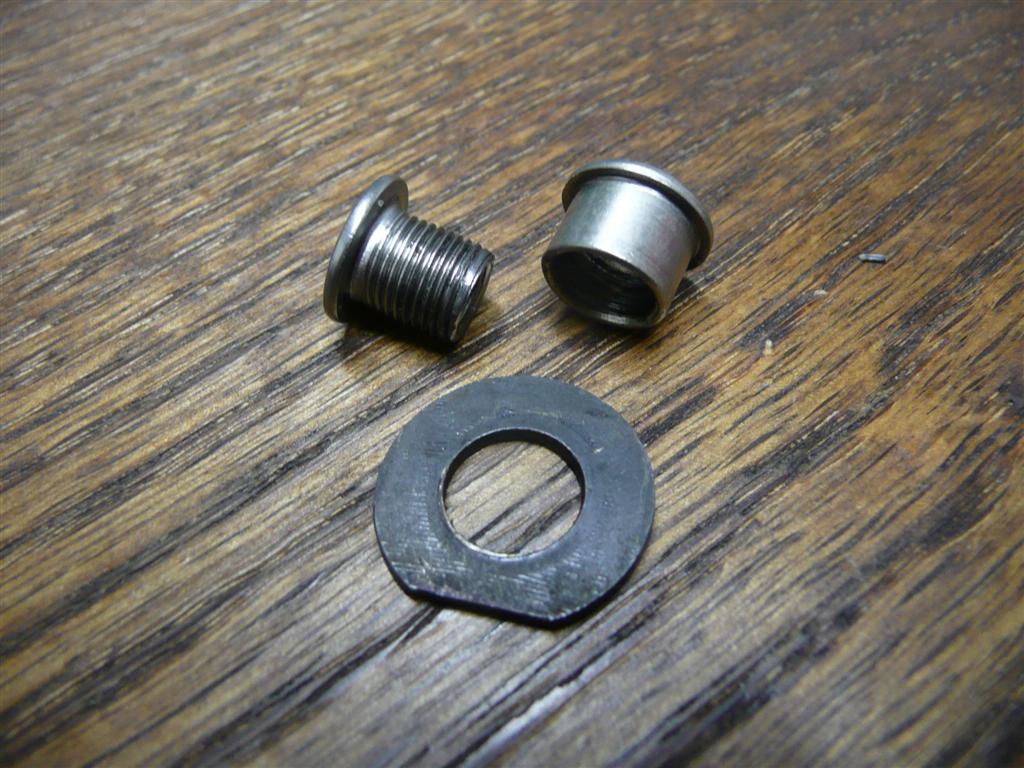
Front Suspension Fork Bushings
The original German A bushings were metric sized and only 0.5mm thick (14mm ID, 15 mm OD) consisting of a steel shell with a layer of teflon-like material bonded to it. Over time the teflon wore away, making the fork become sloppy and leaving the steel to work against the aluminum axles. This rapidly wore away the softer axles, leading to ever increasing sloppyness...
Naturally these bushings were not available in the states (even custom), and proved to be virtually impossible to get from German A after several months of trying.
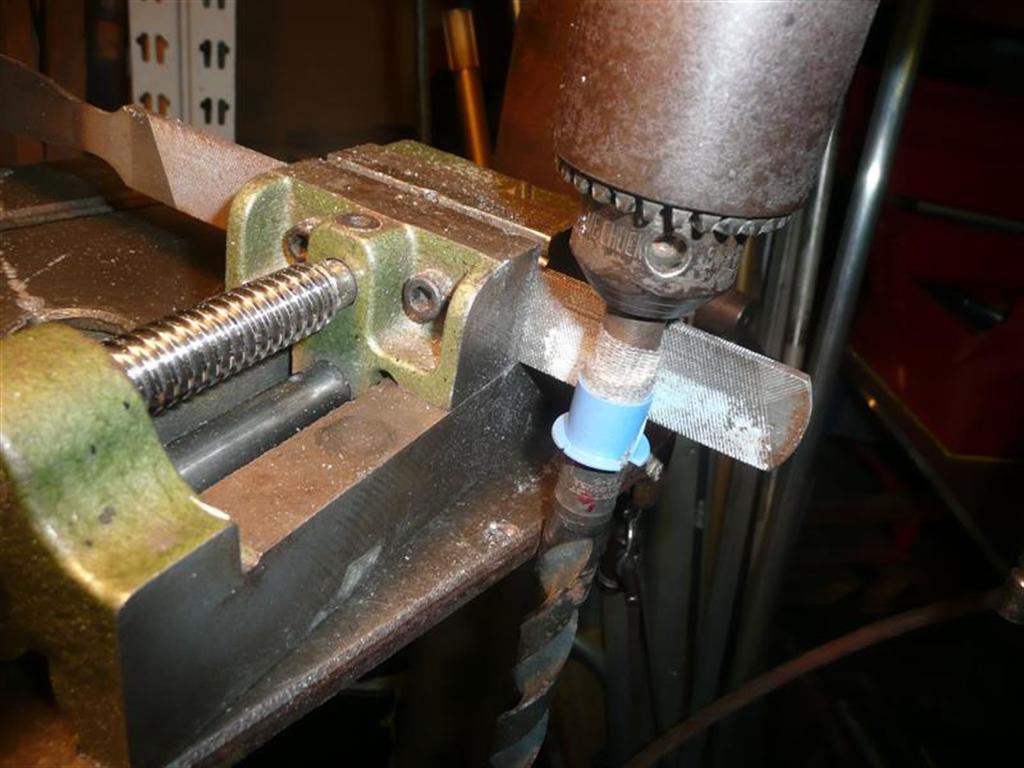
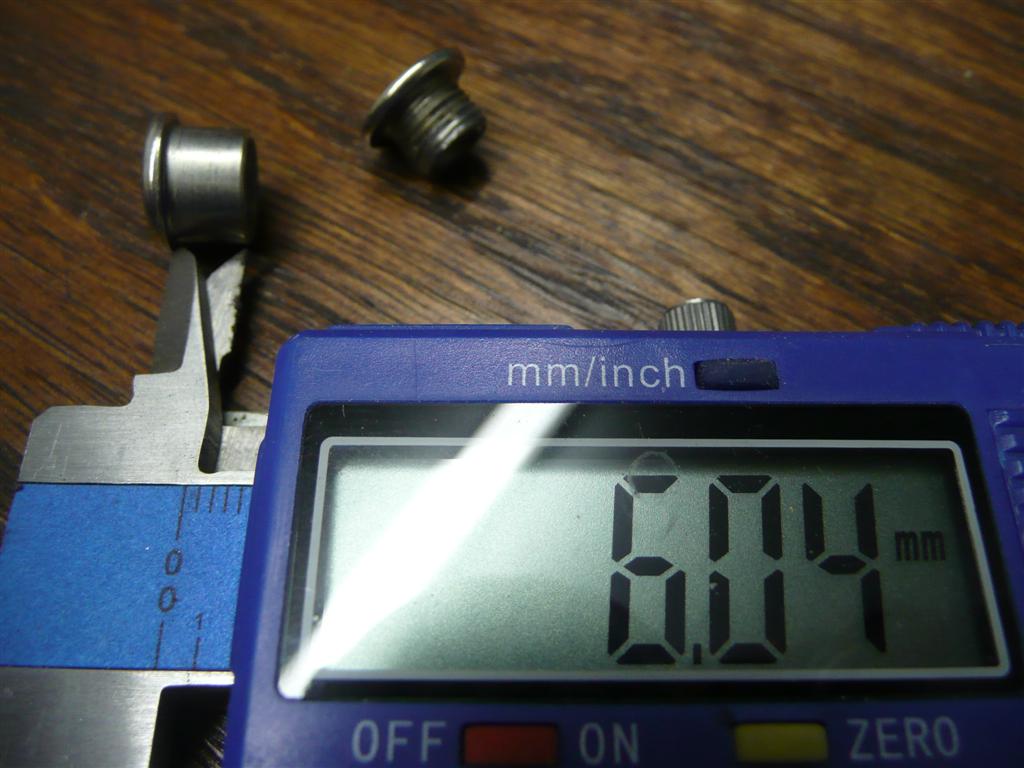
Custom fork bushing service tools

So I decided to try and make something work. I found some "space age" plastic bushings with the right ID but too large OD, and turned them down using a space age "file against a drill" technique. These worked well at first, but unfortunately didn't last very long.
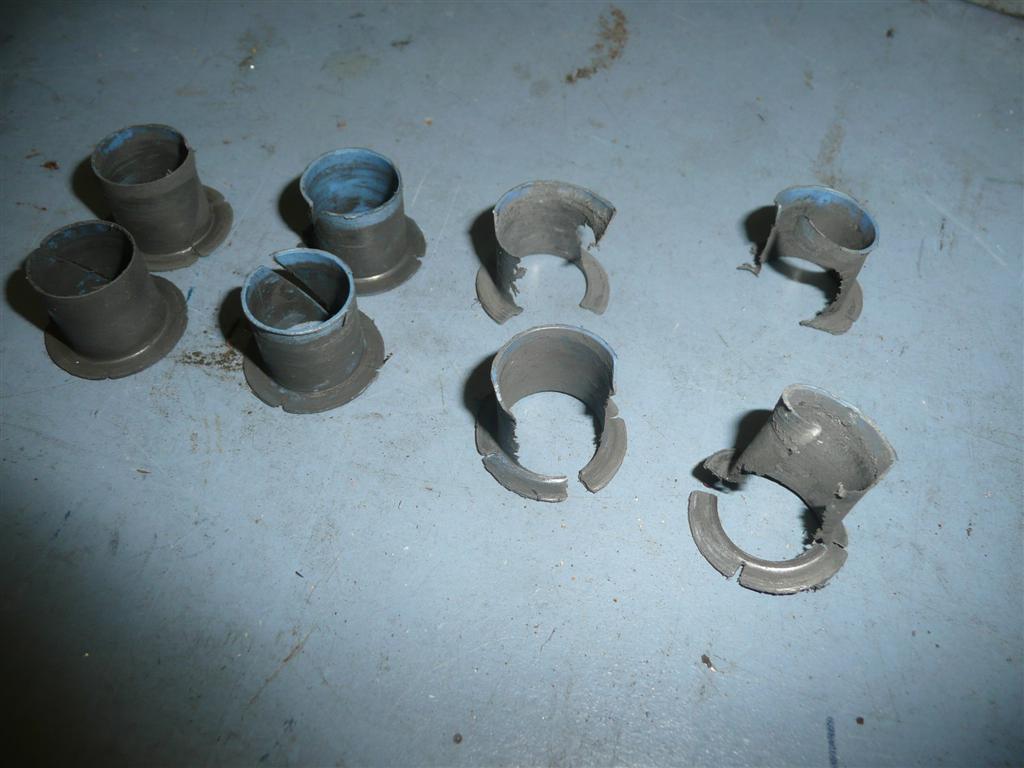

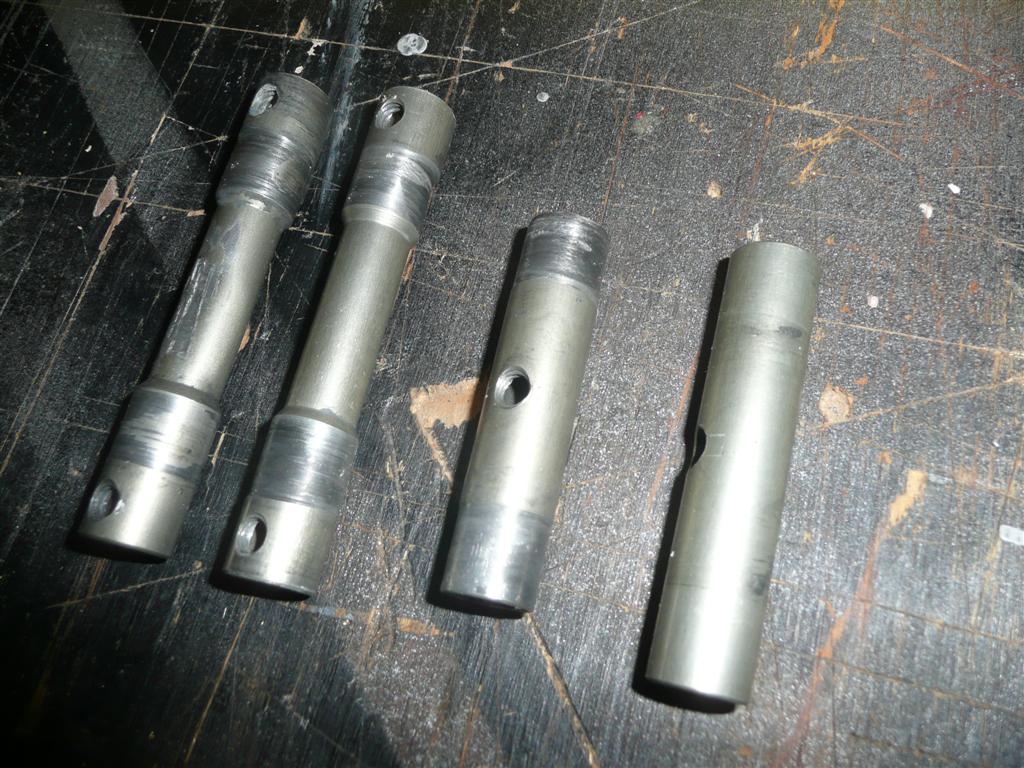
After that, I decided the only long-term fix would be to make some new axles, of a smaller diameter so that I could use off-the-shelf bronze bushings. So in early 2010, I bought a foot of 12mm dia polished stainless rod, a bag of 15mm ID by 12mm OD bushings, and some shims, and got to work cutting and drilling.


This arrangement tested out quite well, so after a few rides I got a friend with access to a real machine shop to drill out the axles and lighten the load a bit. (Thanks, Jim!)
By the summer of 2012, my new axles had worn down enough to need replacing. I will soon be fabricating another new set, this time using case-hardened stainless driveshaft material, with a Rockwell hardness around C54 versus the first set which was un-hardened and rated C35. This material will be trickier to cut and drill, but should last much longer. We'll see...
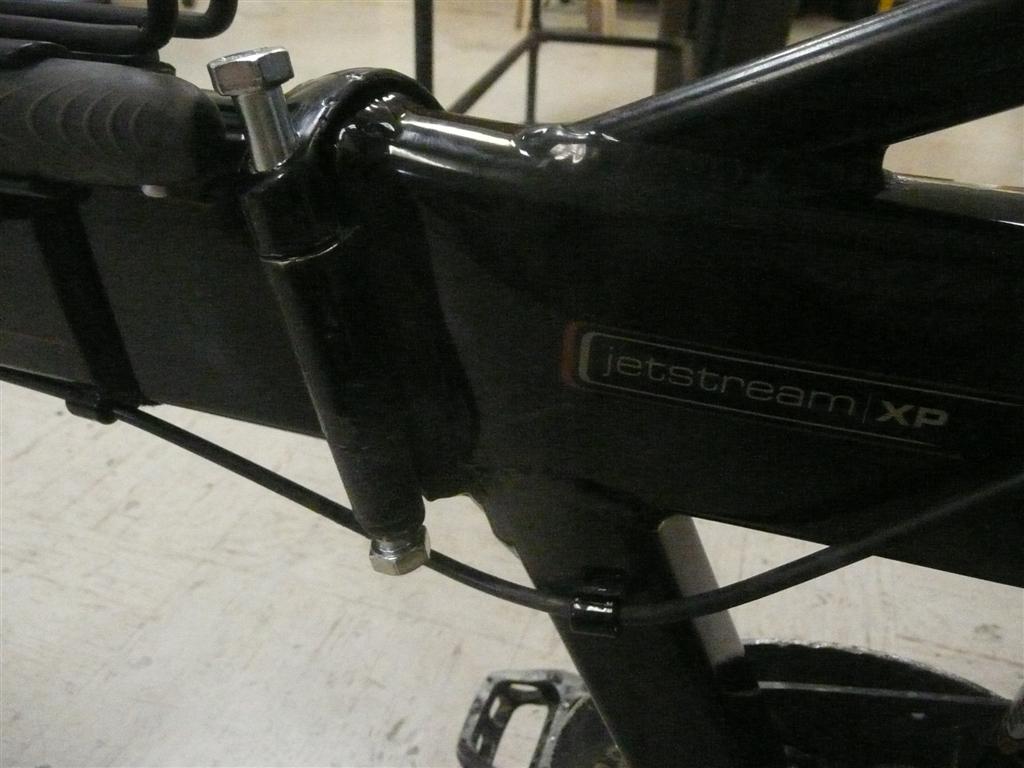
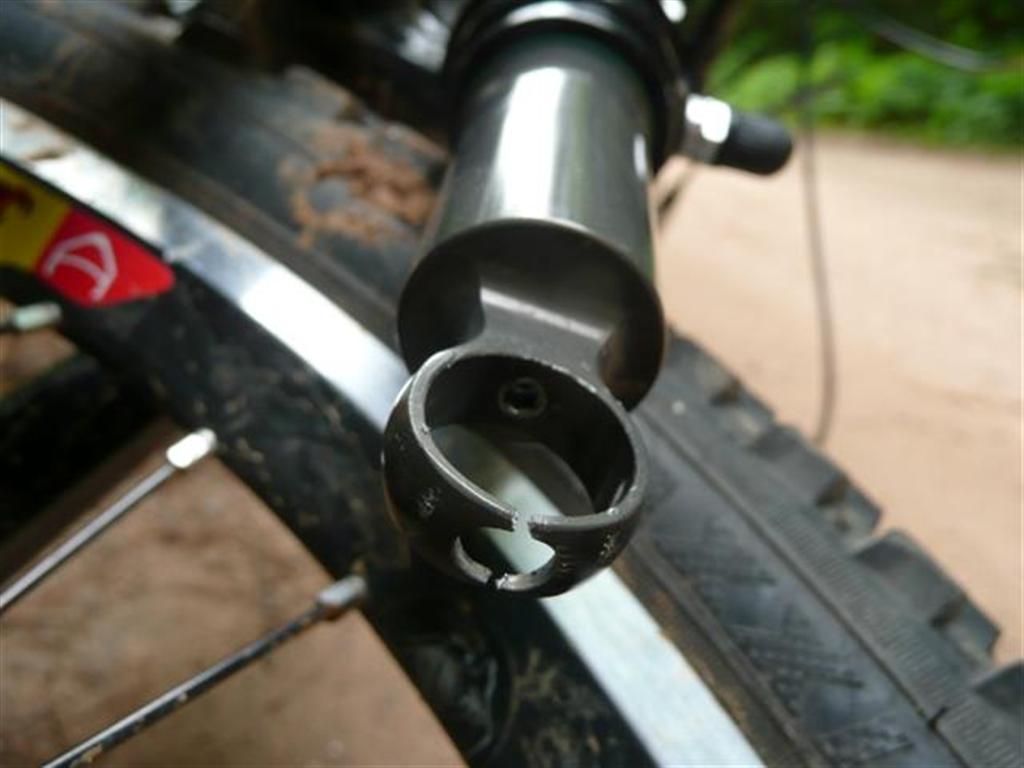
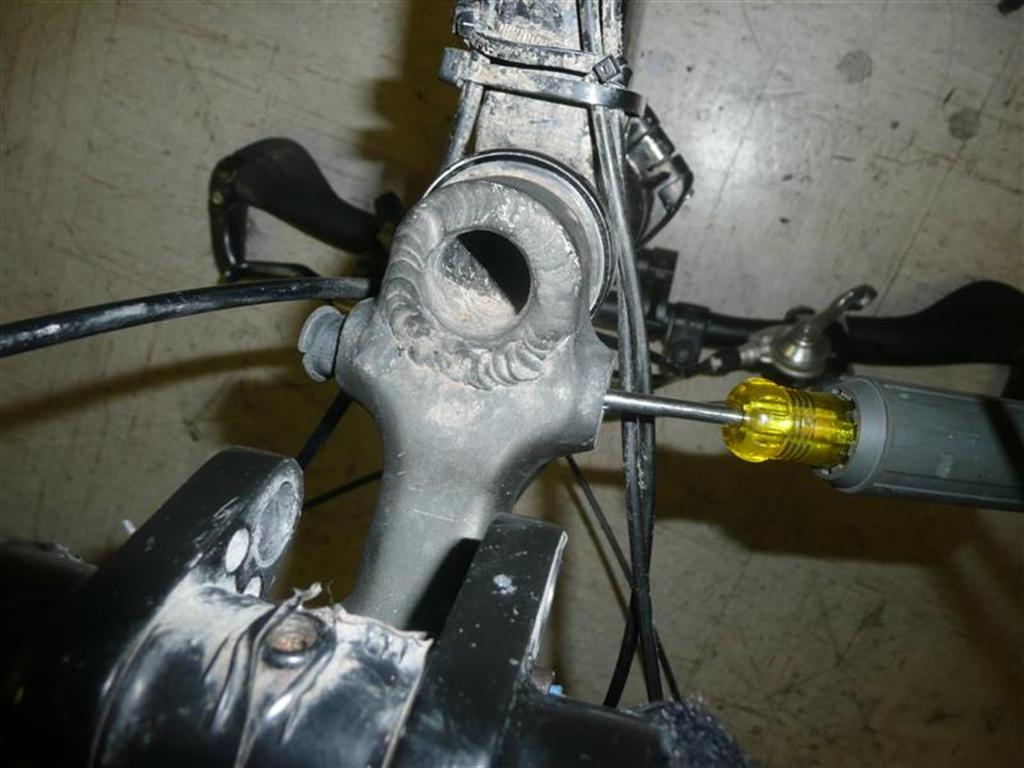
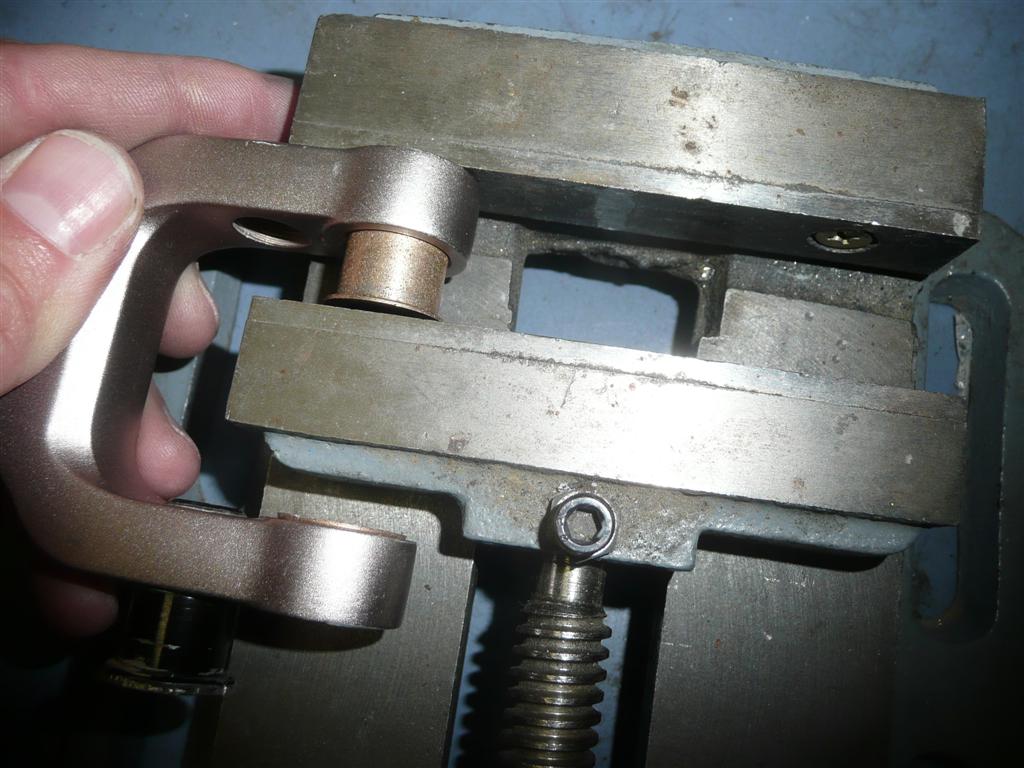
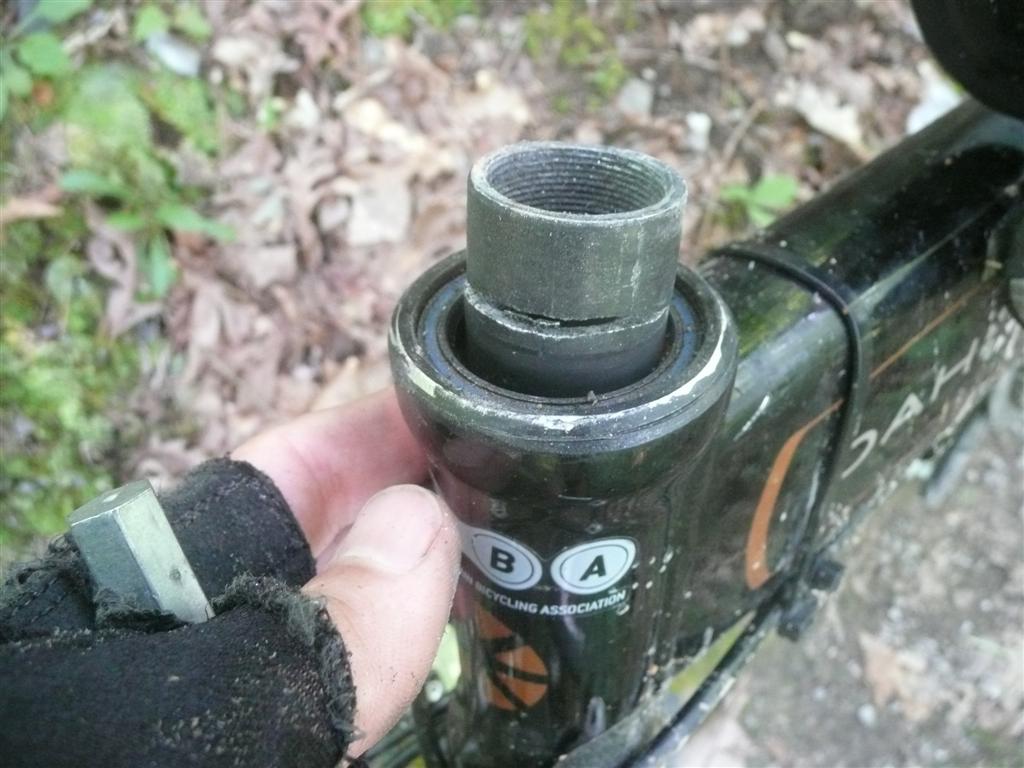
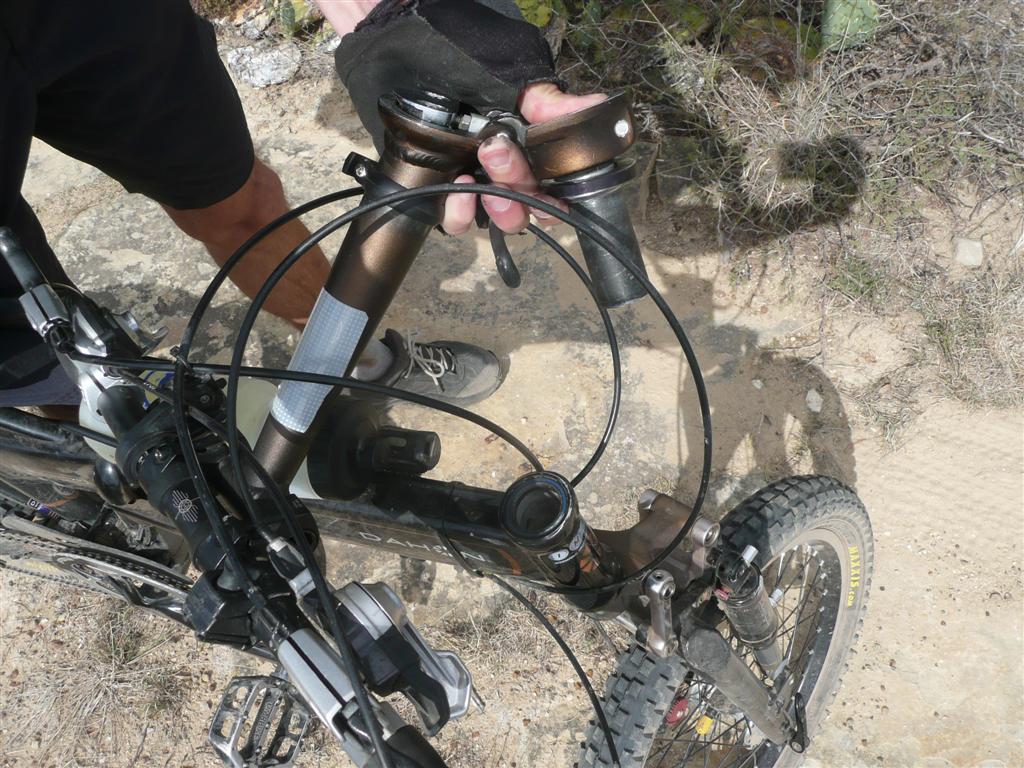
In the middle of the 30+ mile IMBA Epic ride ("The Womble" in Arkansas in Spring 2010), my handlebar started to feel kinda soft so I stopped to check the handlebar hinge. Instead of any hinge issues, I found that the top of the fork's steerer tube had cracked and was about to break off. I initially figured that ride was over and it was gonna be a long walk out, but after a bit of head-scratching, I realized I could try a field fix.
I went ahead and broke off the top-most part of the steerer and still had a few threads left. Removed the headset spacer and was able to get the big bolt started in the steerer threads. Was able to cut enough new thread to get it tight enough to finish that ride.
After that trailside fix, back at the shop I set about devising a long term fix. Using aluminum for the steerer tube in this application, which has about 18 inches of leverage above it, was doomed to break. Still can't believe they did that. I wanted to replace the aluminum steerer with a Chromoly tube somehow but couldn't find the right size metic tubing and didn't have a suitable press to be able to retrofit that myself anyway.
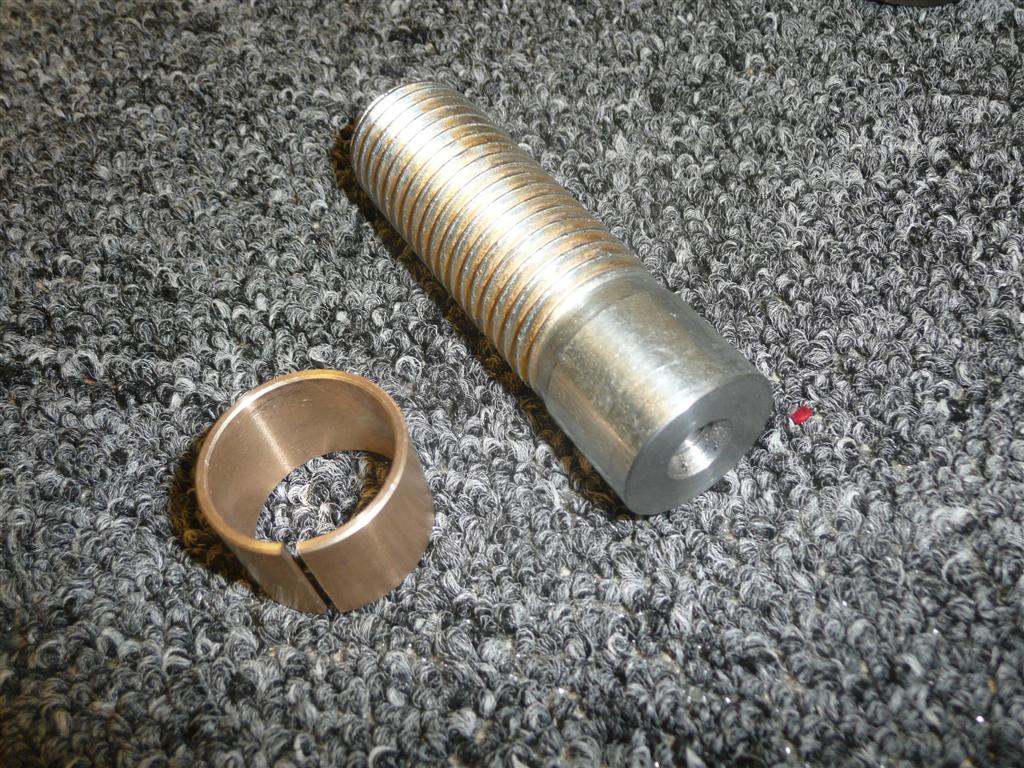
So I ended up tapping the original steerer and threading a stub of a grade 8 steel 1" bolt to the top, along with a collar shim to make the diameter right.

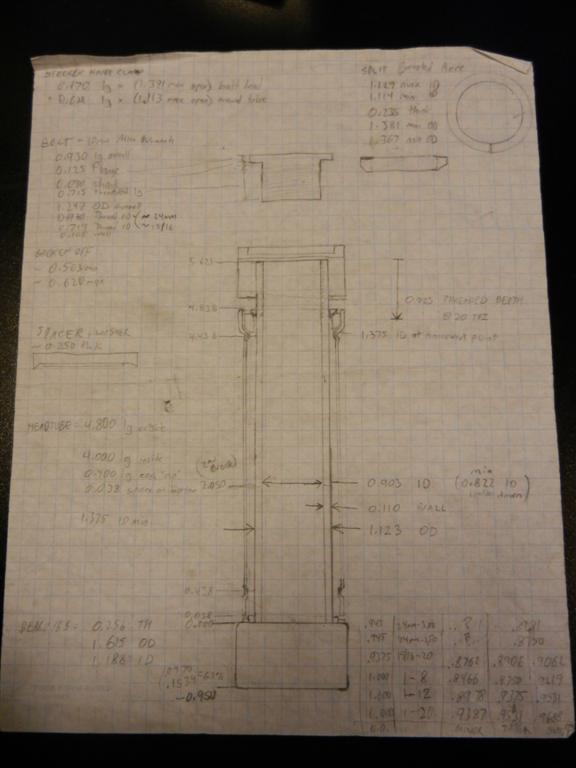


This looked pretty good, but unfortunately cutting the threads in the aluminum steerer had left their walls too thin, and this arrangement broke a few months later, lower down. This happened mid-ride and there was no fixing it trailside this time, so for the first and so-far only time, I had to finish a ride by walking it about 3 miles out.
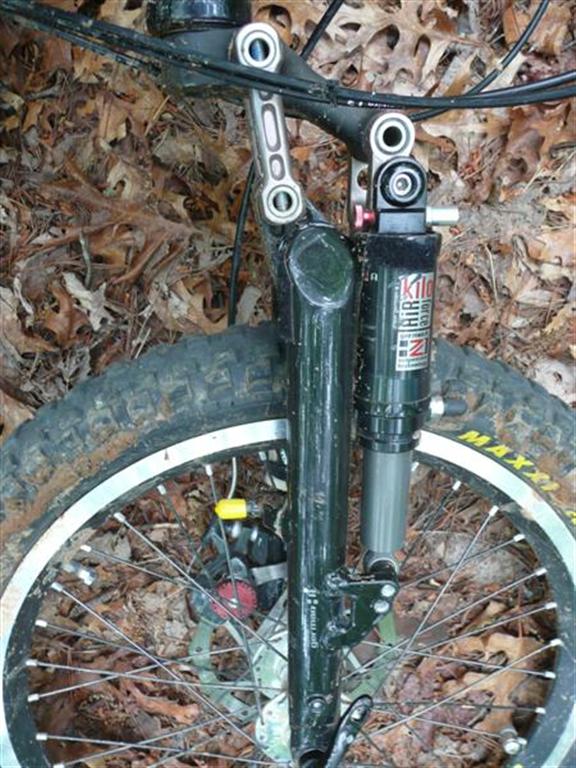
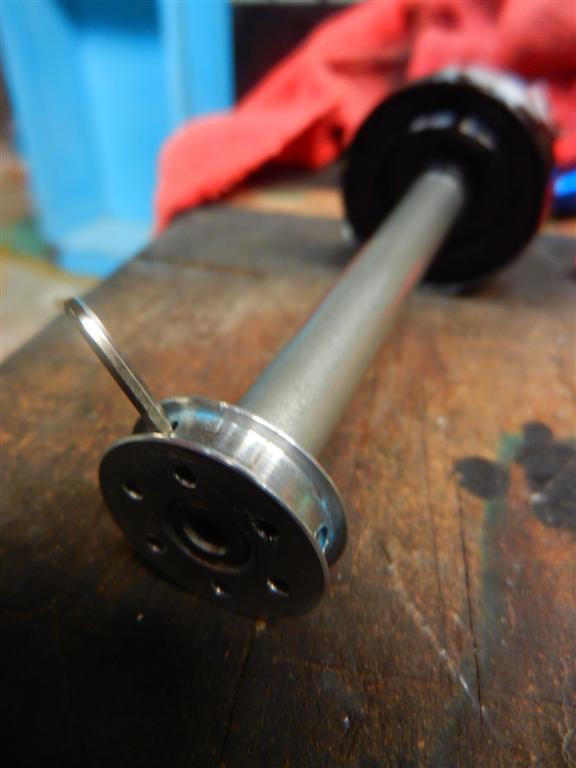
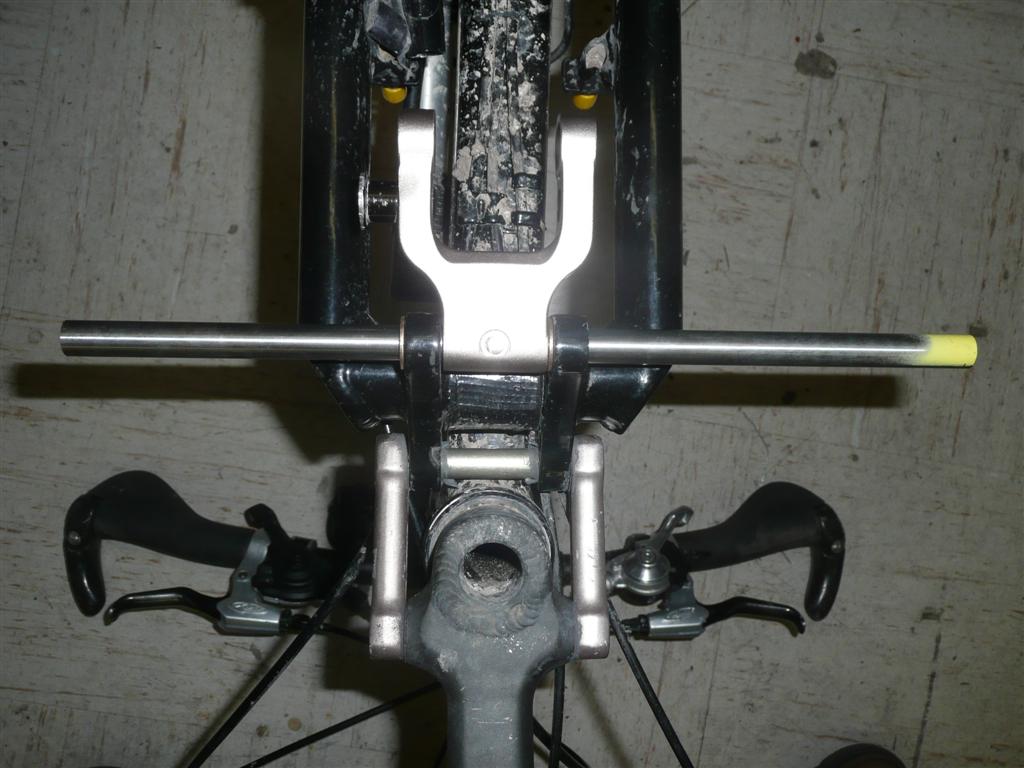
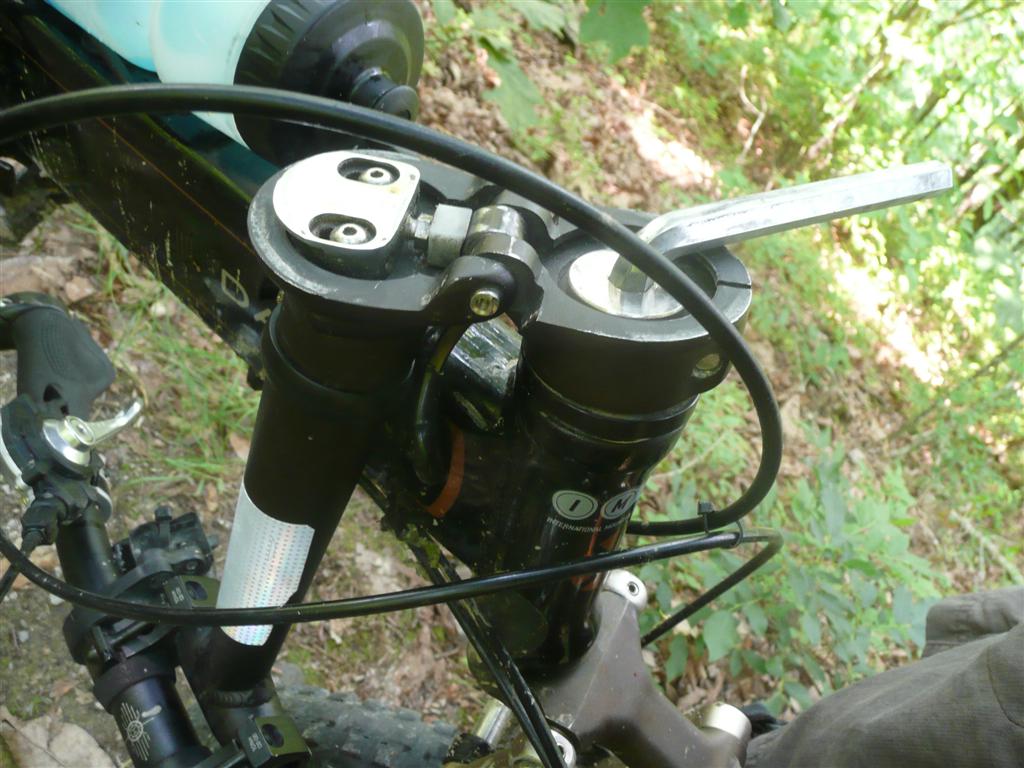
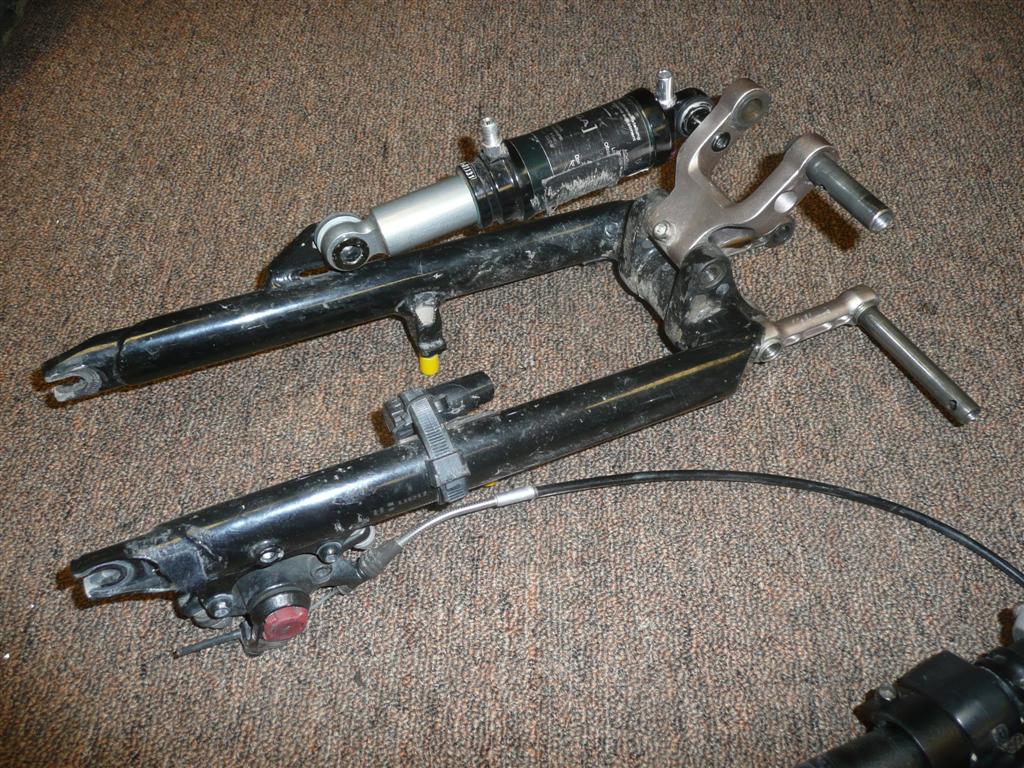
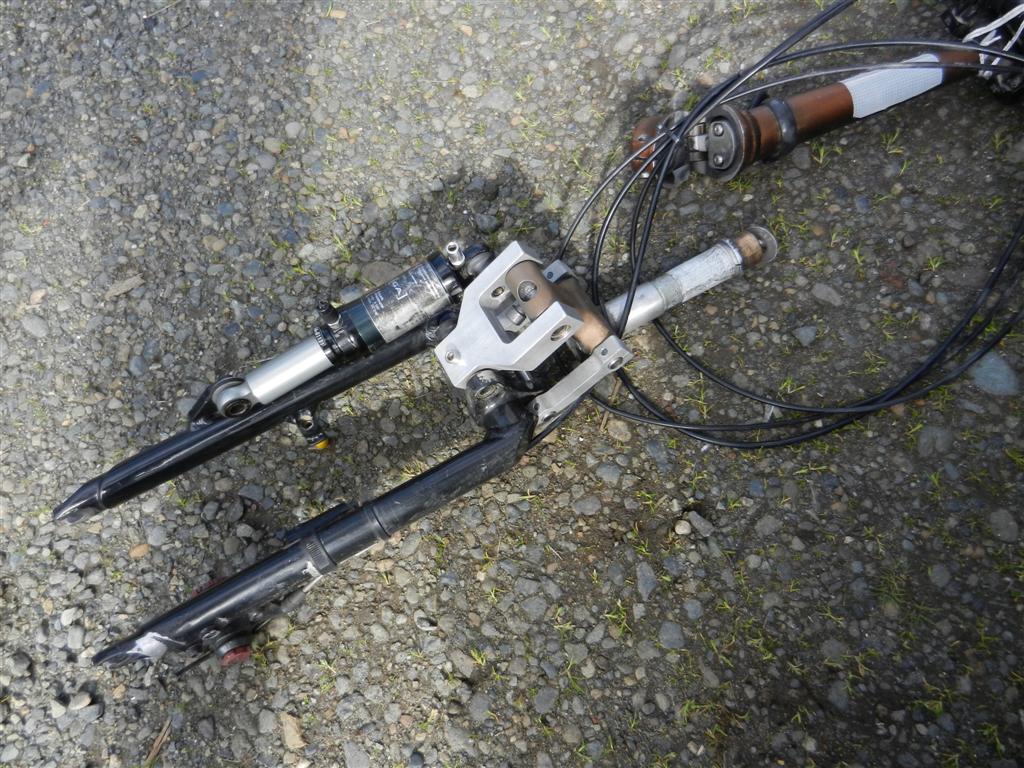
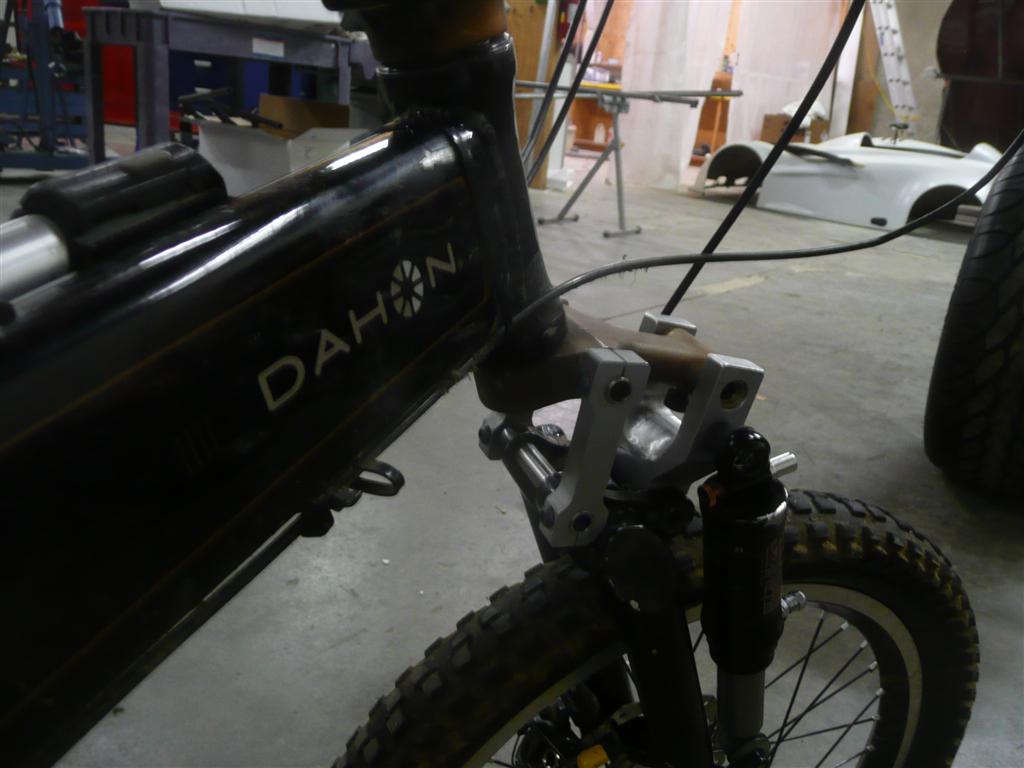
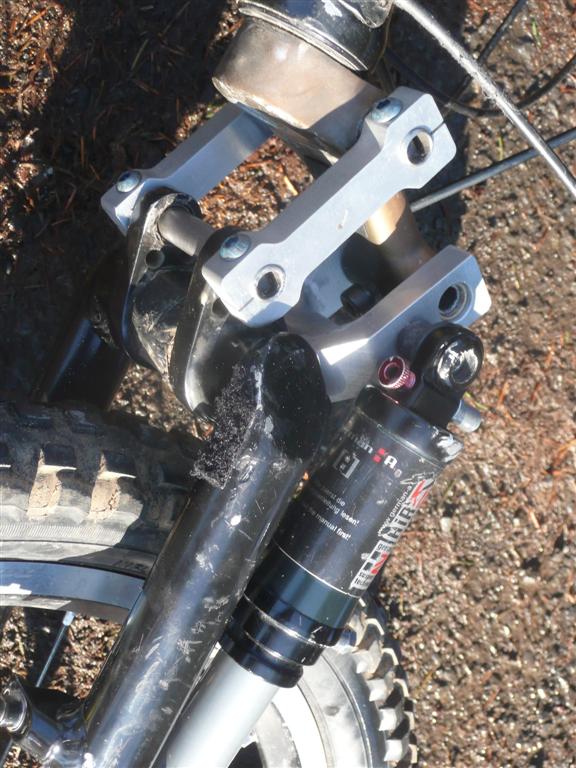
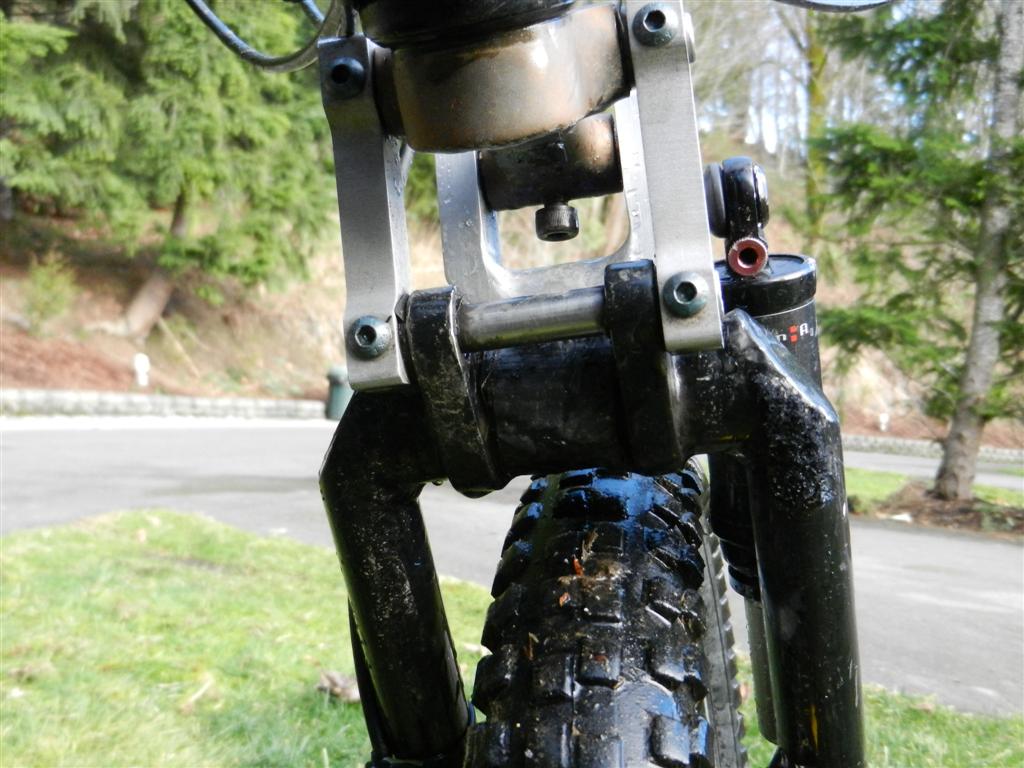
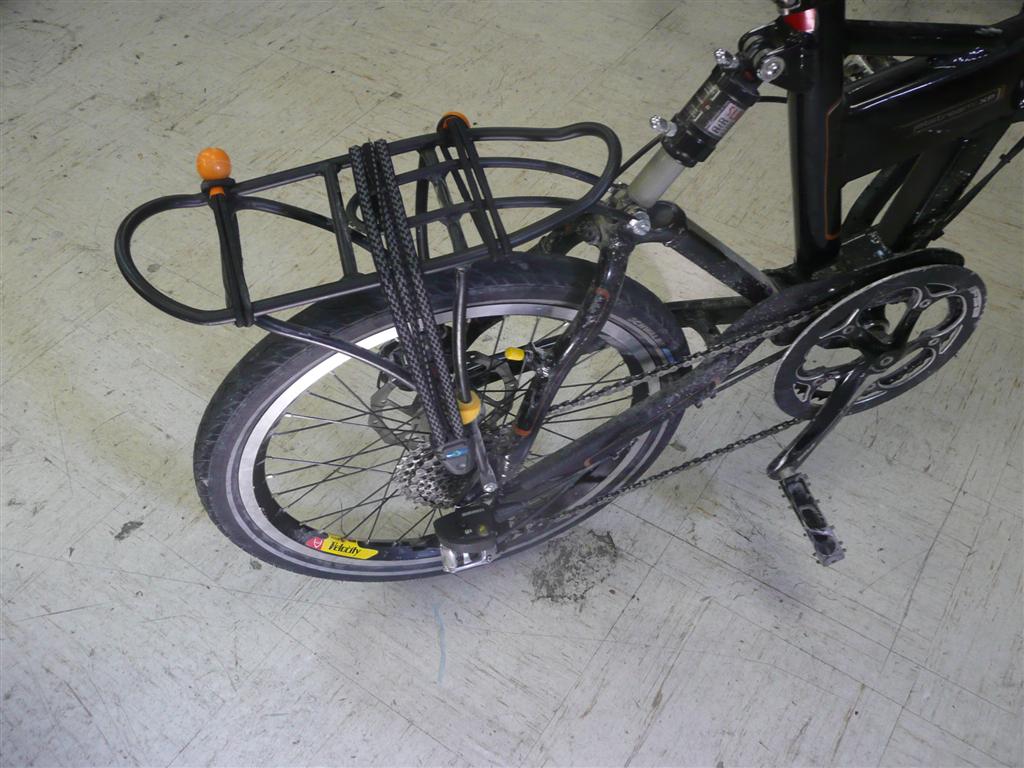
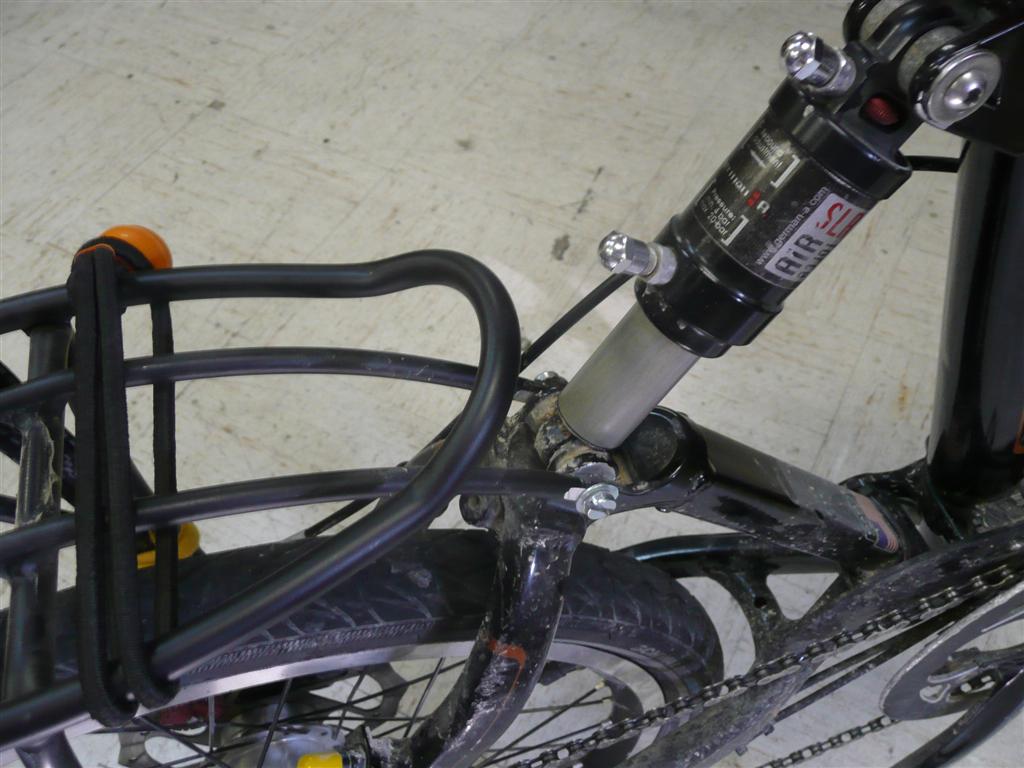
After that, I did what I should have done initially and replaced the entire aluminum steerer with a sold steel bolt. The solid bolt added a considerable weight up front, but I'm confident it'll never break again! (picture below was taken several years later, and also shows my new linkage pieces)
FWIW, the handlebar hinge has been relatively trouble free so far. Only mod I've done is add a couple pieces of 10mil thick UHMW tape to shim it a bit to compensate for the slight wear of the hinge pin, which the normal adjustment Dahon provides doesn't really address.
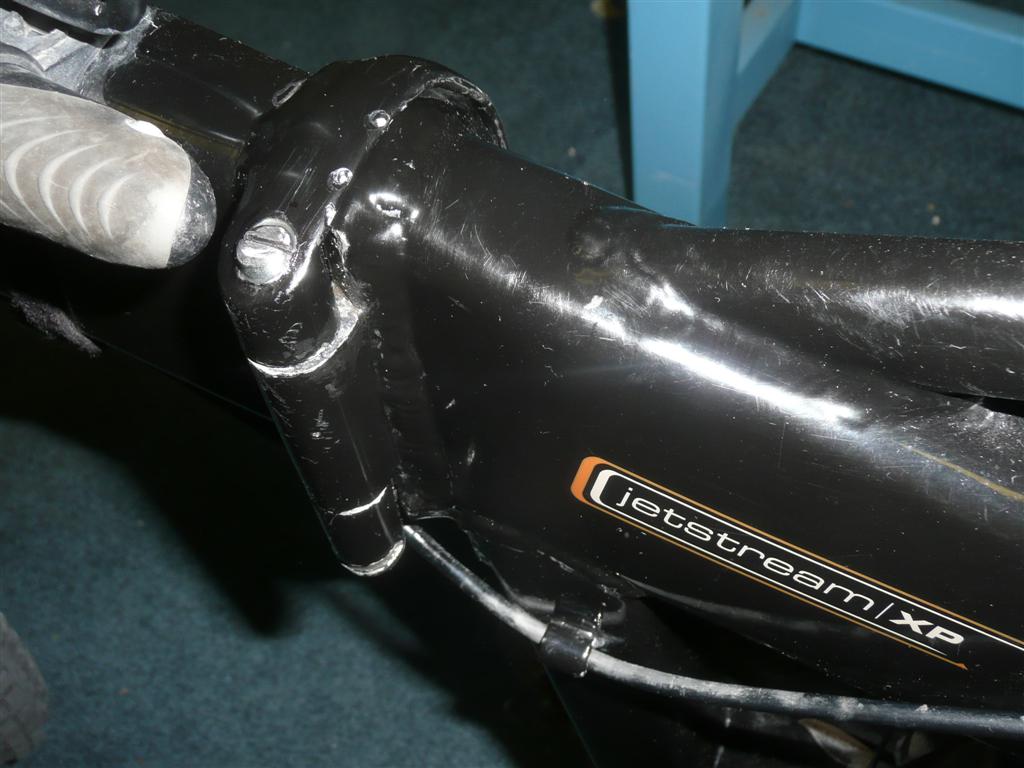
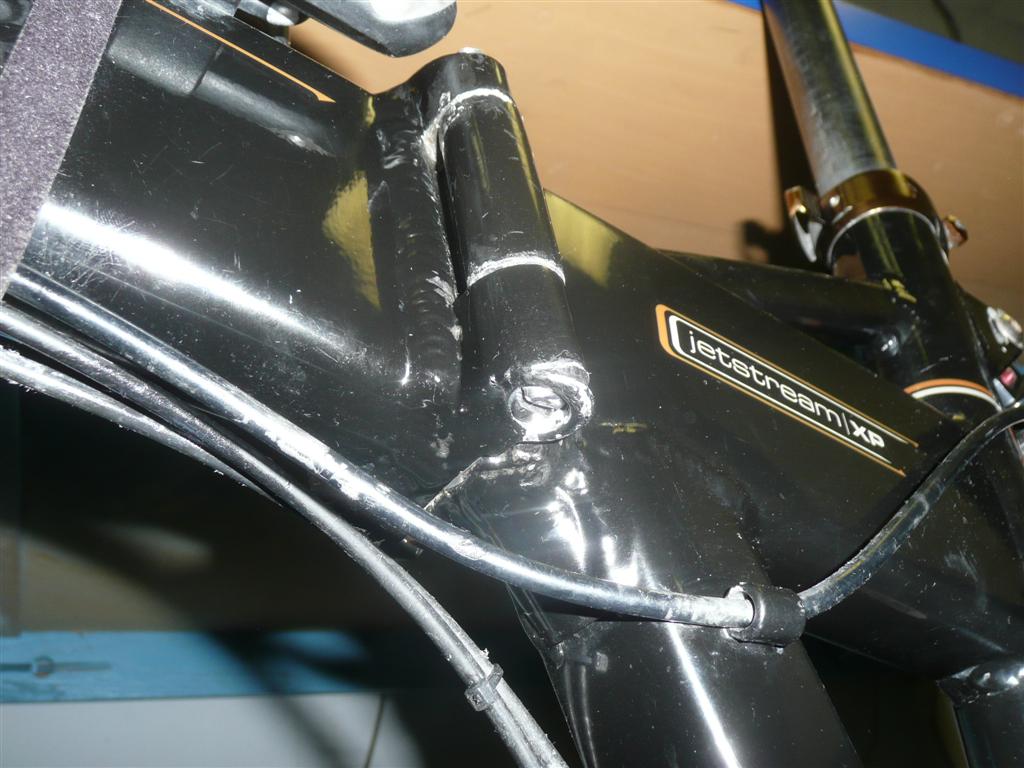
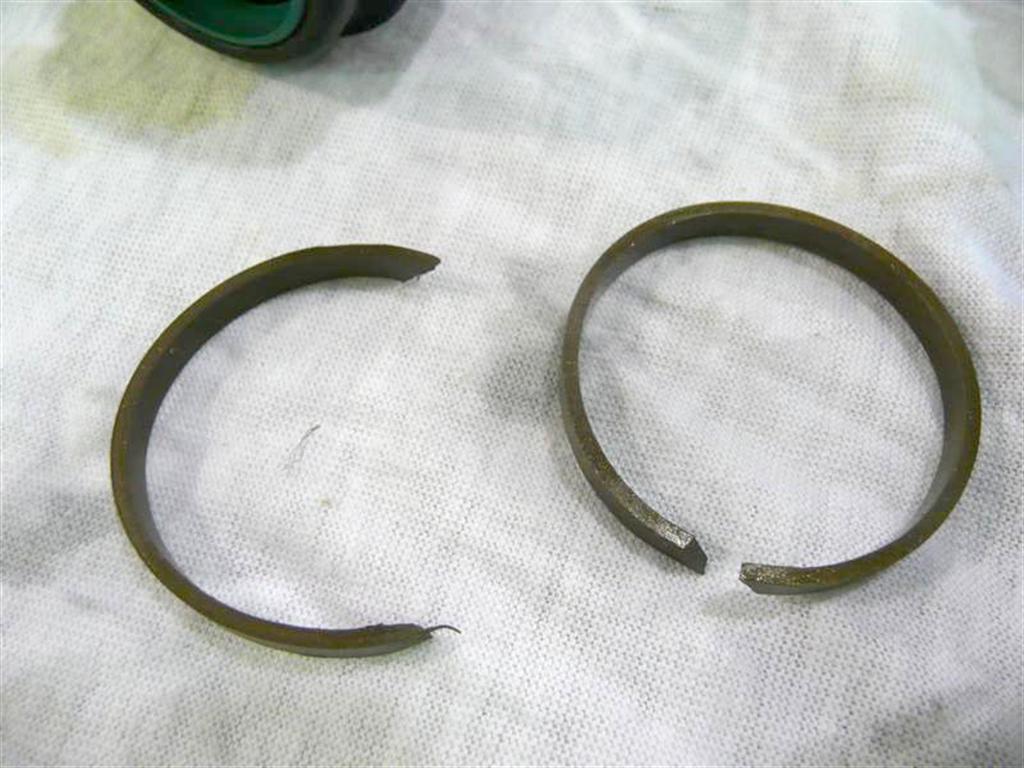
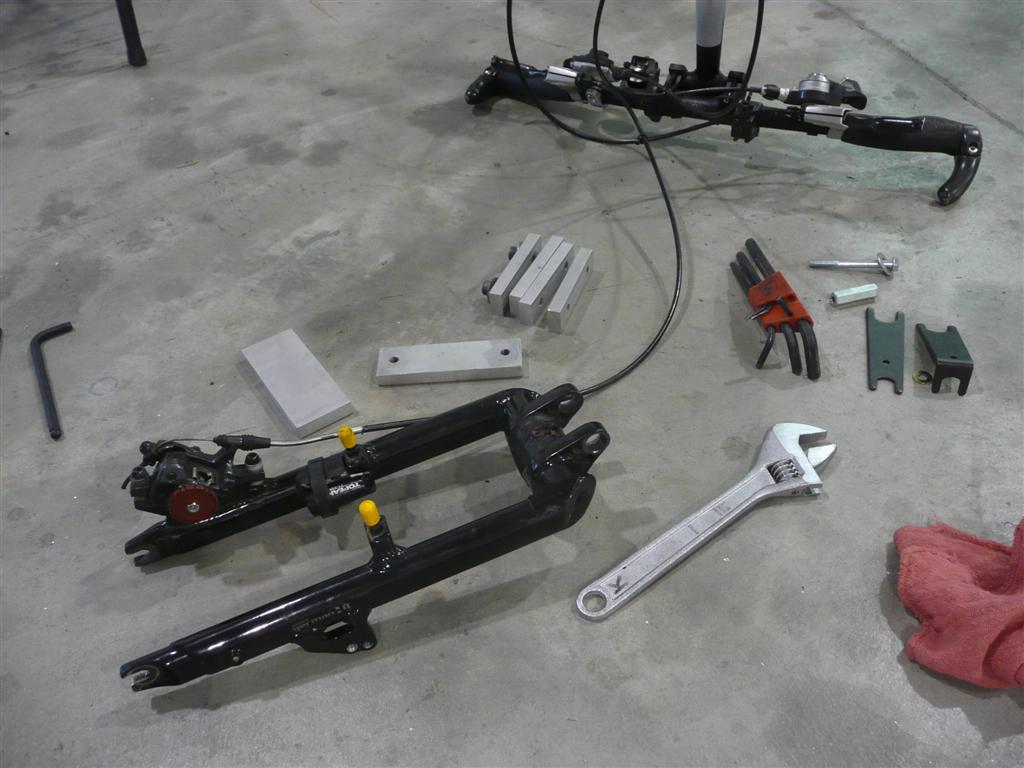
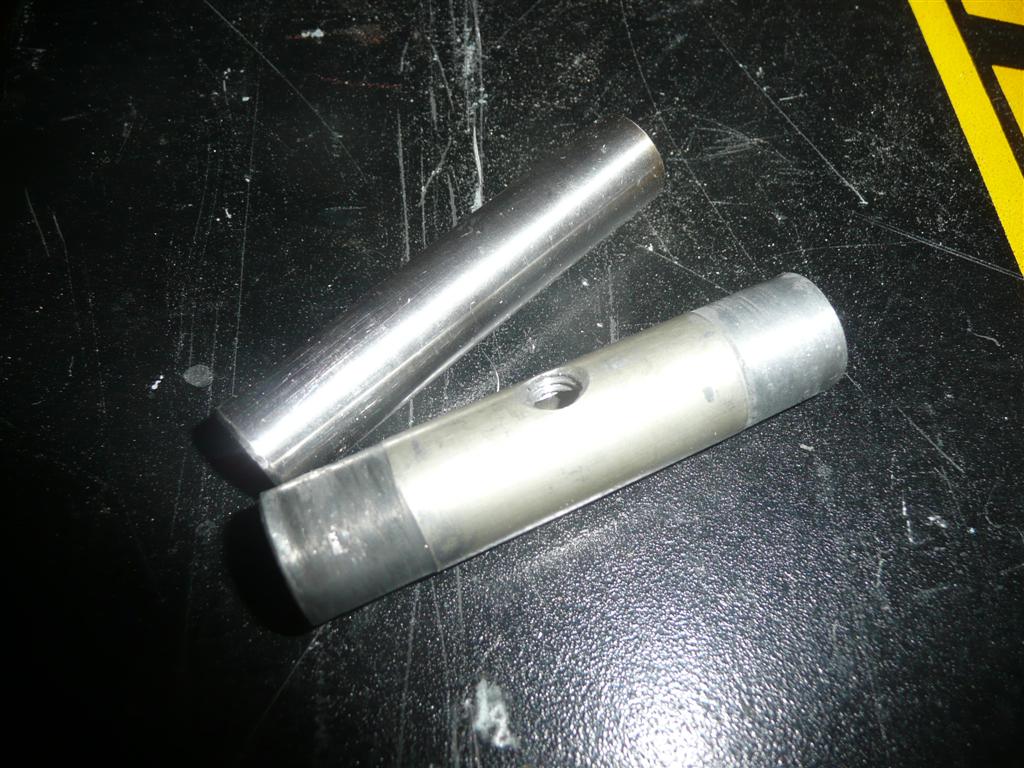
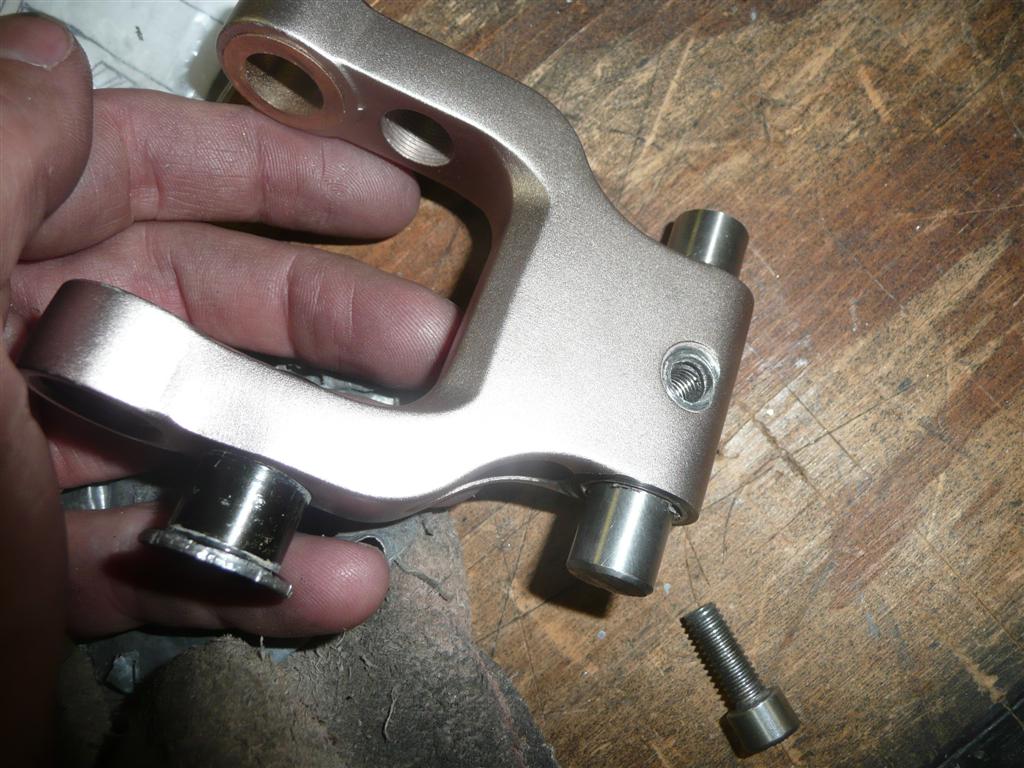
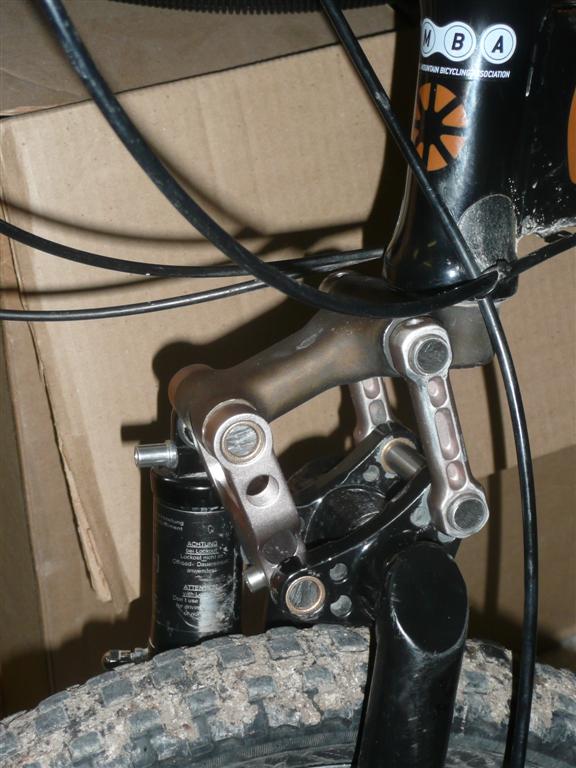
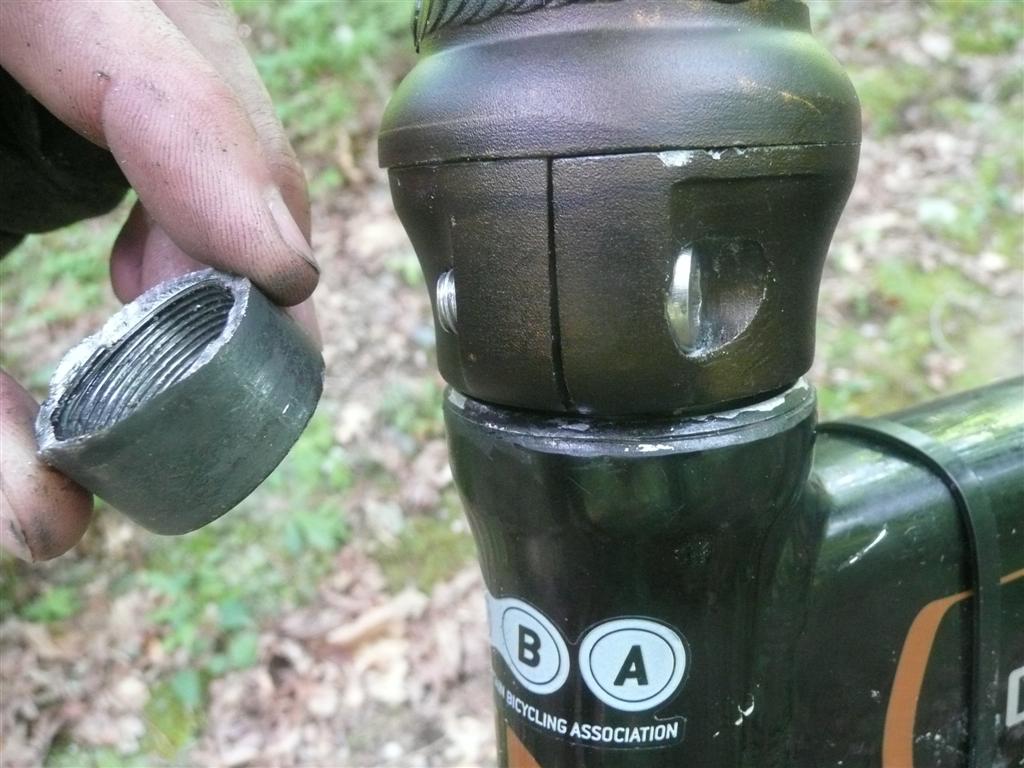
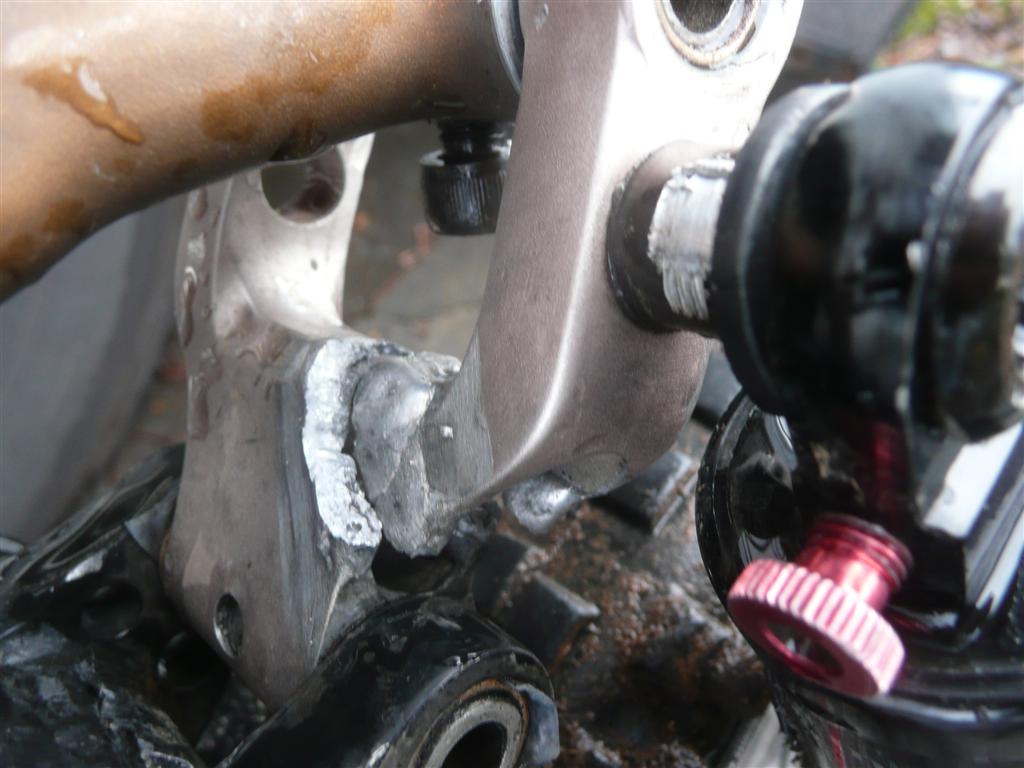
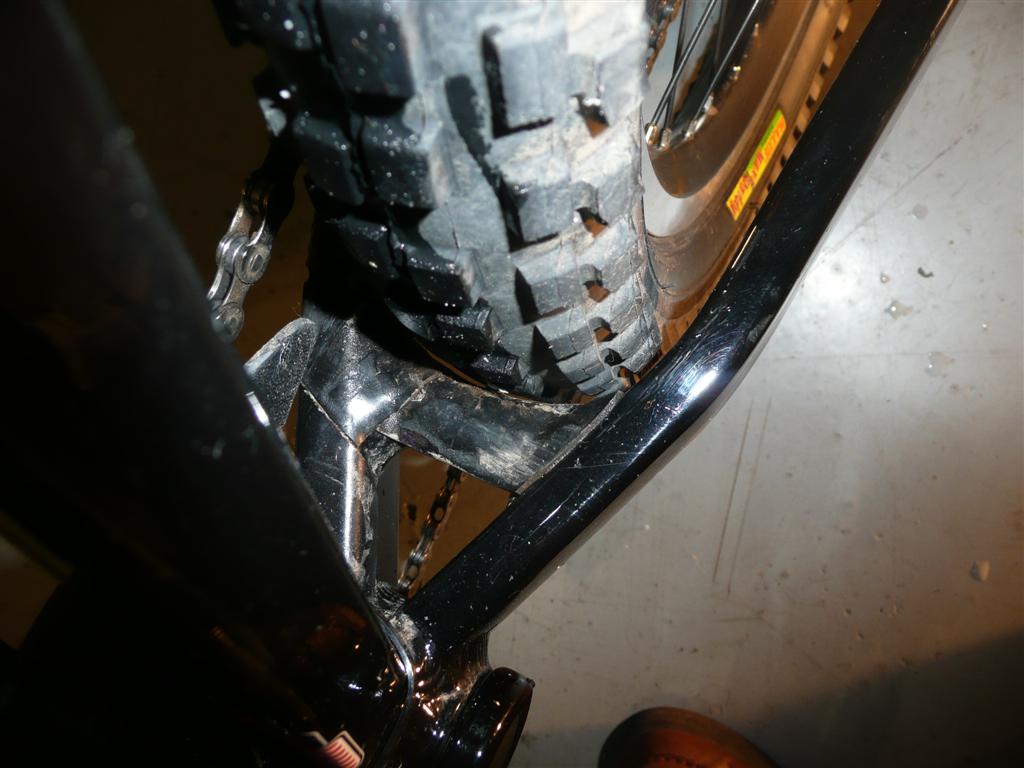
Discovered a crack after a ride in Montana in Fall 2011. I was early in a three-month stretch of intense riding in the mountains so found a local shop and convinced them to weld it as a short term fix so I could keep riding until I could fix this properly. A few months later the welded piece indeed did break again, but I hadn't expected a permanent fix, so thanks much to All Things Metal in Missoula for doing the temporary fix that kept me rolling for those couple of awesome months in the mountains of Montana, Idaho, and Oregon.


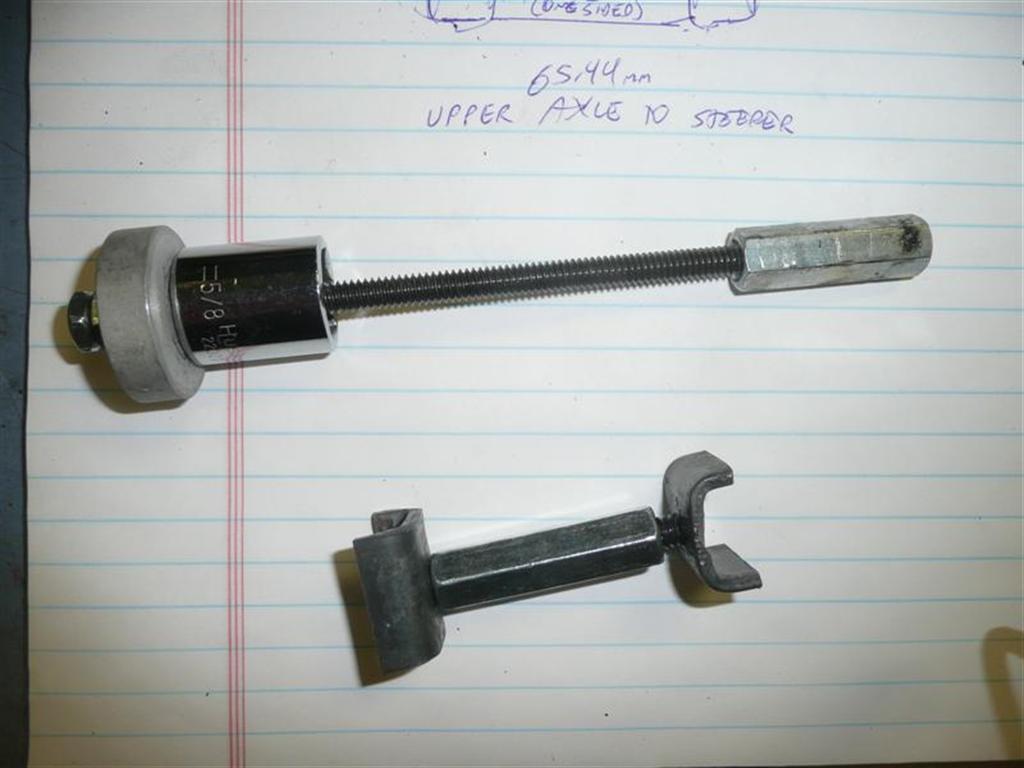
To tide me over for a few weeks while awaiting new parts, I improvised an extremely ugly but surprisingly effective "wedge" out of a long coupling nut that held things aligned just well enough to allow easy riding on pavement.


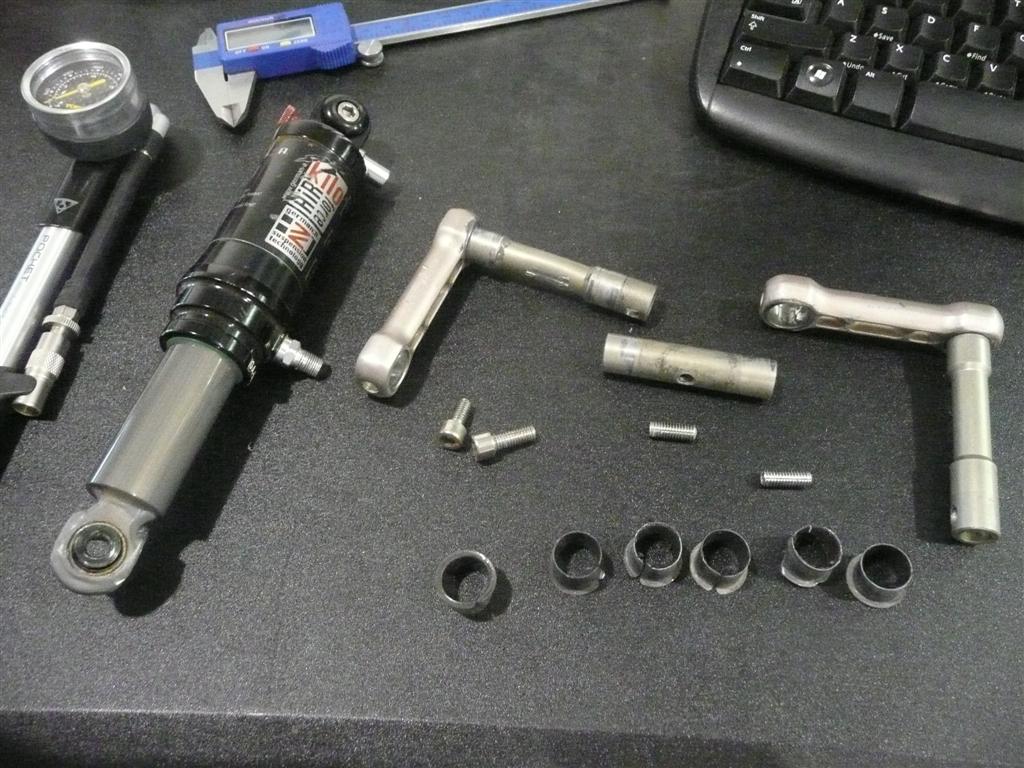
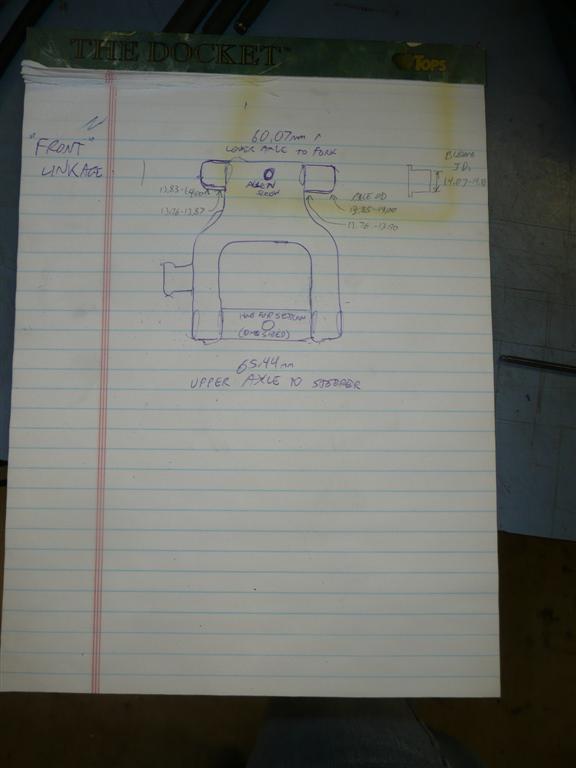
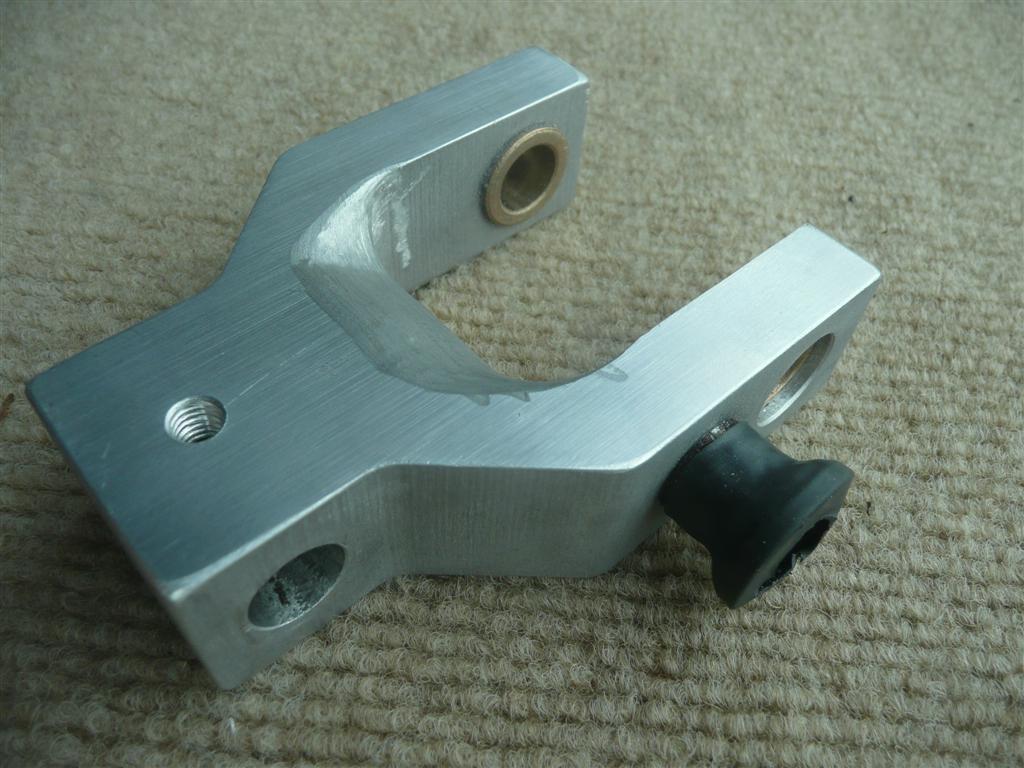
I figured it would be pointless to simply replace the broken part with a new one from German A. Not only would it take months to get and cost a small fortune, it would just break again at some point.
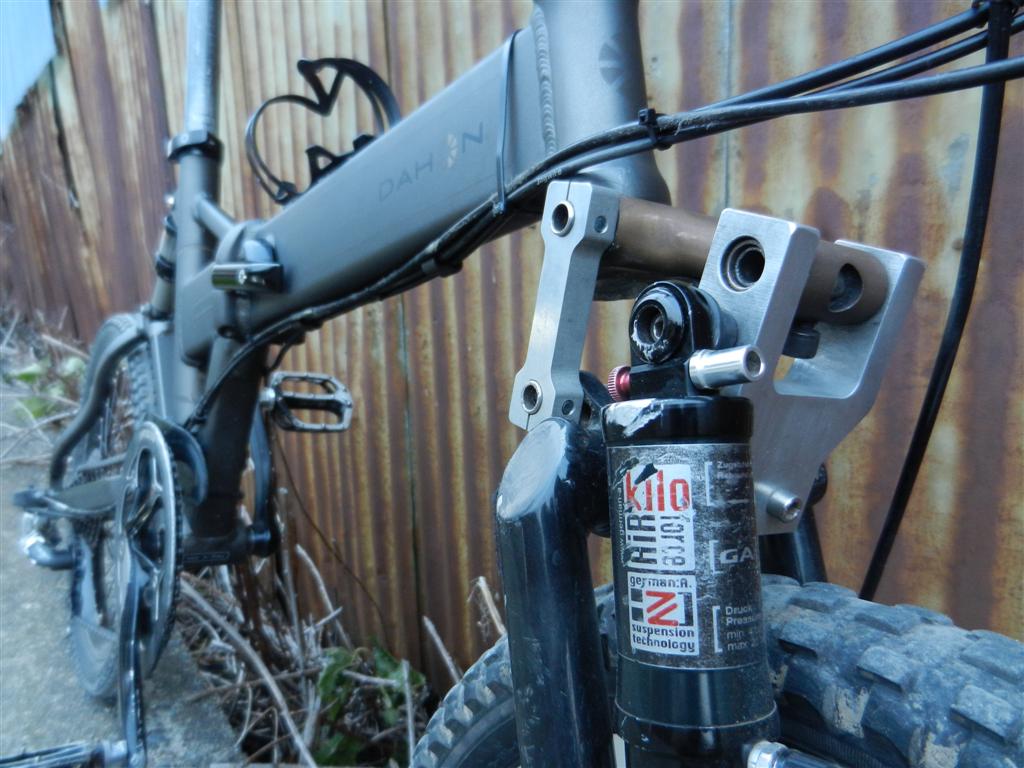
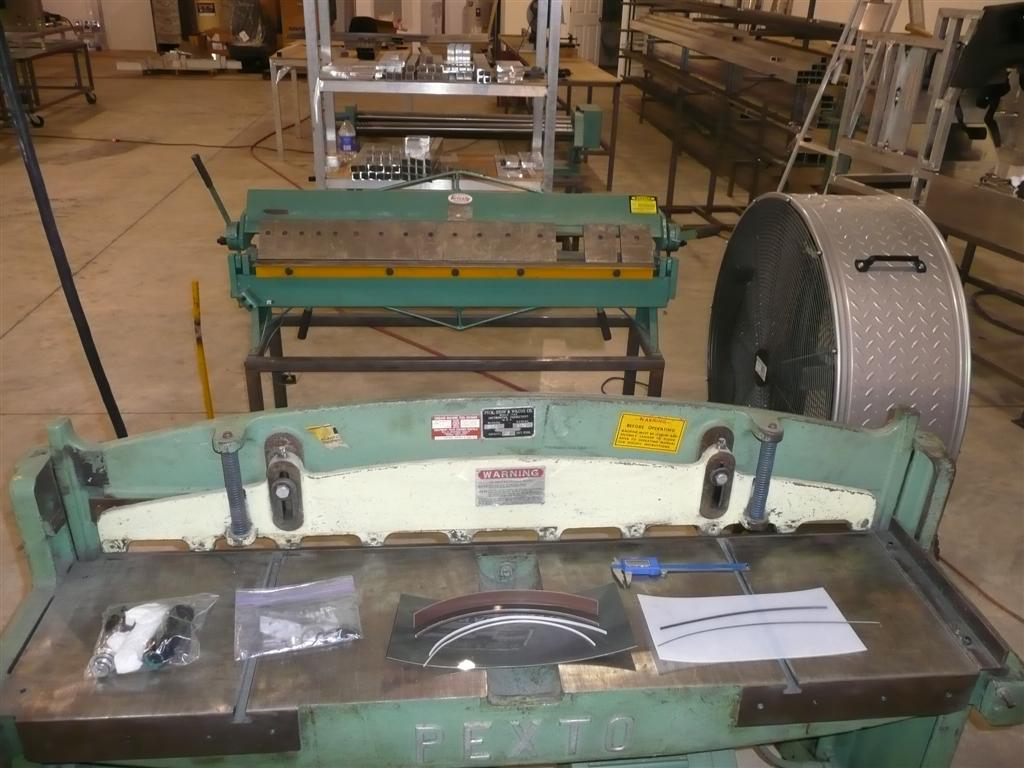
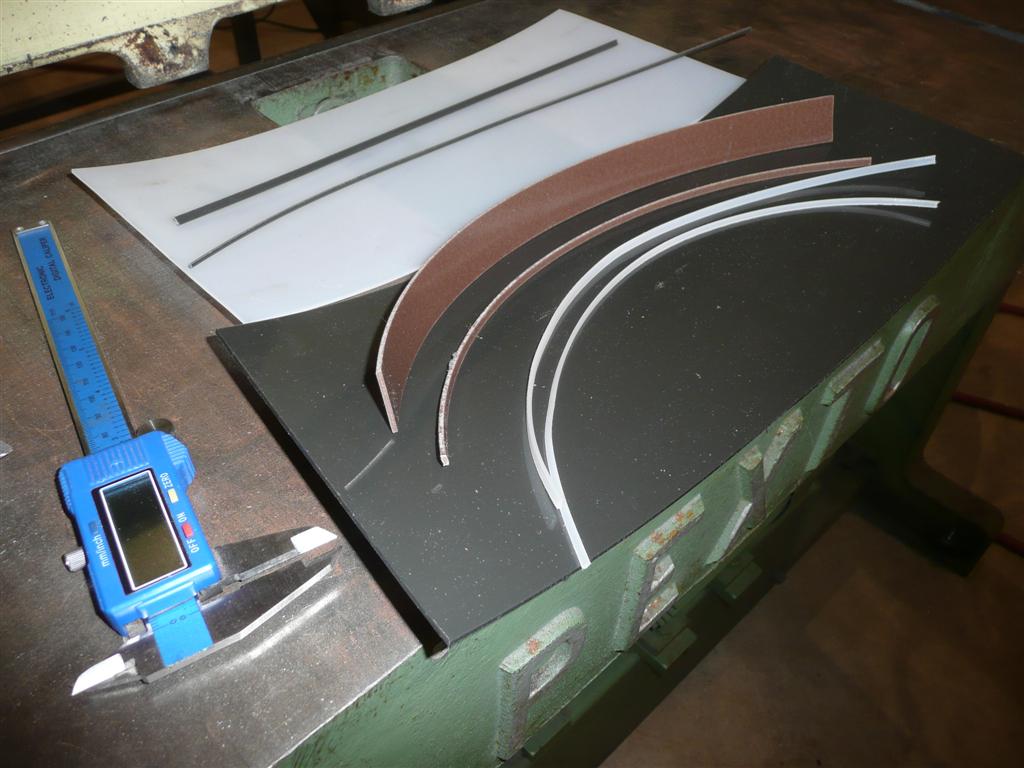
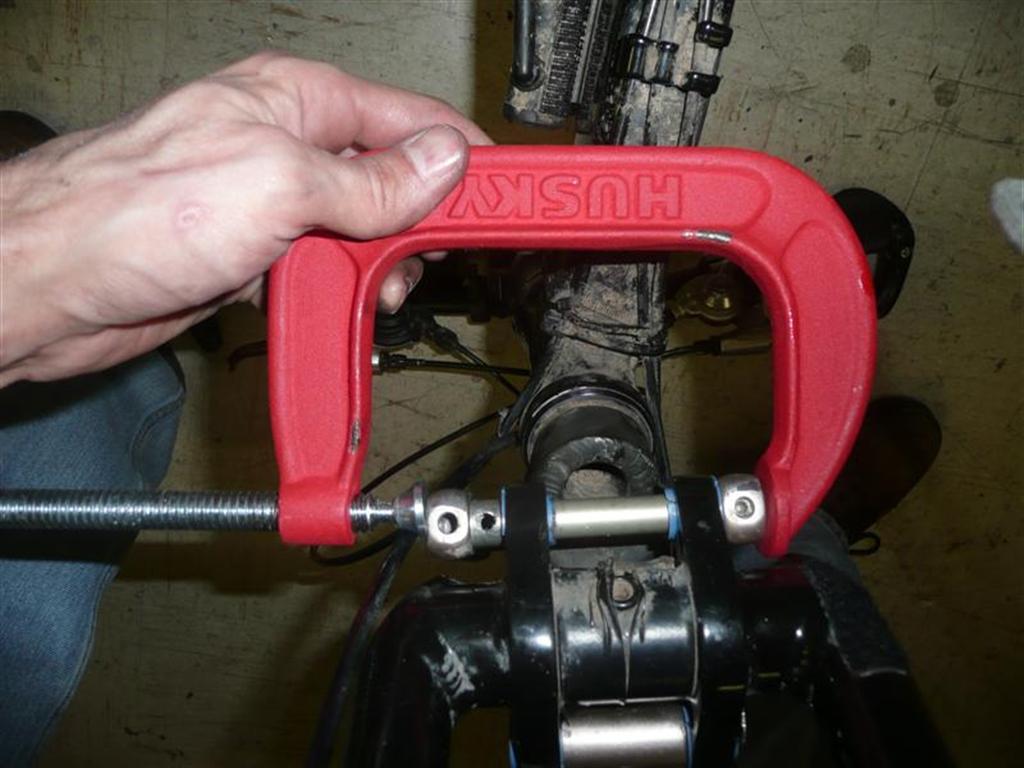
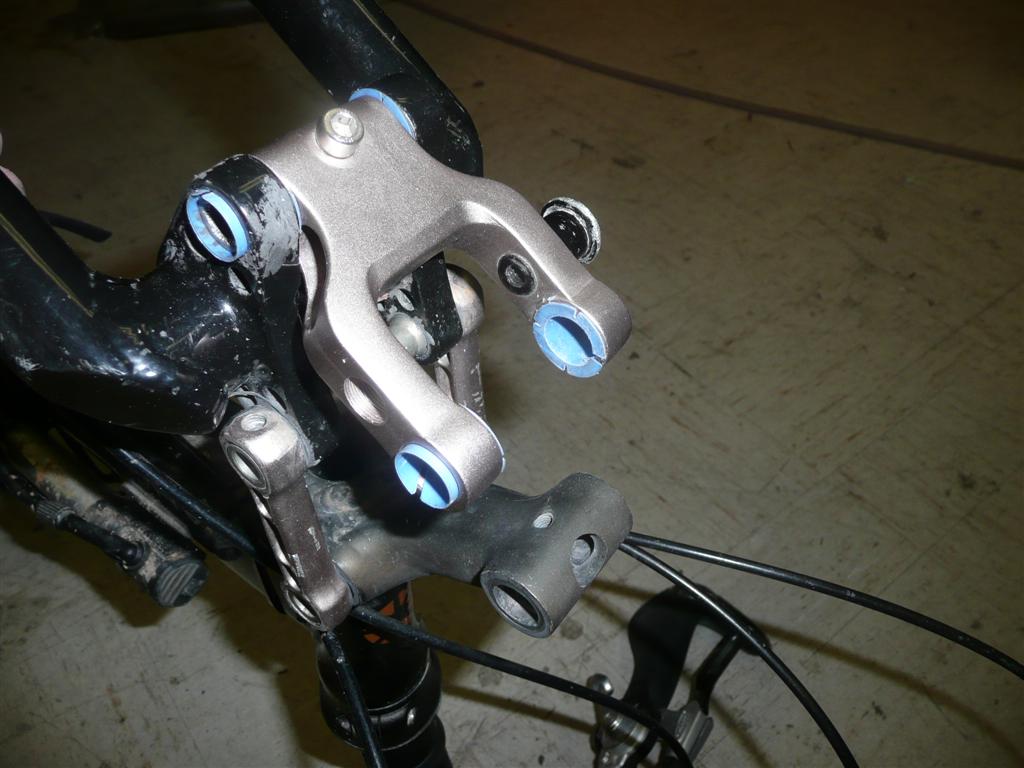
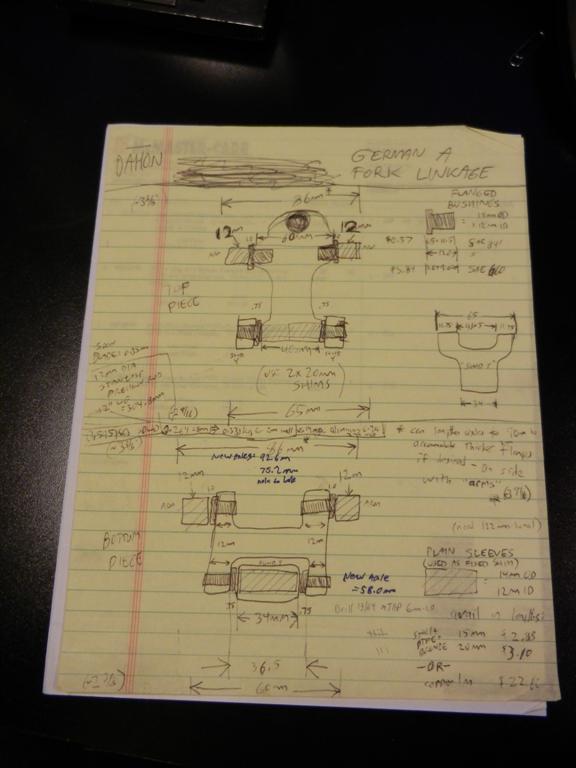
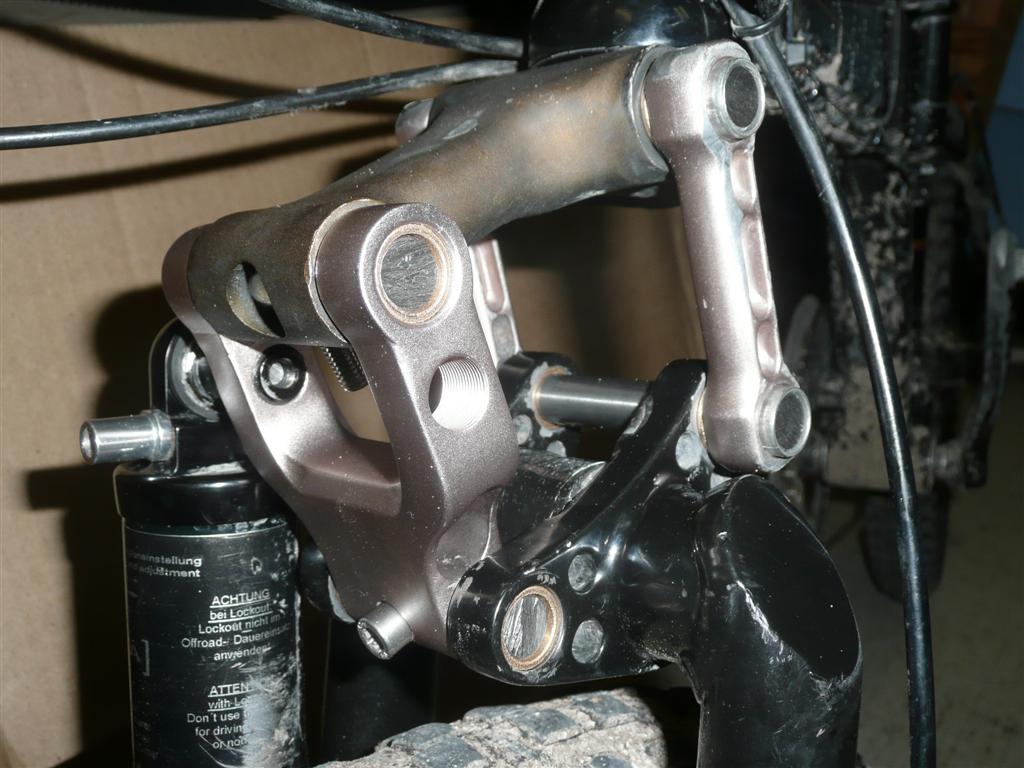
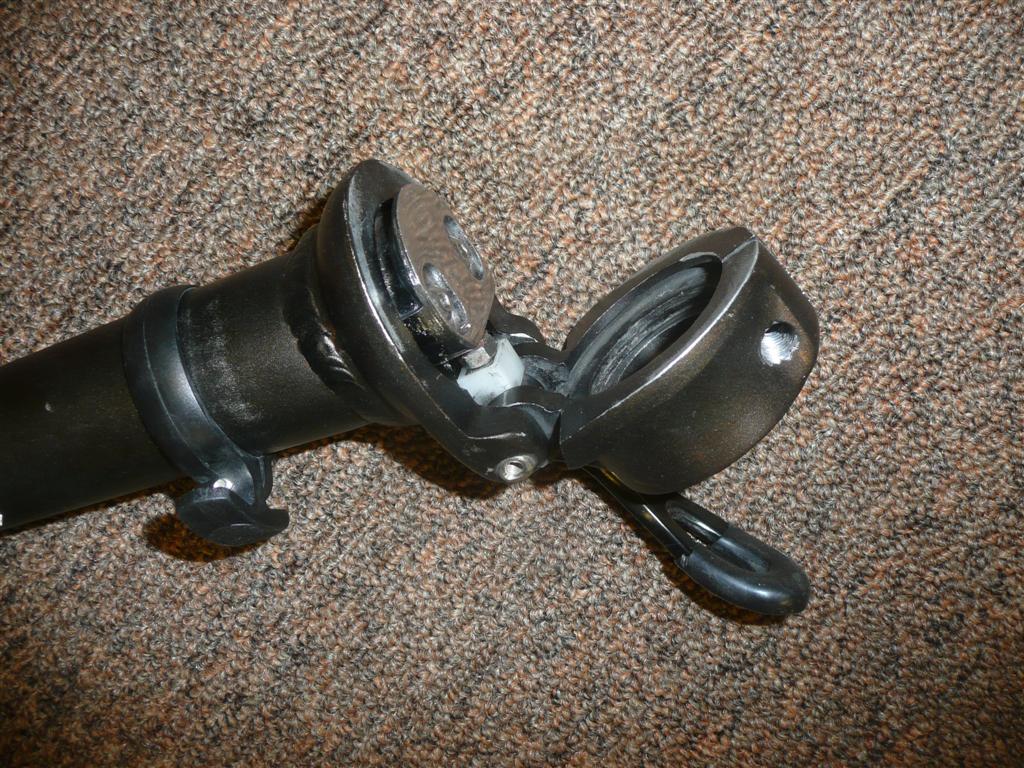
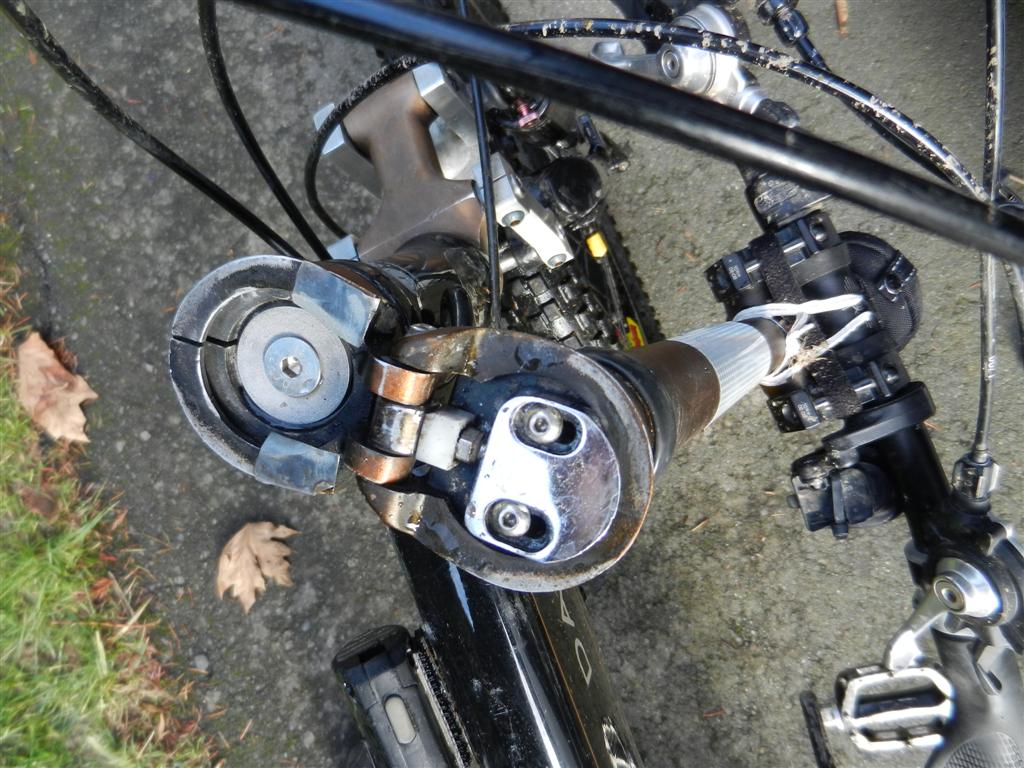
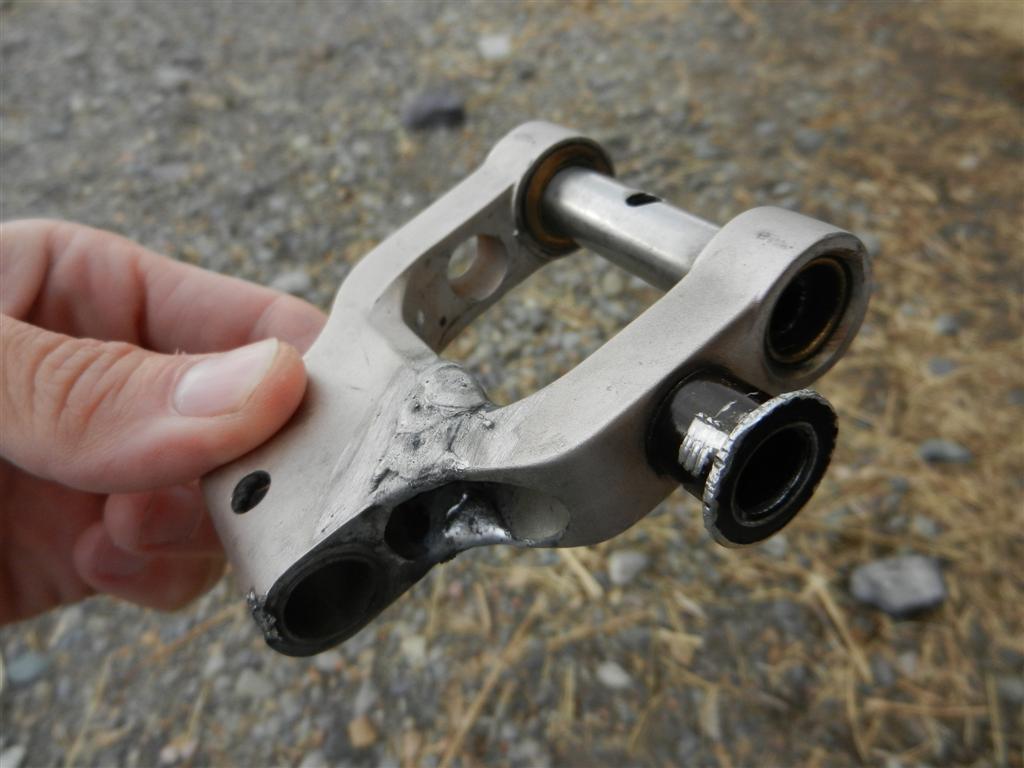
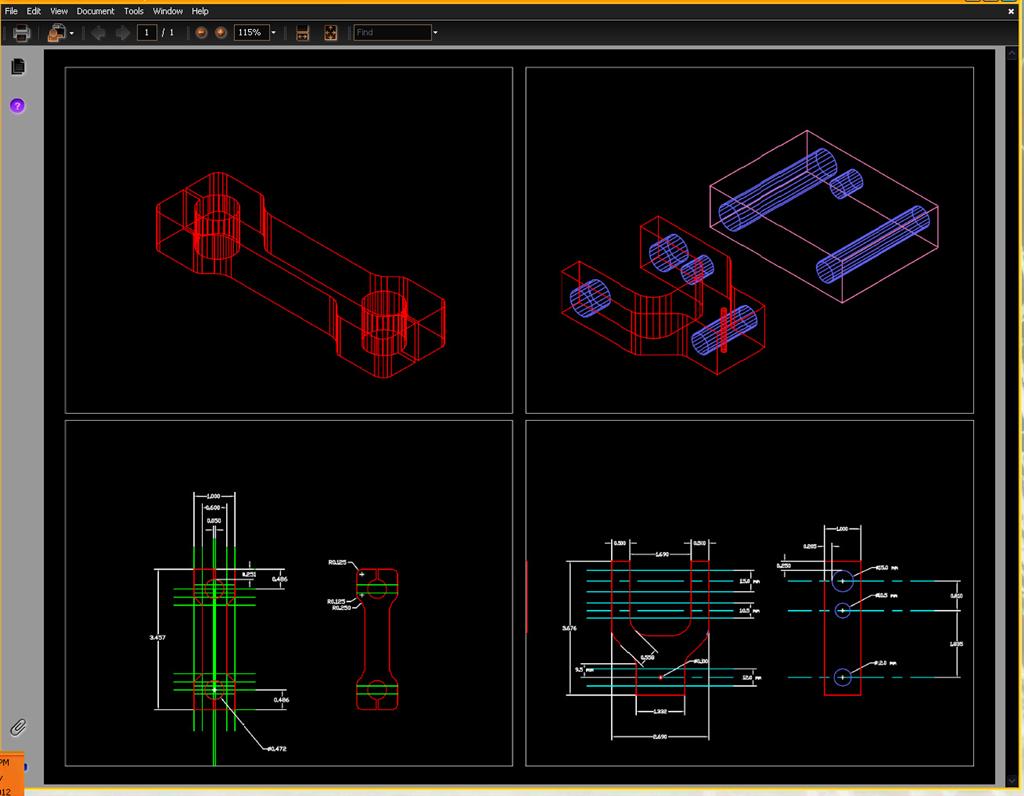
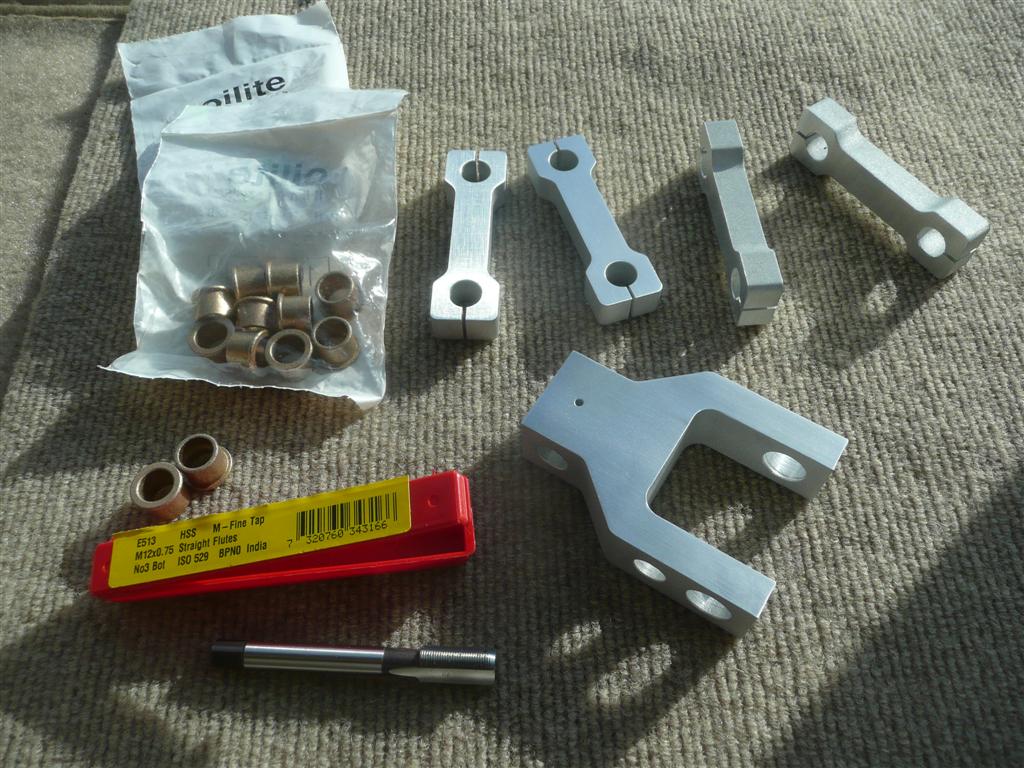
So I fired up the old CAD program and designed a beefier replacement for that, along with a matching set of rear links that sort-of "clamped" around the axles instead of merely being setscrewed in place as the originals are. I tracked down a shop in Wisconsin called Westar Mfg to fabricate the pieces from solid 6061-T6, using waterjet and traditional machine tools. Westar did the job quickly, well, and remarkably inexpensively and I'd highly recommend them for such work. They also build robots for the Battlebots TV show so are pretty cool folks. My biggest challenge was finding the special "extra fine" M12-0.75 metric tap for the shock mount. After trying dozens of industrial type suppliers and coming up empty, I finally found one at Amazon (of all places). Not just a bookstore anymore, for sure.
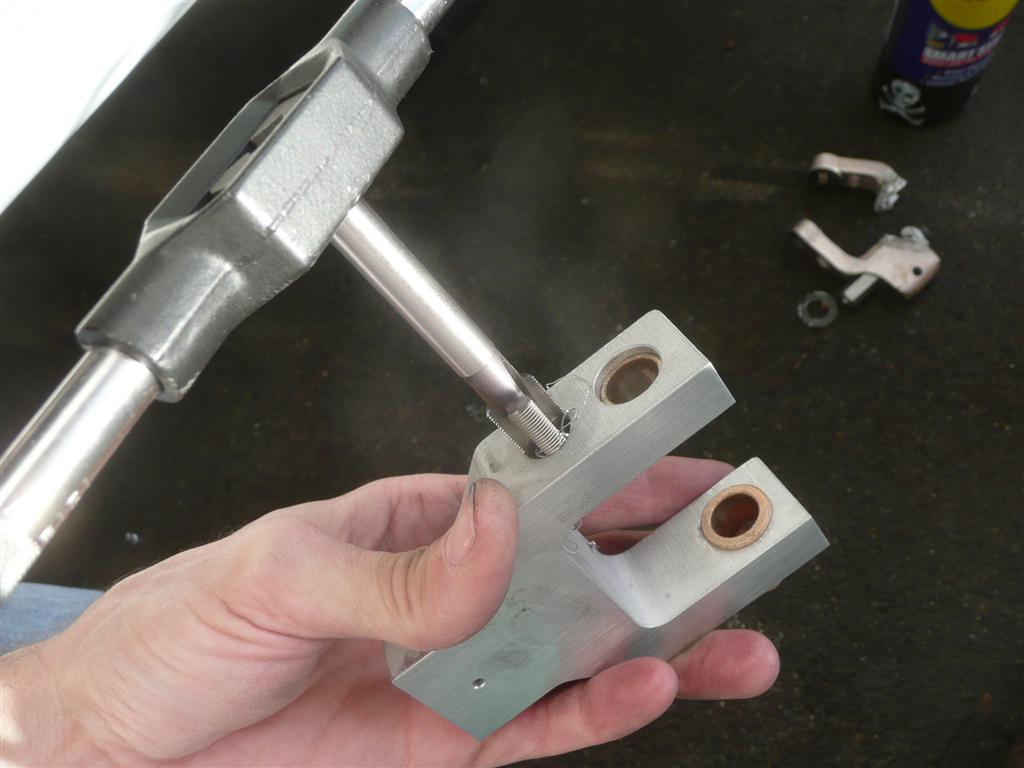

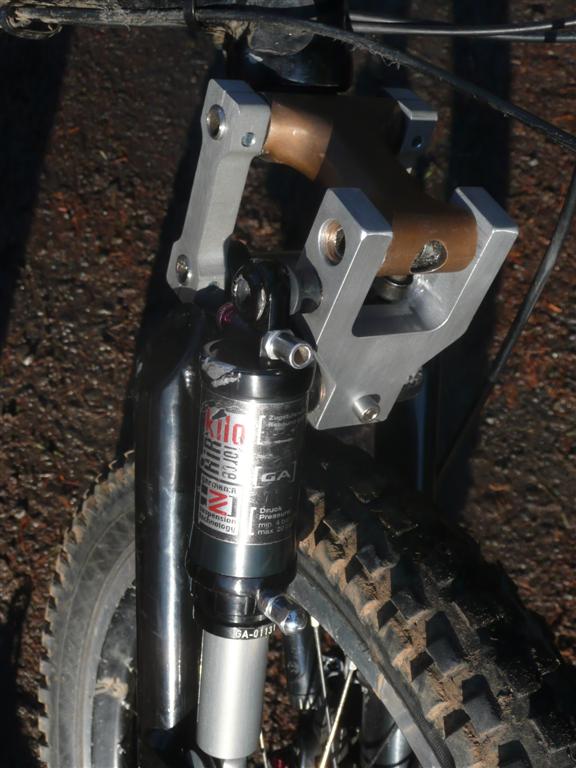

My initial testing grounds were the awesome rock gardens on the new Quid Pro Flow trail at Sandy Ridge, Oregon: Passed with flying colors. The bike feels very solid now indeed, and since I designed the new pieces from scratch around my new bronze bushings and steel axles, everything now fits perfectly with no shims or filing required, so it should be even easier to maintain bushings going forward too.

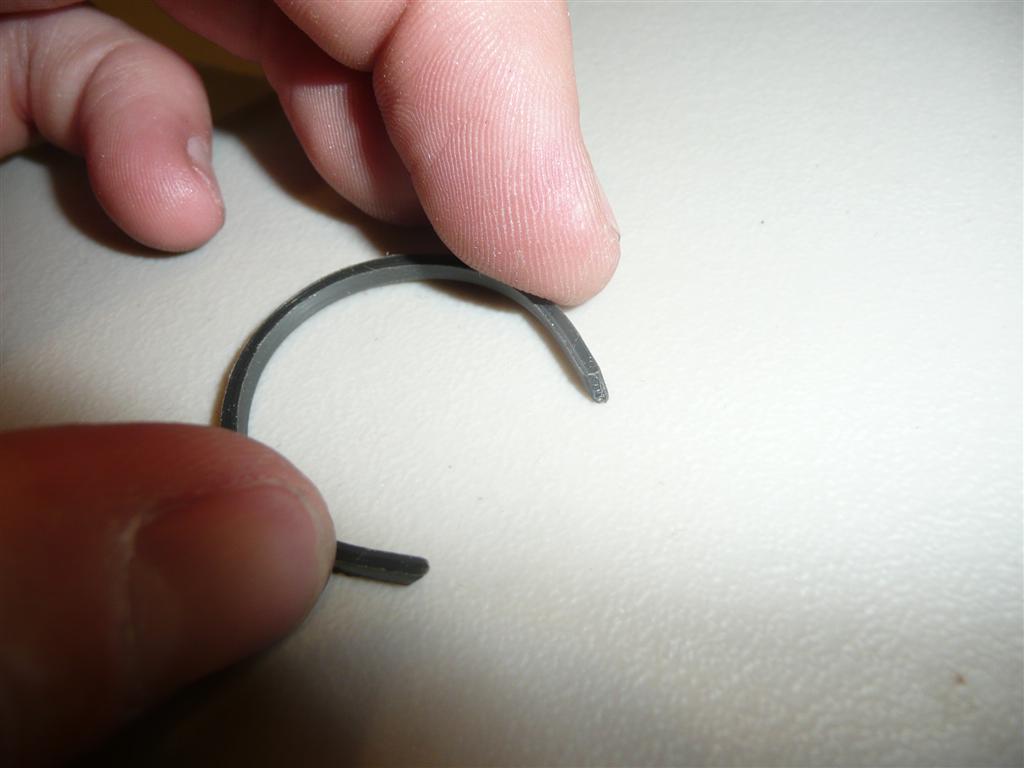
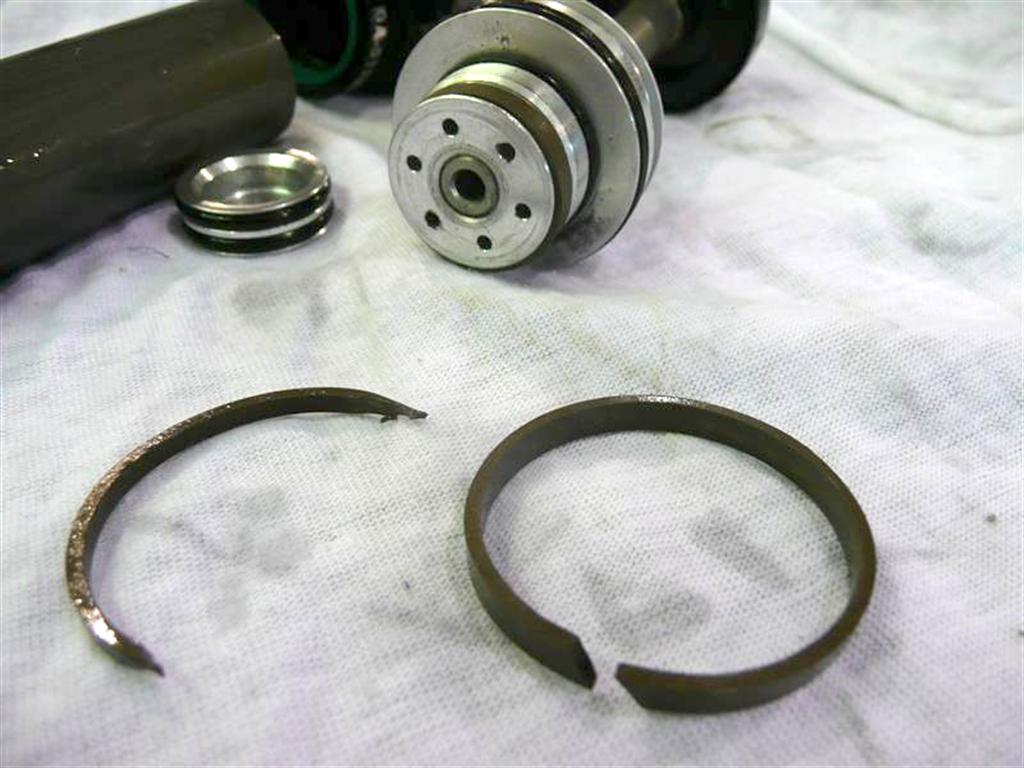
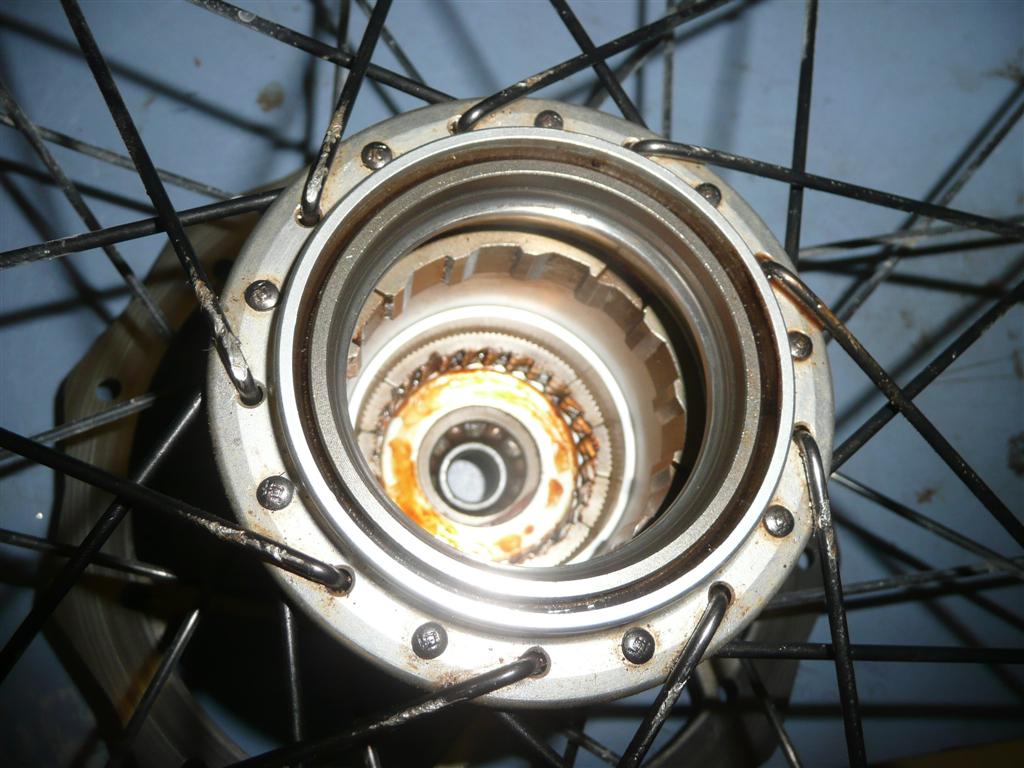
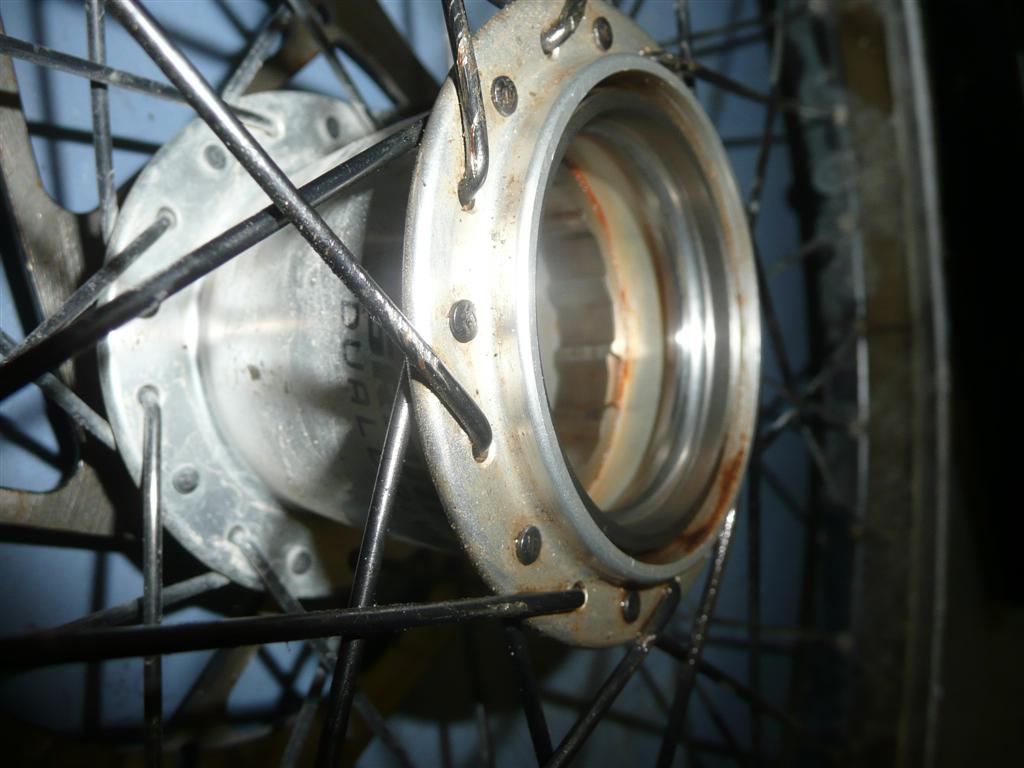
During our Fall 2010 bike tour, the rear hub developed an awful shrieking noise. I nursed it home, and found deformed ball bearings and pitted races. SRAM does not support the DualDrive in the USA with any spare parts, and none are available through normal distribution channels, so I imported some spares from dotbike.co.uk.
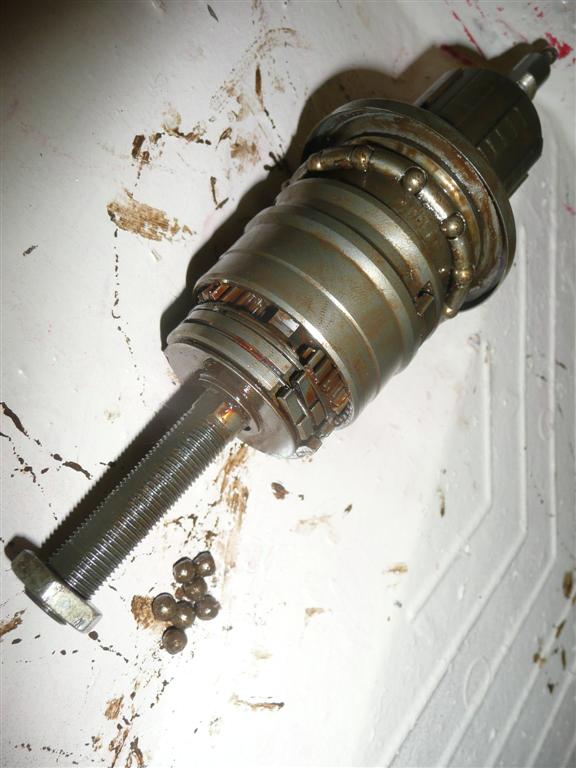
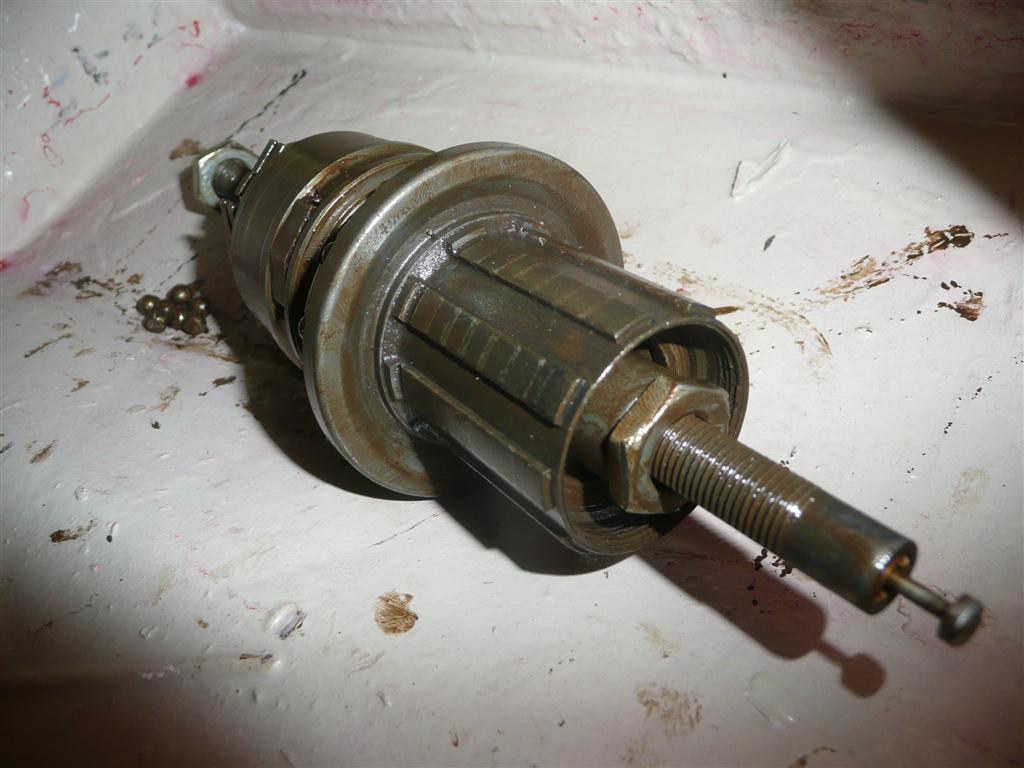
I also found that several of the long, thin pawl activator springs were damaged (and eventually broke) so I had to devise replacements since these are not available as spare parts, even from overseas. I initially tried 30 AWG wire, tightened and soldered into a loop. This worked well for a while but eventually the wire would lose its "spring" and the pawls would stop engaging.
My eventual solution was to cut individual coils out of an approximately 1.25" diameter by 1/32" dia music-wire spring, and trim and reshape them into "spring clips" that just fit into the pawl-retaining grooves in the hub. Took a little finessing to get right, but they've been working perfectly since summer 2011 at least.
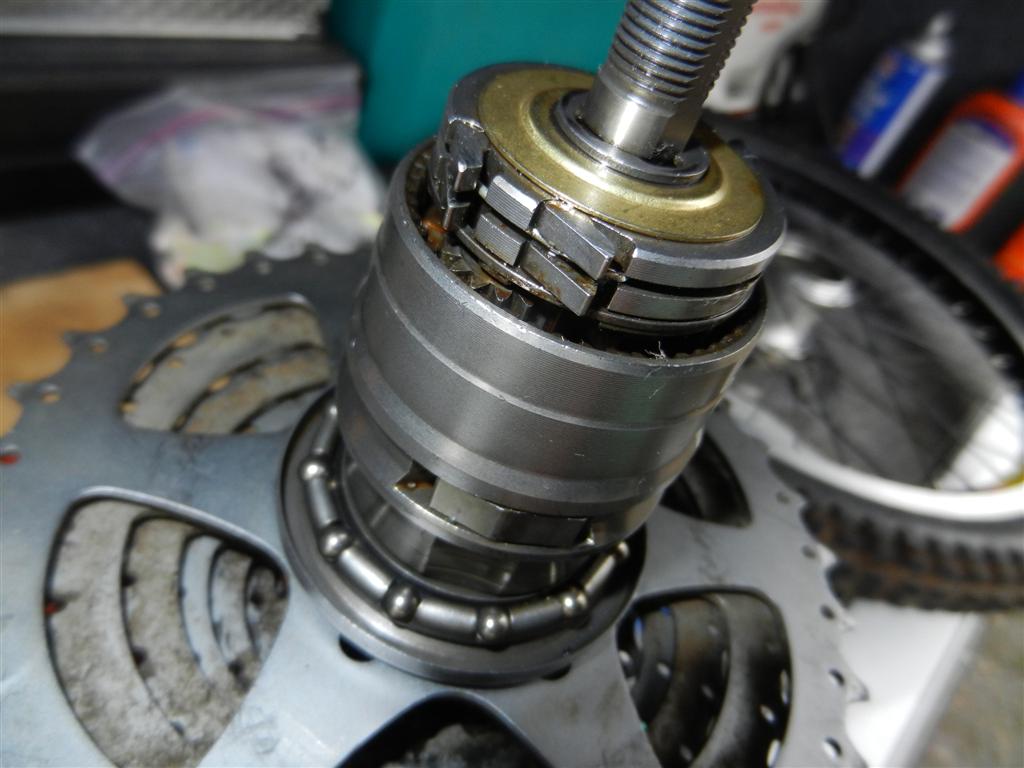
During a relentlessly wet winter season (2011/2012) in Portland and Seattle, the hub started getting a bit noisy so I opened up it up again and replaced a couple more bearings and cones (this time, using spare parts found the USA at Easy Street Recumbents -- thanks, fellow Austinites!), and re-packed all with the legendary Phil Wood Waterproof Grease. Nice and smooth and quiet again, and hopefully somewhat waterproof too.

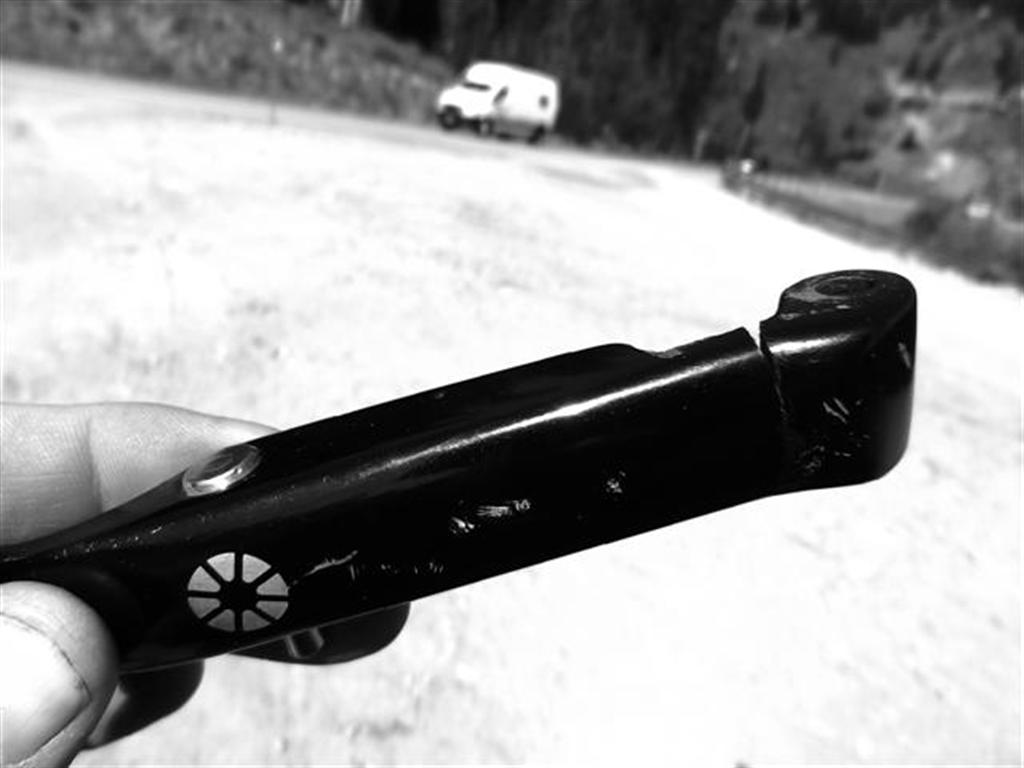
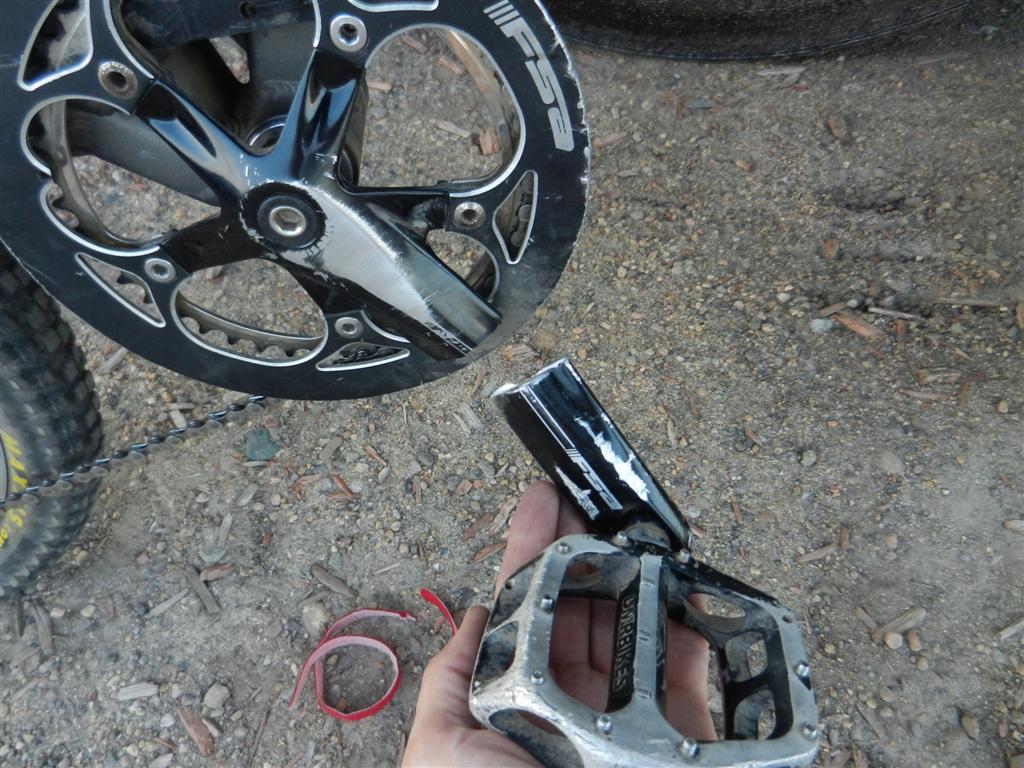
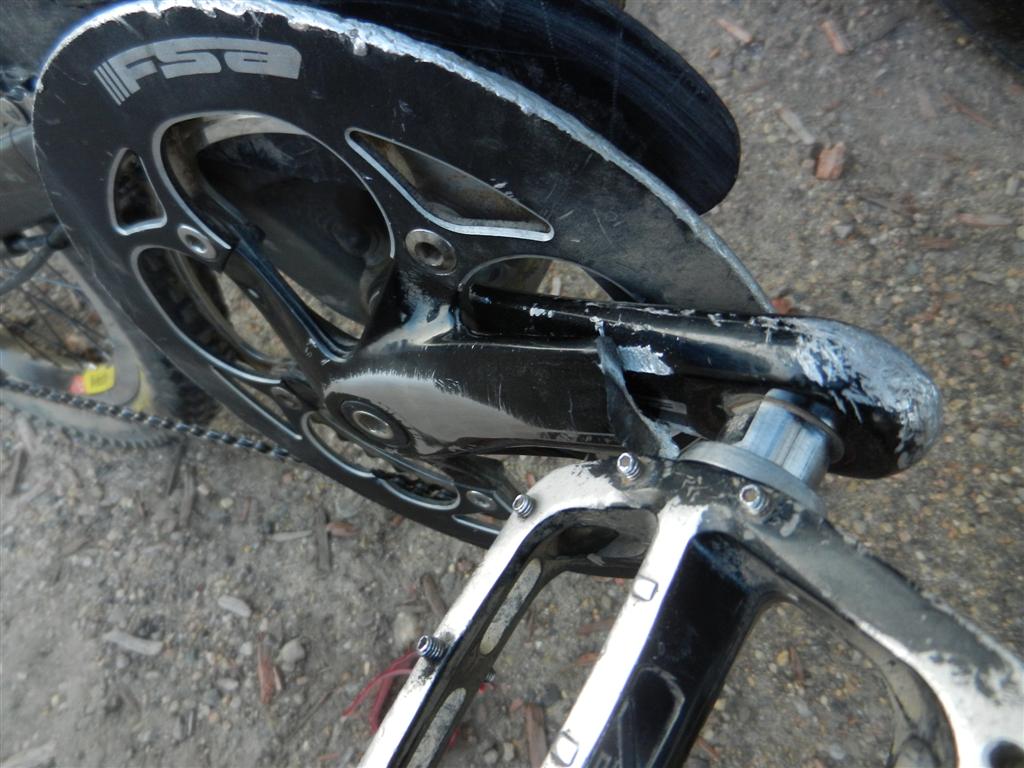
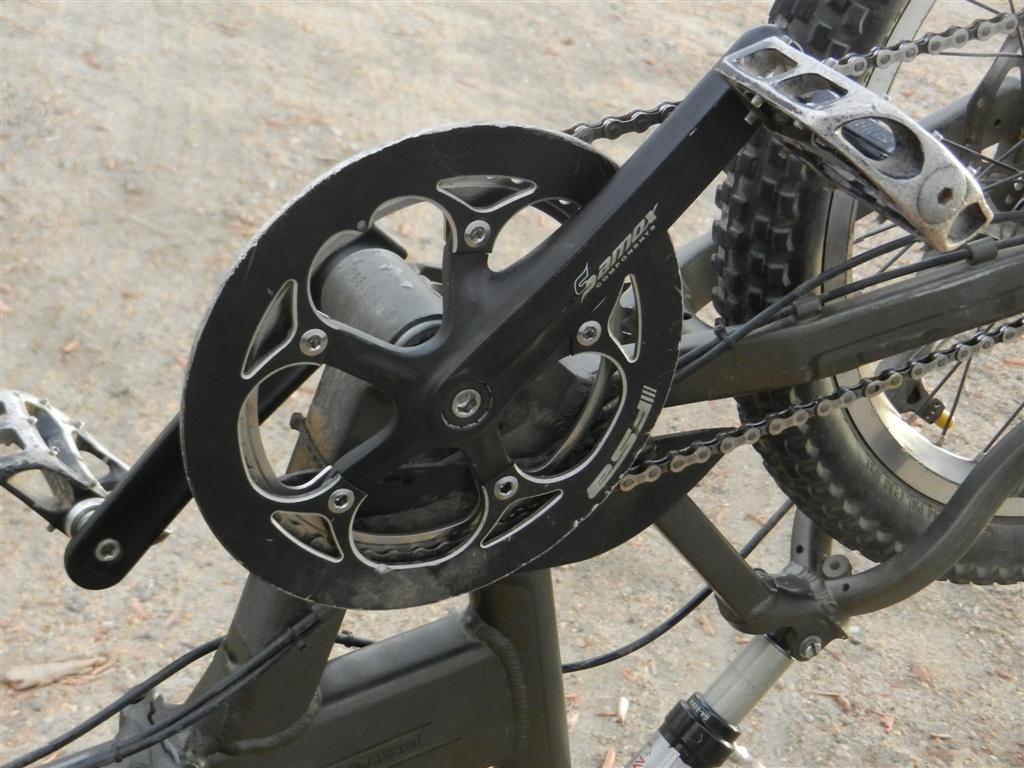
Out one afternoon in August 2012 to watch the US Pro Cycling Challenge race and have lunch with Debbie in Denver, I stepped on the right crank to get going after a stop and it snapped. Truly "J.R.A.", as they say! Well, true if you ignore the previous 8000 miles of slamming the thing into rocks and such... I don't see any signs of impact on those cranks, do you? ;)
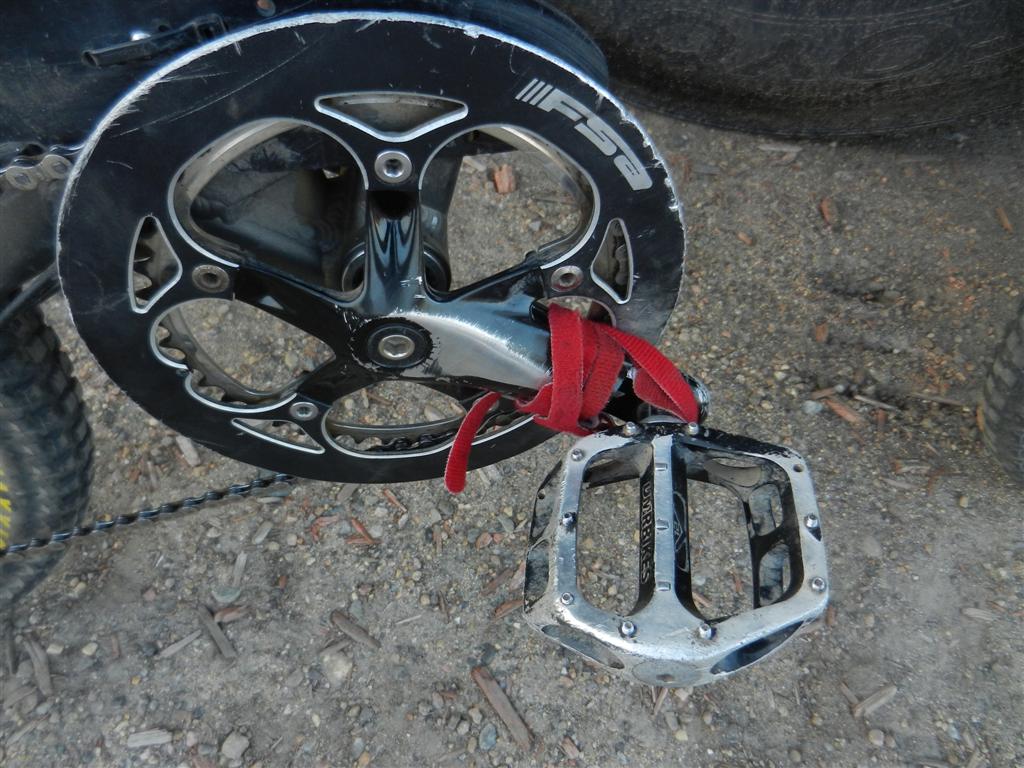
Anyway, heeding Debbie's excellent suggestion, I wedged the broken off part between the chainguard and the unbroken stub, and managed to lash it together with velcro in such a way that it was actually stable enough to ride on. Good enough to make it another 15 miles or so that afternoon, anyway.
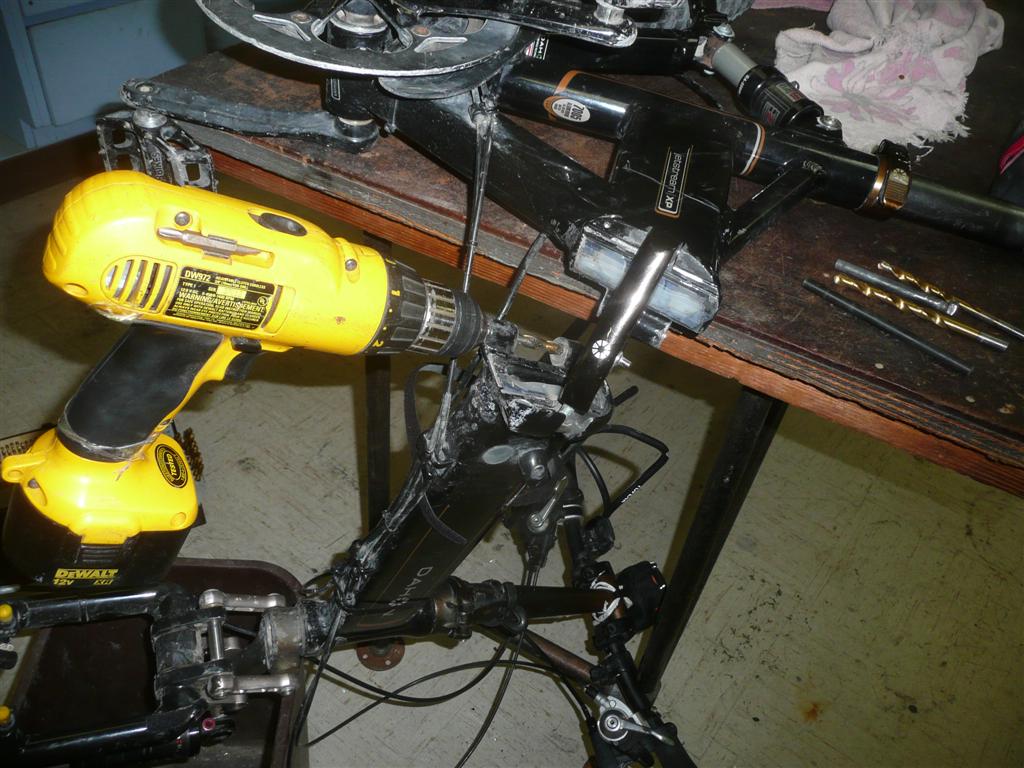
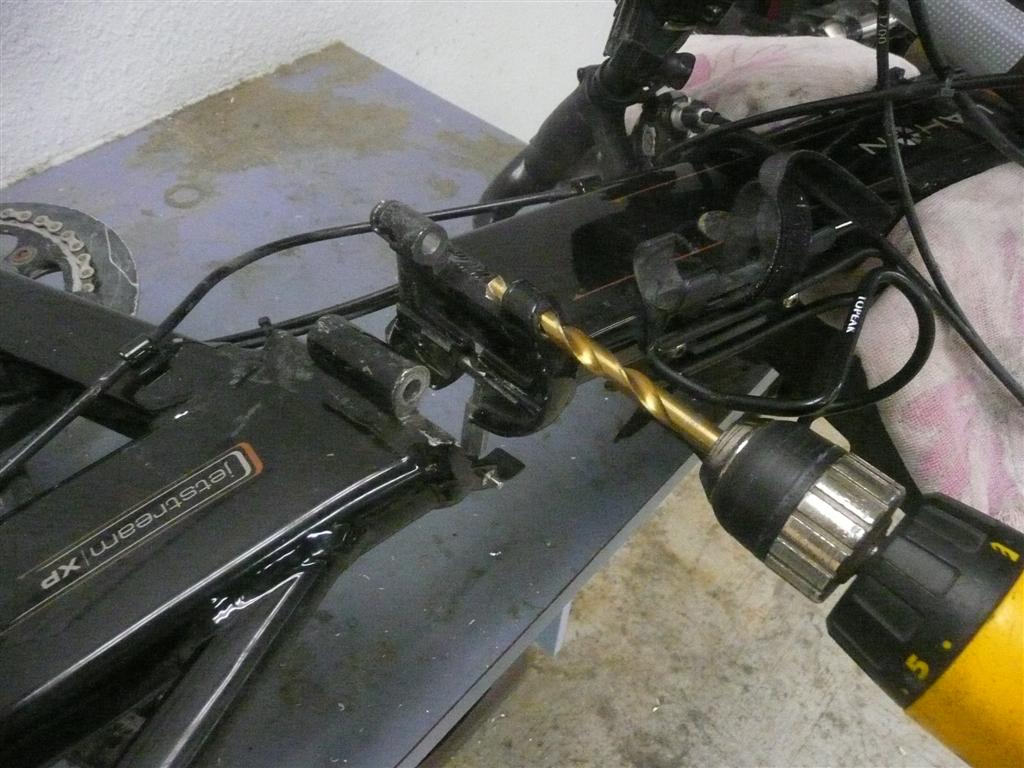
Upon getting home, I drilled and bolted the arm together to tide me over for another a week or two of at least putting around bikepaths while awaiting replacement parts. This solution was surprisingly effective for cruising around town on pavement, anyway. The large difference in lengths didn't feel nearly as strange as you would expect, and it was remarkably stiff due to the way the curvature of the arm interlocked with itself. Satisfying little improvised repair.

It turned out to be surprisingly hard (impossible) to purchase a direct replacement for the broken crank arm. The combination of Isis Drive with a 5-arm spider to hold two 130mm BCD rings is not readily found, even online. I could buy a complete crankset with new chainrings and new BB (for $200+), but I'd just have to throw away the chainrings and I didn't really need a new BB yet. So I turned to ebay and found one guy with a used crankset that matched the specs I needed, so I got that for $35. We'll see how it holds up, but I think it'll be fine.

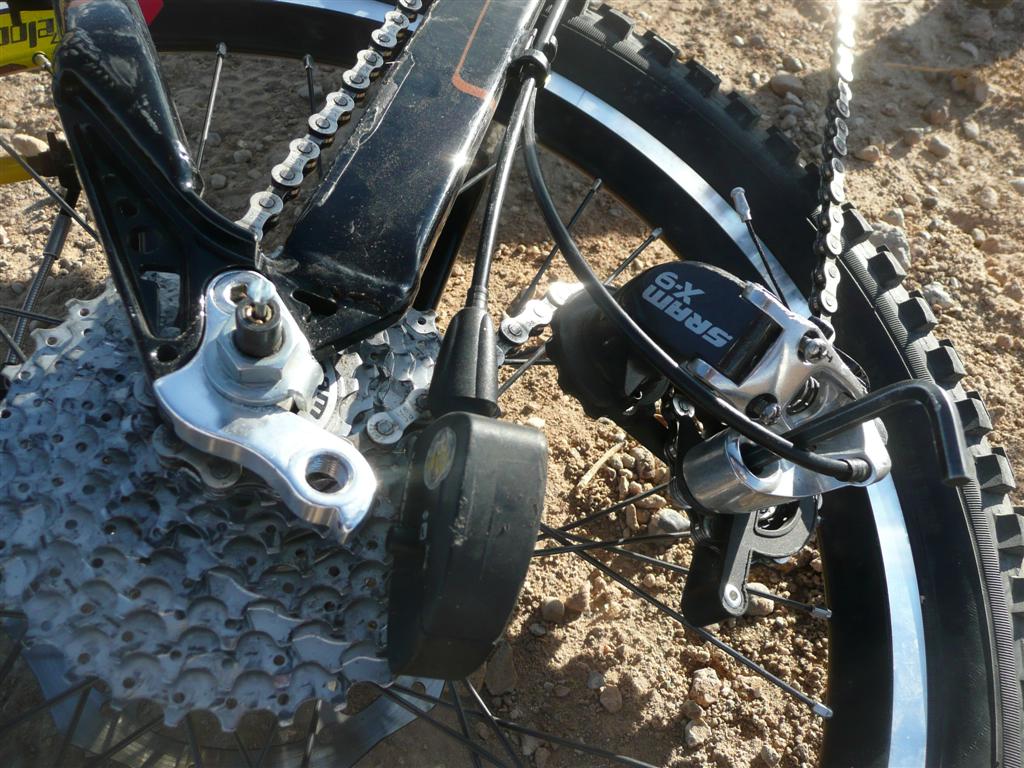
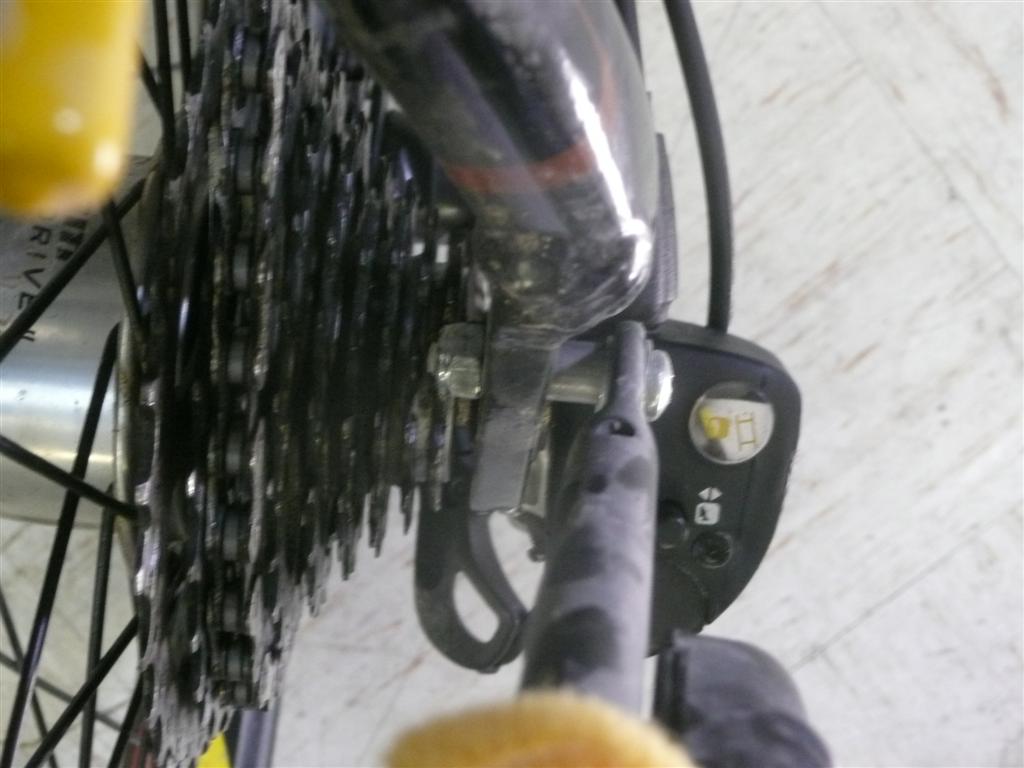
I've smashed the rear derailleur into plenty of rocks over the years. The theory is that the der is mounted to a soft hanger instead of directly to the frame, such that the cheap hanger will bend instead of the frame. So far, that's worked out as intended. Early on I bought a few spare derailleur hangers from everyone's favorite online Dahon dealer ThorUSA, and I always carry one in my pack. Easy to replace trailside, IF you have the part.
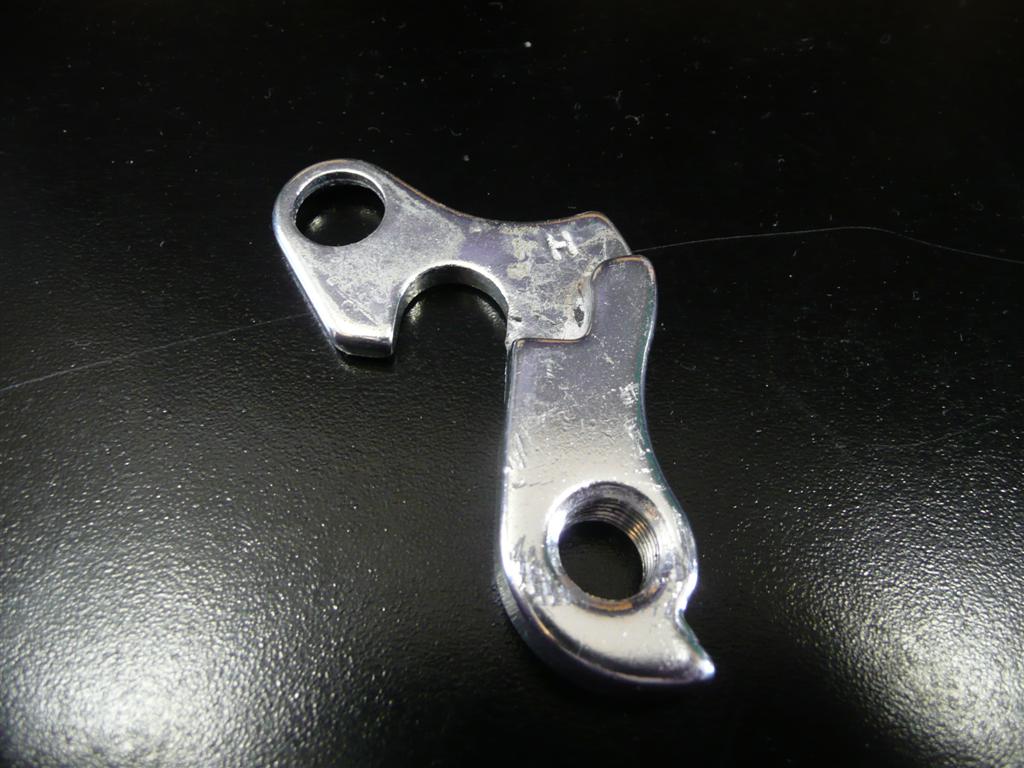
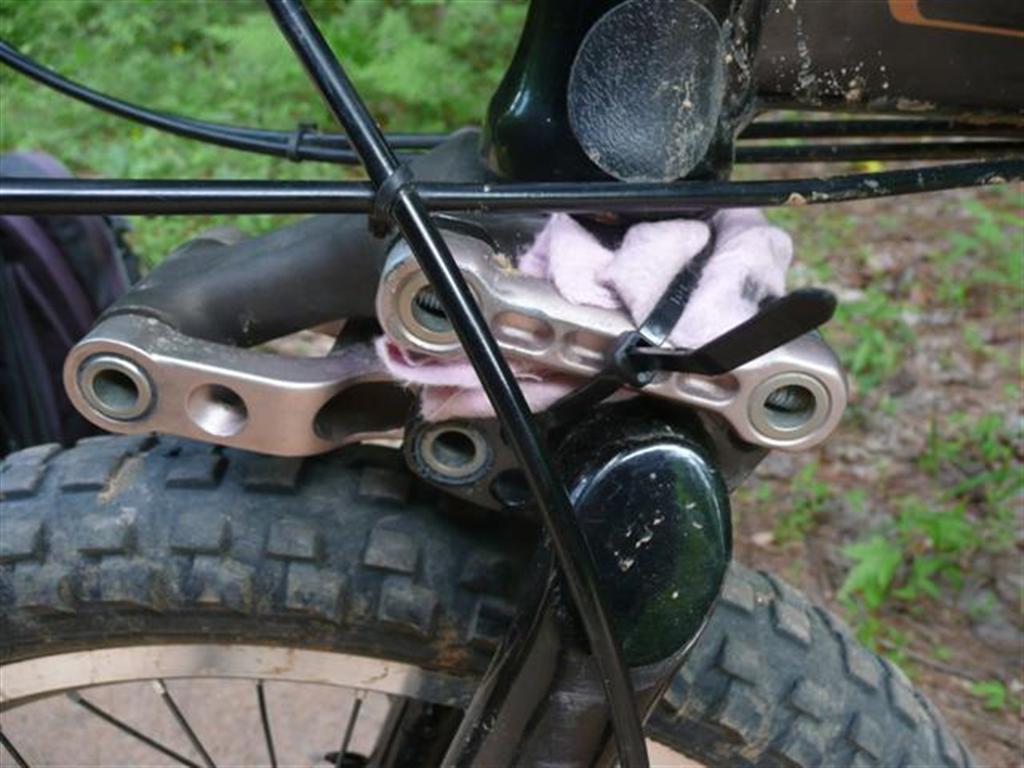
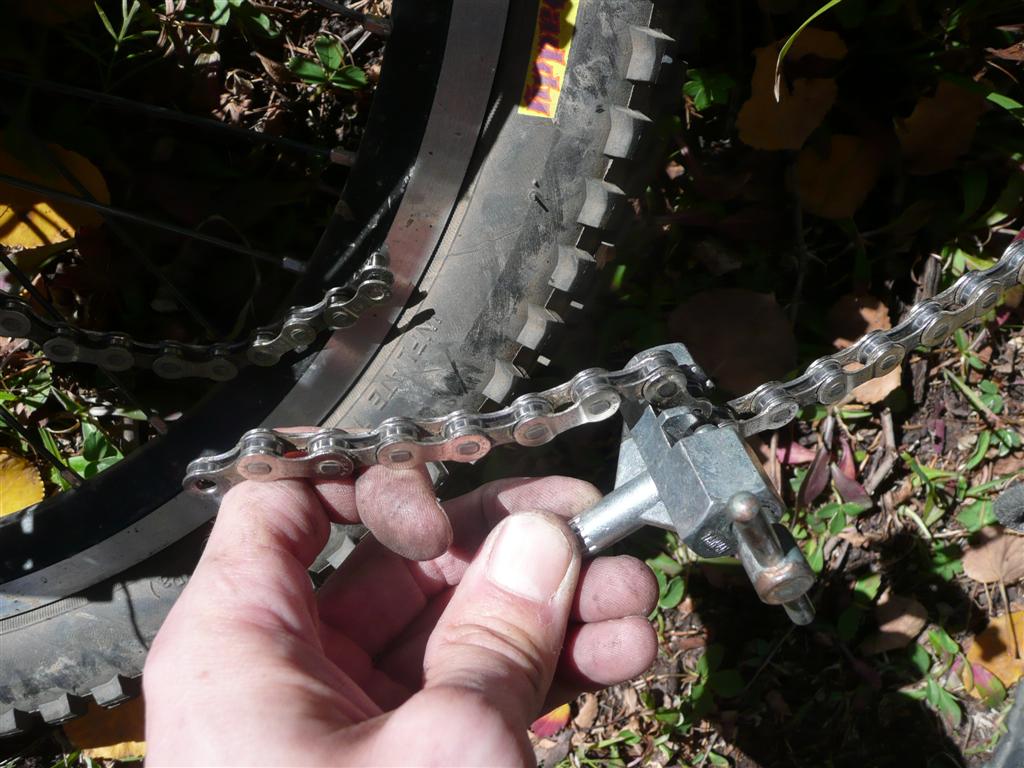
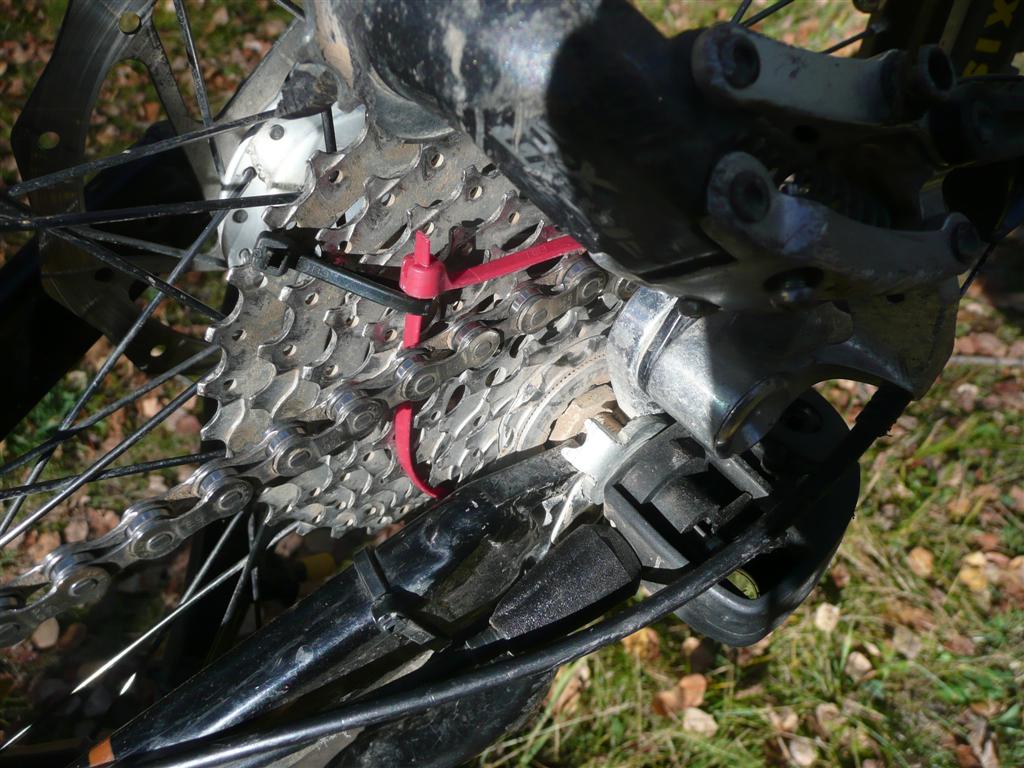
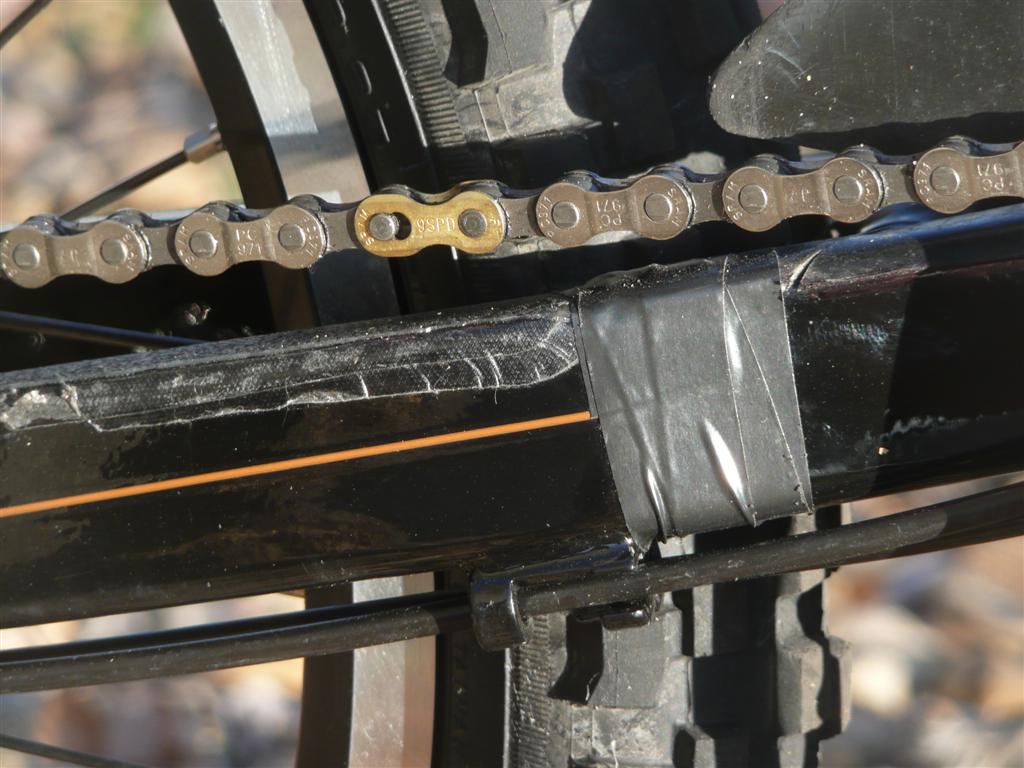
I've also snapped the derailleur itself clean in half after snagging a stick. When this happens, your best bet is to open the chain and re-rig things to make the bike into a singlespeed. I've had to do this twice over the years. It was tricky to make it work on the Dahon which has a relatively active rear-suspension so the chain length and tension normally changes a bit. This made it hard to find a combination of just the right length that would hold a gear, so I ended up adding a couple of tie-wraps to help keep it from trying to jump up. Ugly, noisy, and draggy, but it worked well enough to get me to the end of a long, awesome ride on the South Boundary Trail in New Mexico in Fall 2010...


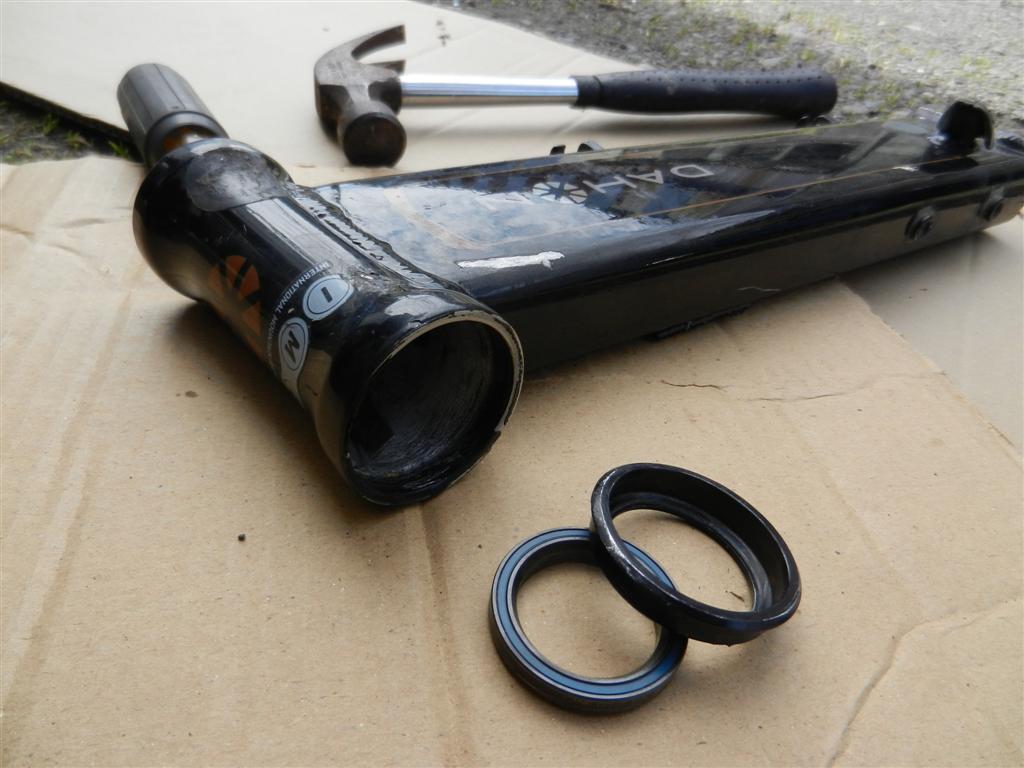
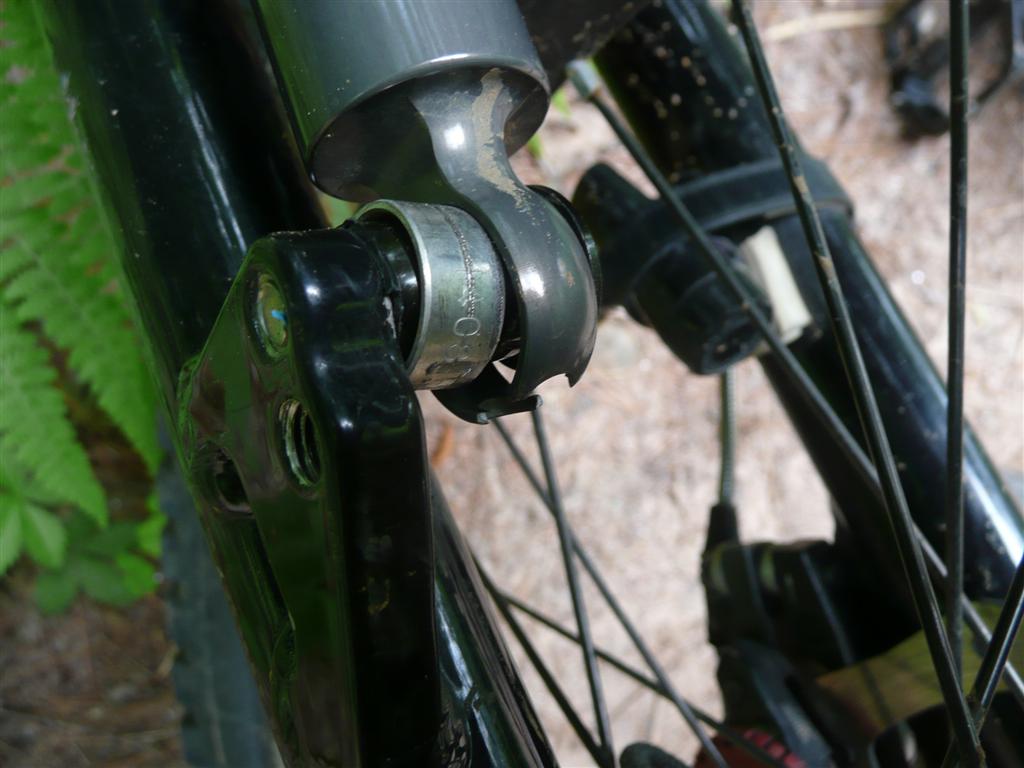
The steering started getting "grabby" in mid 2010, which turned out to be a cratered lower headset bearing. Easy fix once I figured out the bearing specs. Ordered the parts directly from Cane Creek, part number HSS20130, for about $10 each.
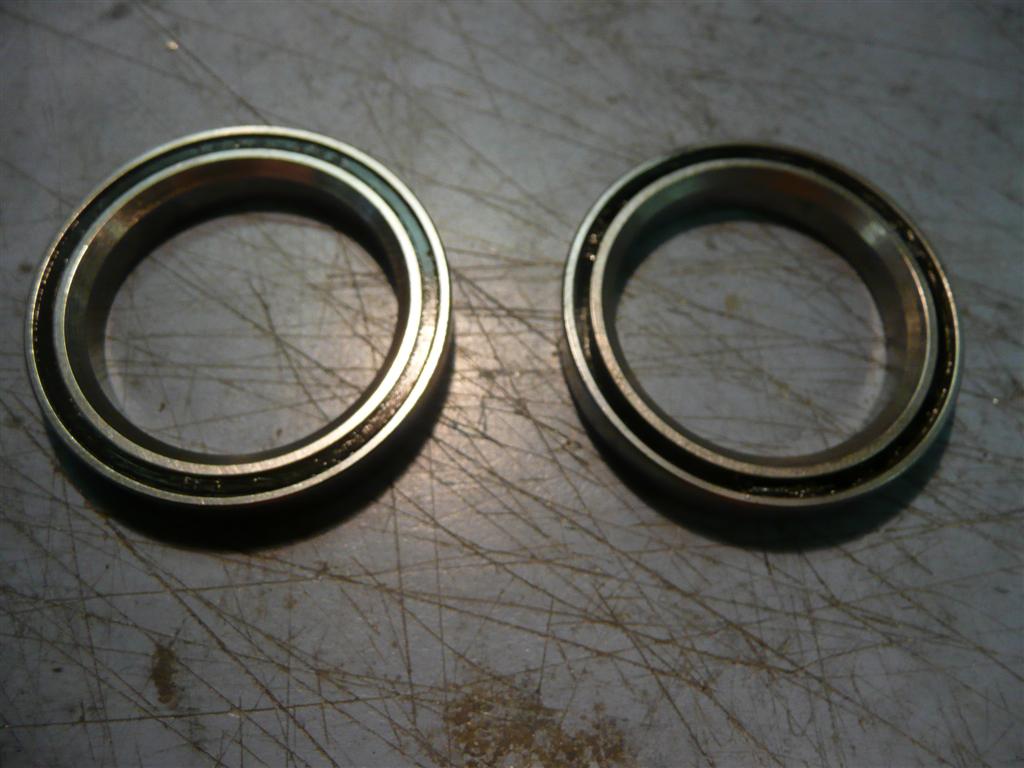
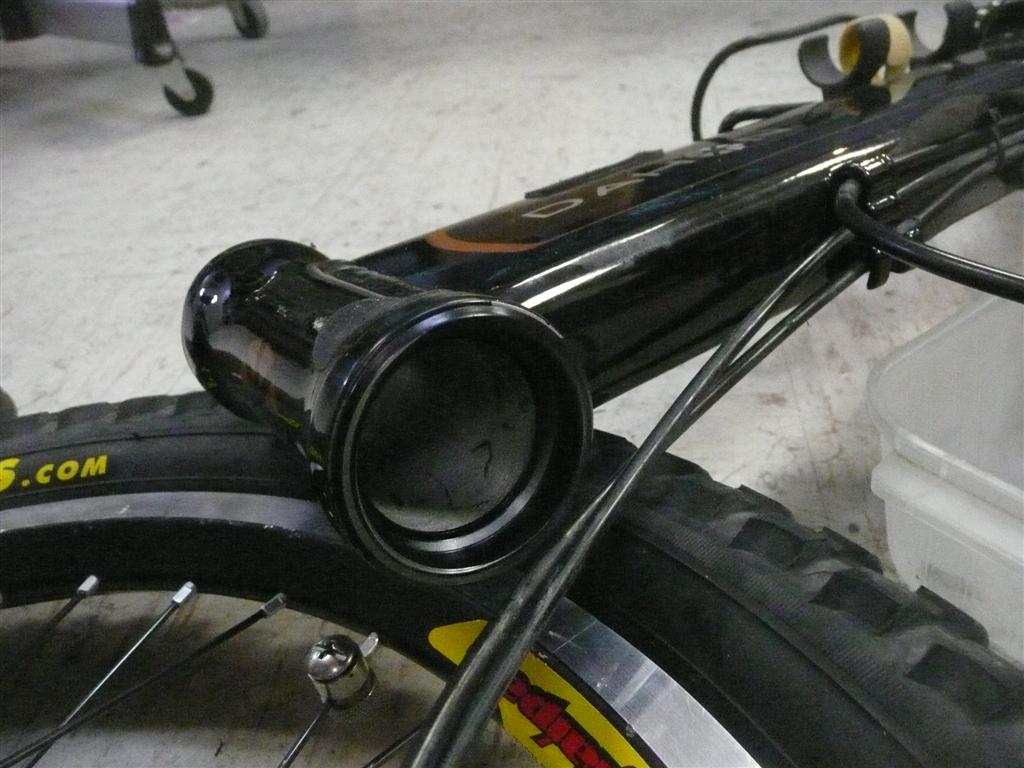
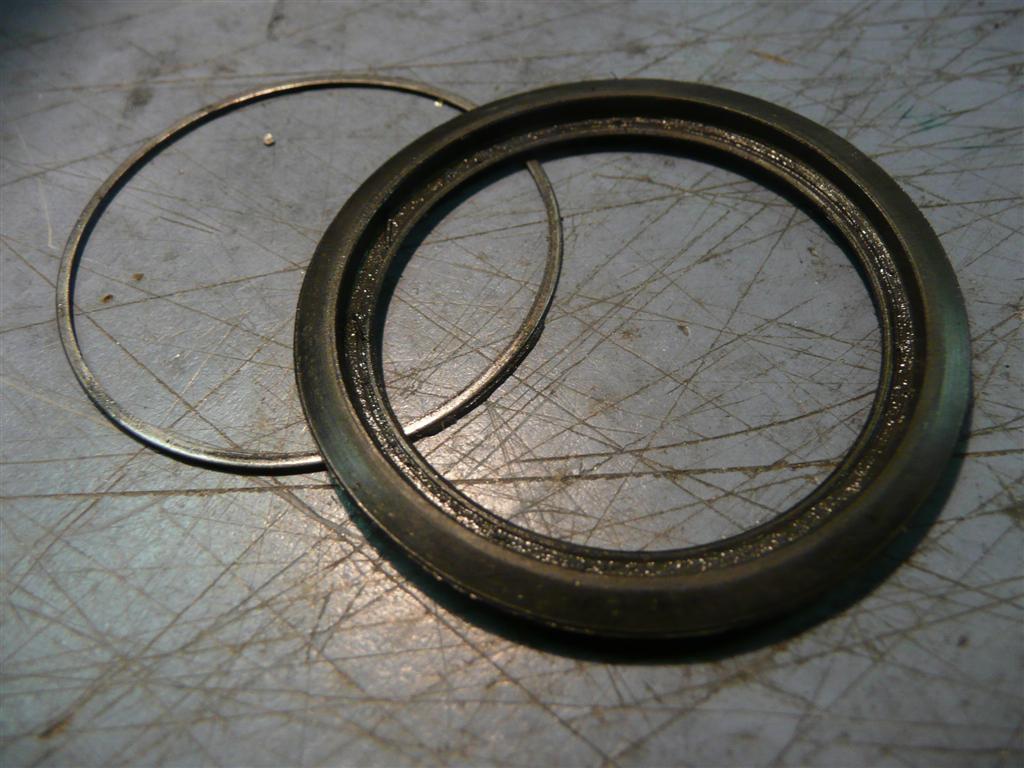
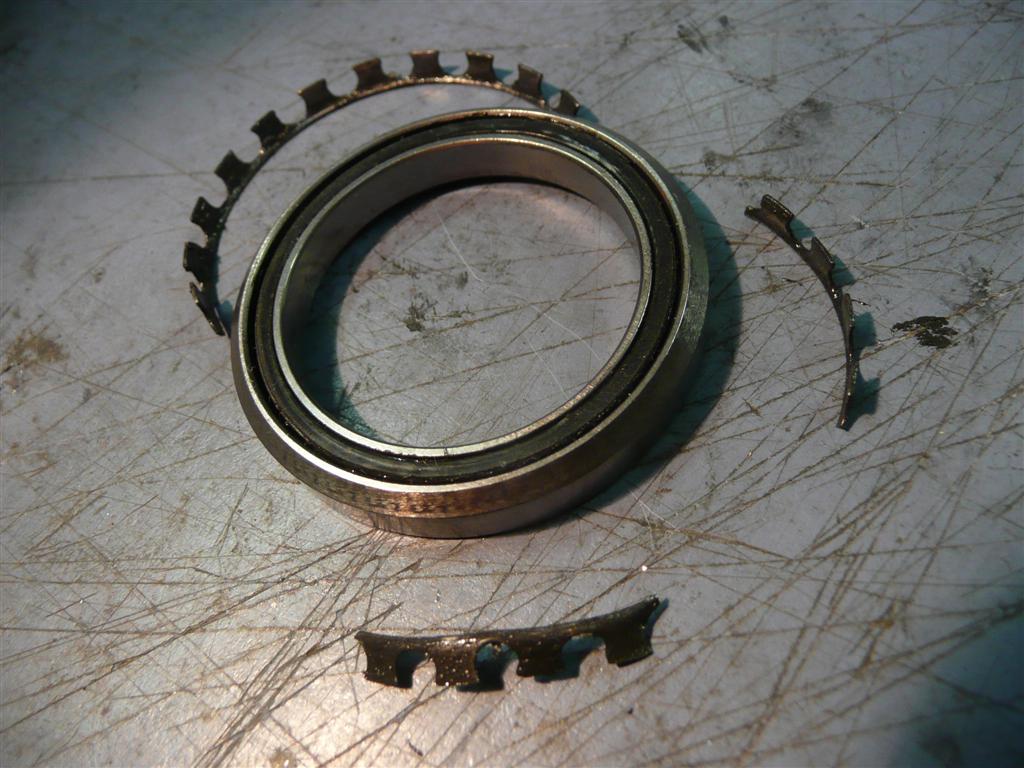
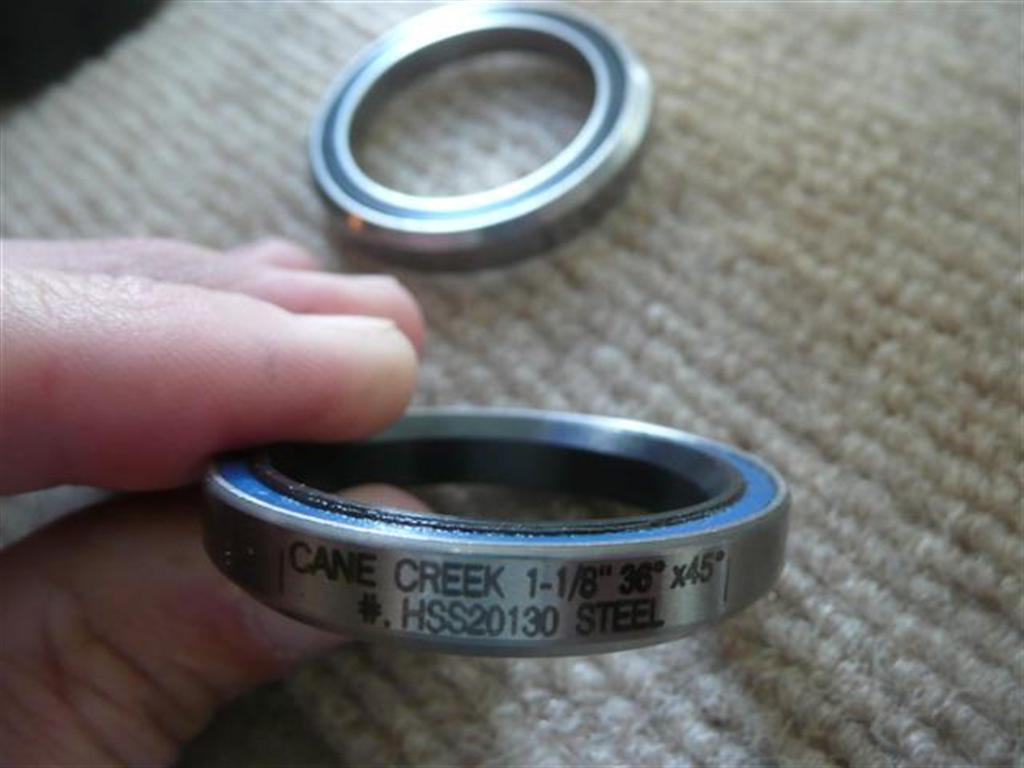
Outer races are pressed in to the frame.
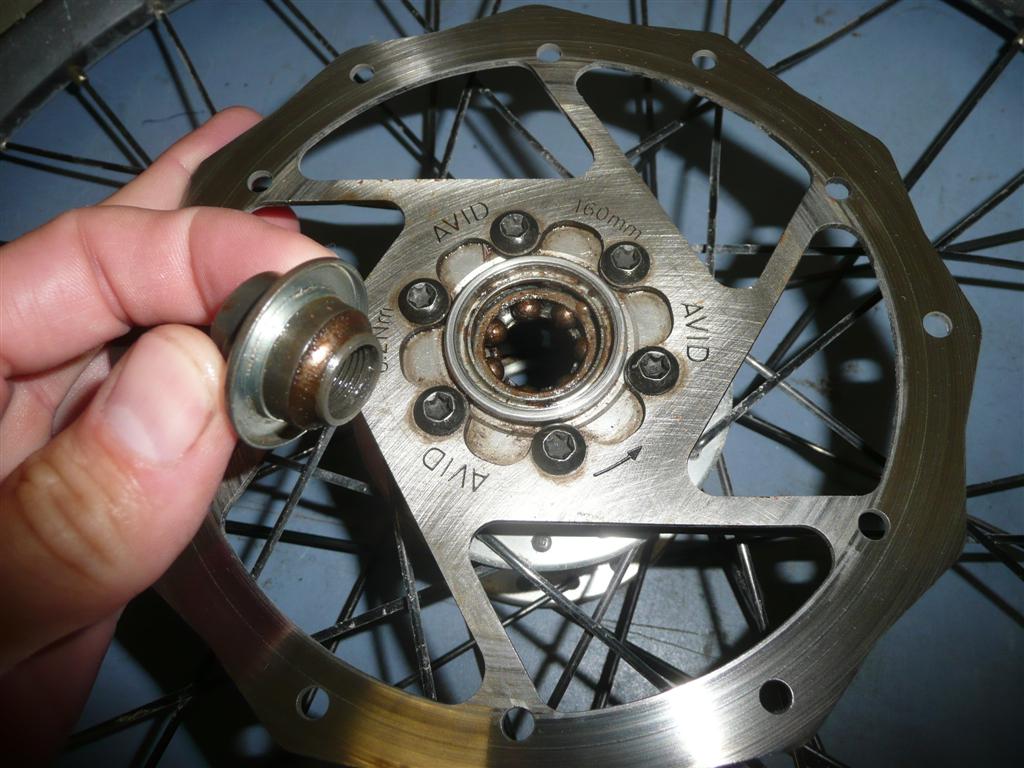
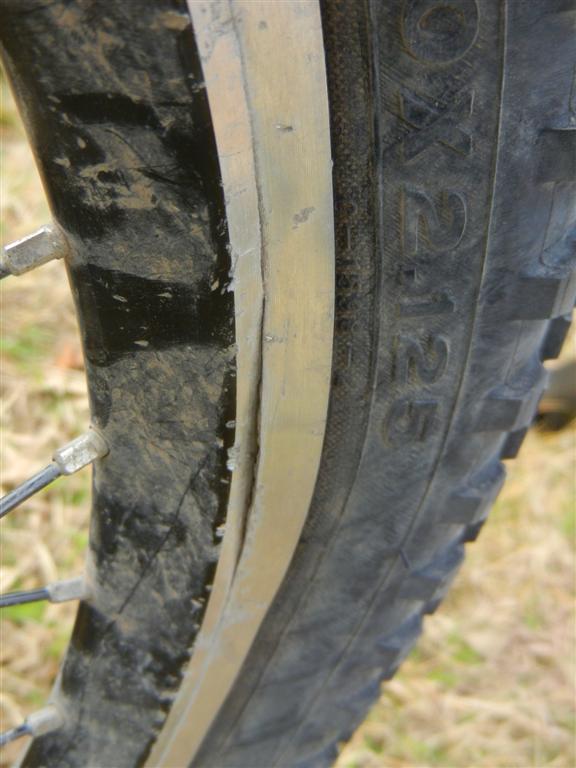
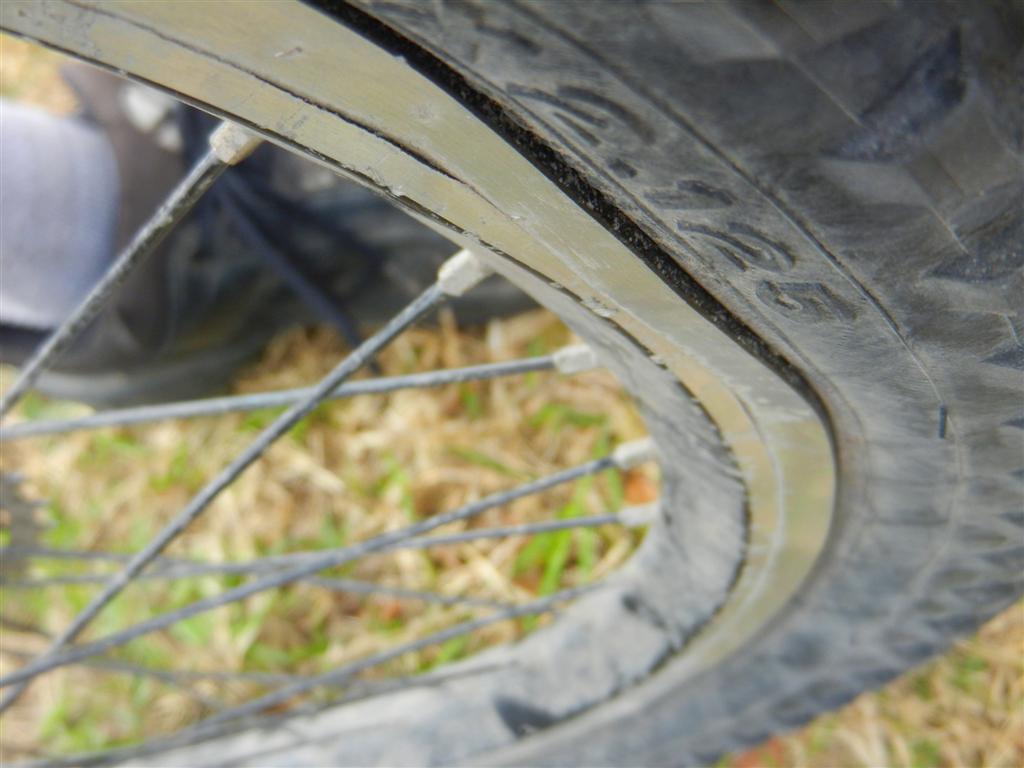
In early 2013, a crack appeared in the sidewall of my rear wheel. I run low pressure (< 30 psi) almost all the time, and with disc brakes instead of rim brakes there is essentially no rim wear. Apparently 10,000 miles of pounding over stuff had simply fatigued the rim and caused a crack where it joins the internal wall. Careful inspection revealed a hairline crack most of the way around. The front wheel, otherwise identical but more lightly loaded, shows no evidence of cracking yet.
As luck would have it, this wheel cracked mere days before the Chihuahuan Desert Bike Fest in Big Bend, so I needed to improvise something for that long weekend of riding. Temporary solution was to transplant the original Kinetix Pro wheel the Jetstream came with and reinstall a V-brake since that hub didn't include a disc mount. The result was very weird-looking, with both disc caliper and V-brake installed at once, but it got me through that event:
I emailed the wheel maker Velocity USA and they were extremely helpful, shipping me a replacement rim right away under warranty. I did a "side by side" wheel rebuild and transferred all the spokes and nipples one by one to the new rim, keeping everything aligned just as it was, since the replacement rim was identical to the original and those components were still in good shape. My camera was on the fritz during that process so I got no pics of the action, but I found the process of truing that wheel from scratch to be quite a fun learning experience, as it was my first full wheel rebuild. Next time should go a lot faster as I learned a lot of tricks doing this one!
Other maintenance / replacement parts
Bottom brackets (2 changes: FSA Platinum, and VP MB603; ISIS Drive, 68mm x 118mm, Park BBT-22 Tool; note: not quite same chainline as stock)
Brake pads (3 routine changes)
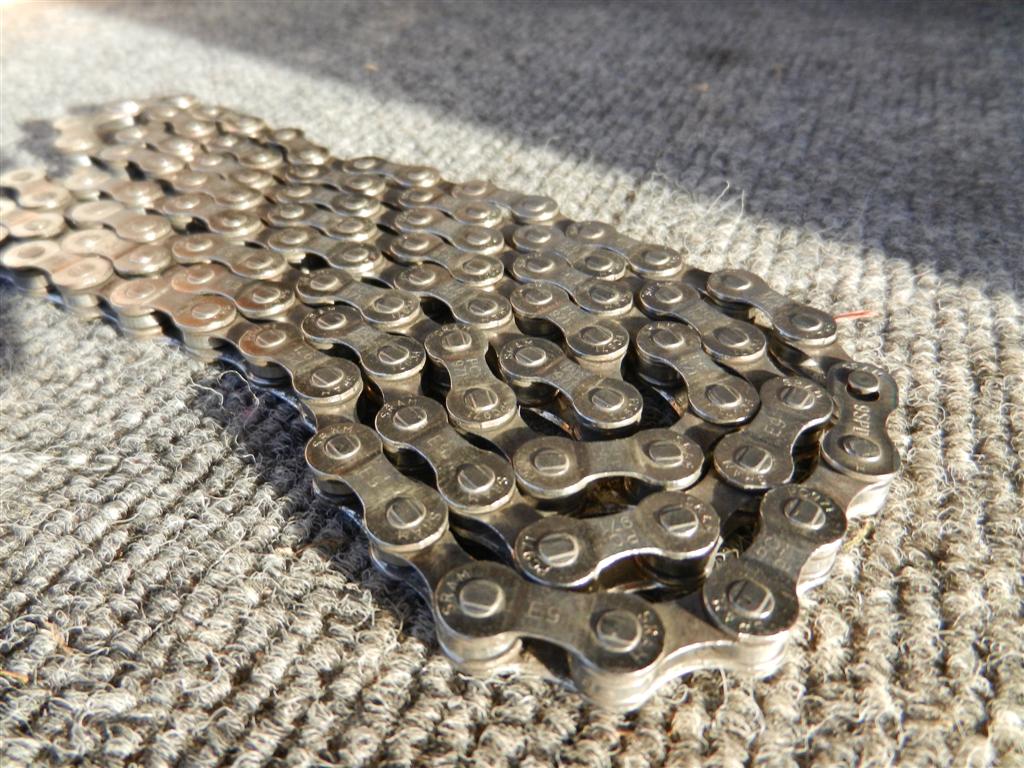
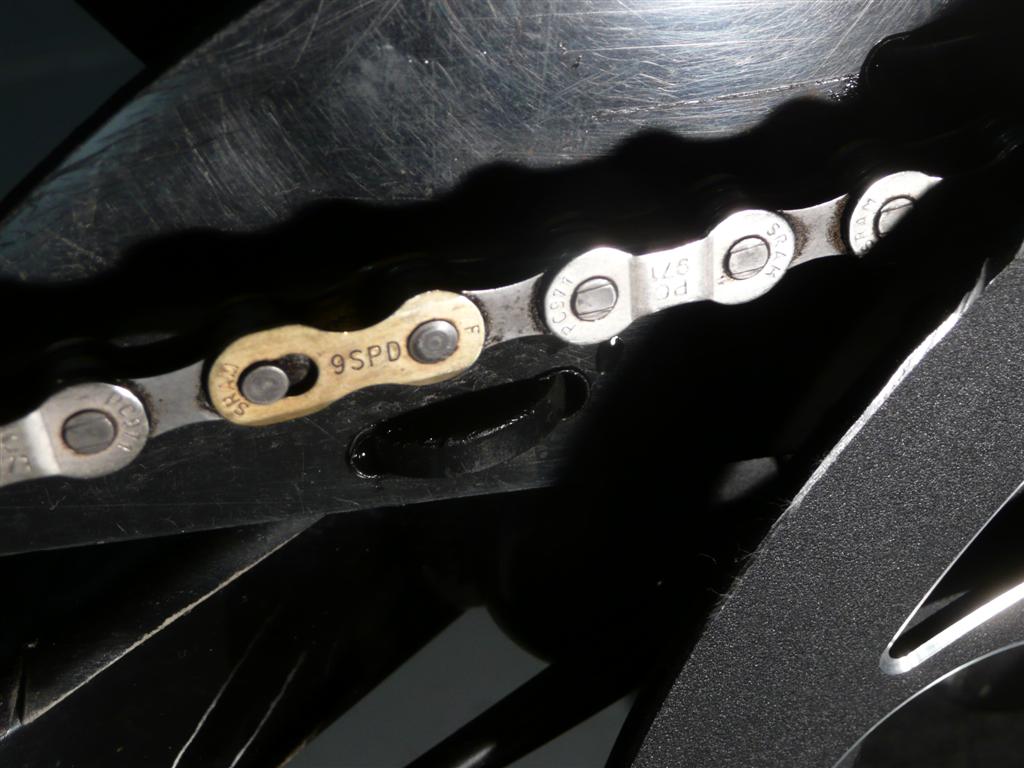
Replacement SRAM 970 chain with quick links (2 routine changes)
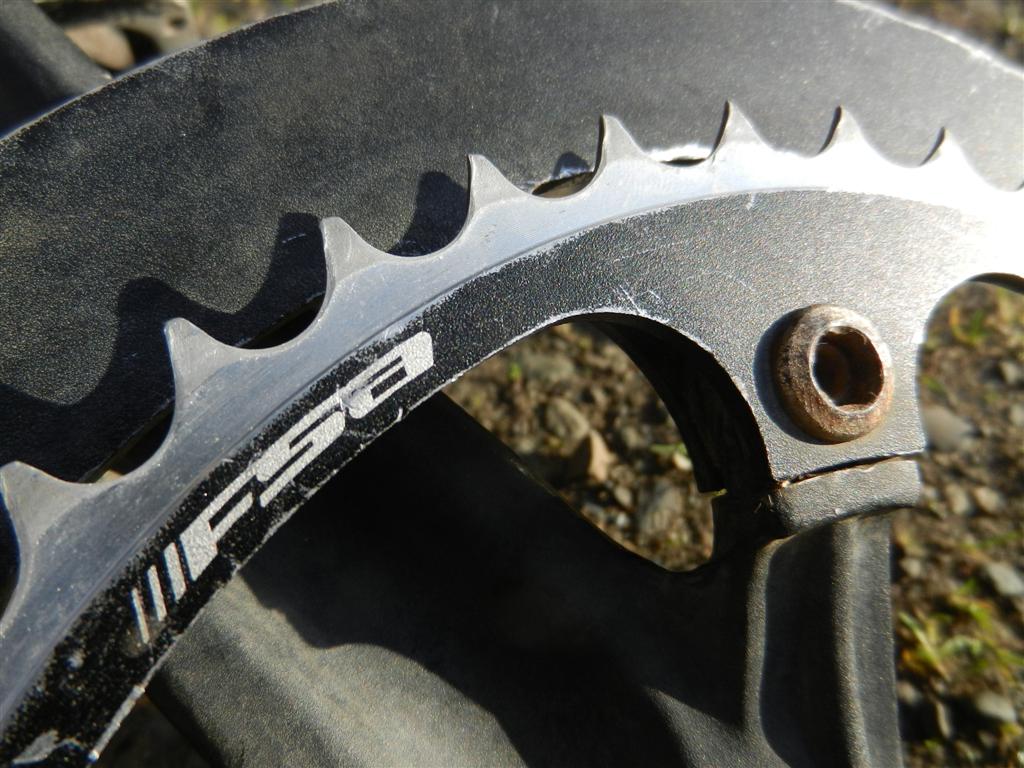
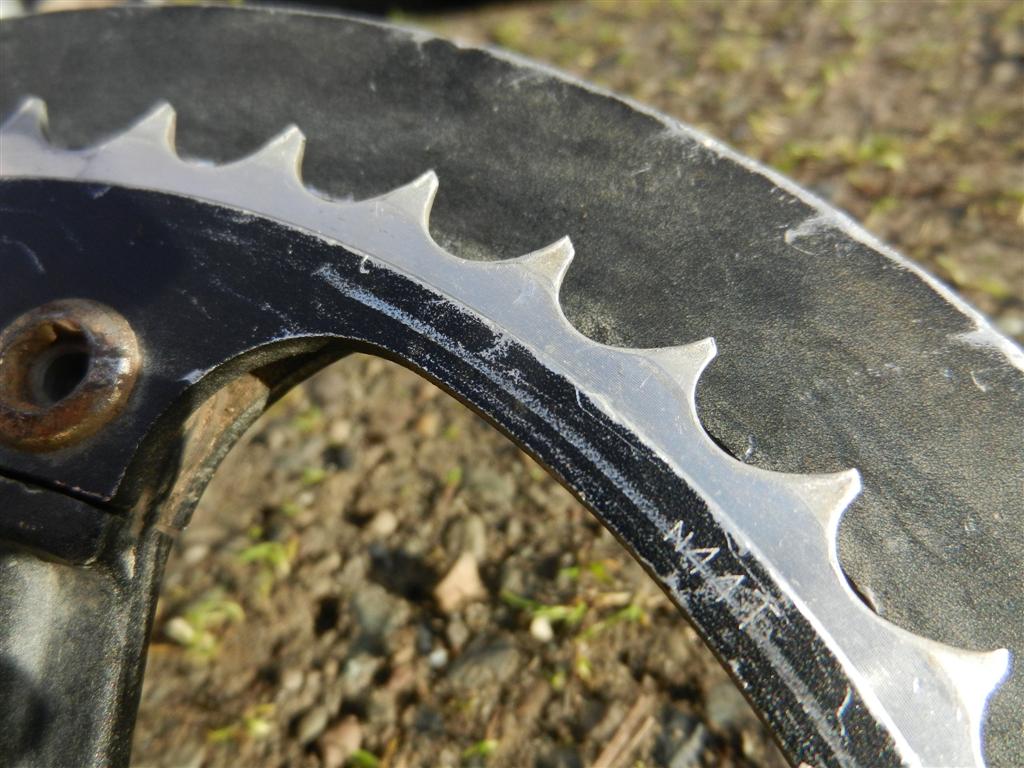
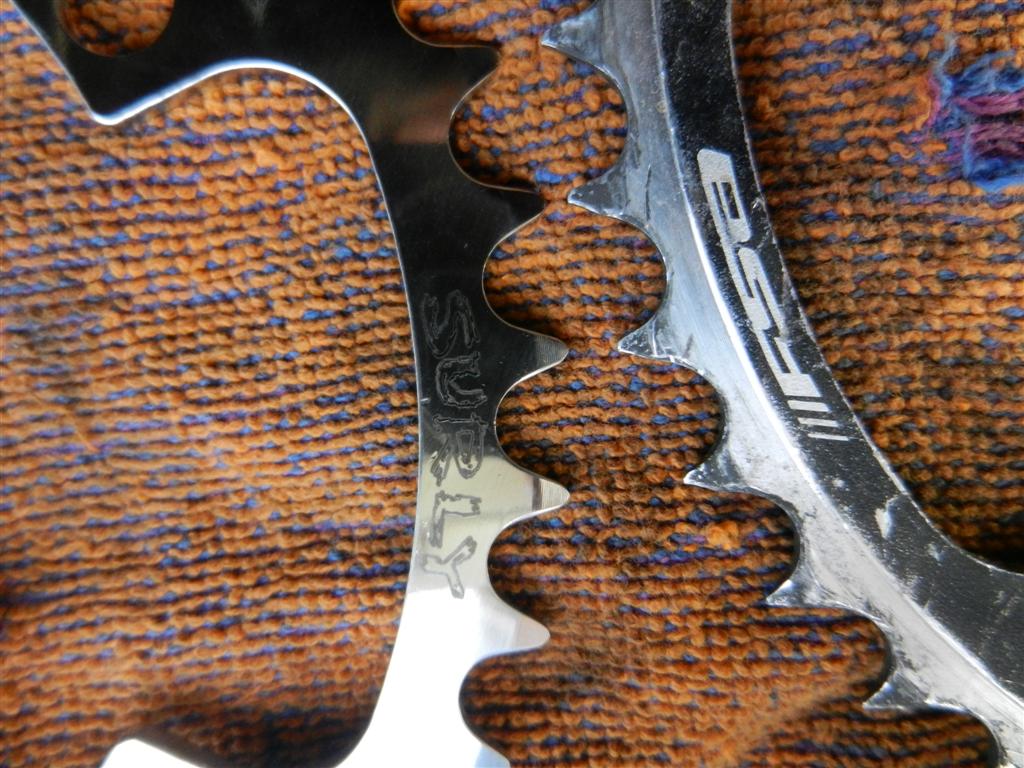
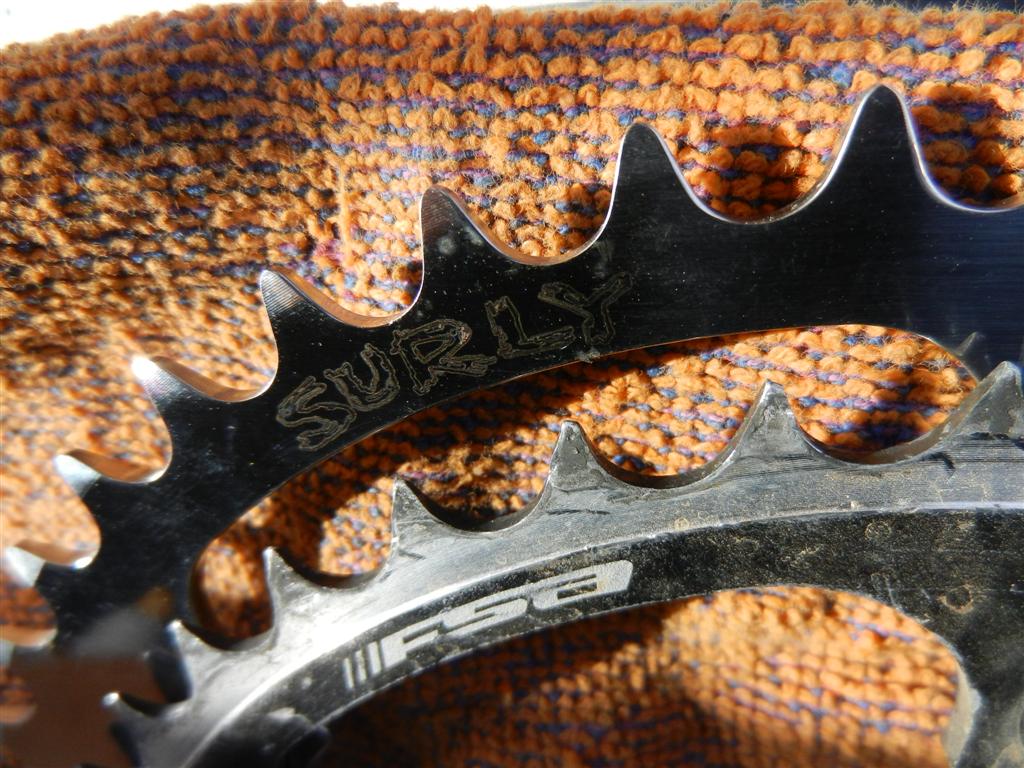
Replacement chainring (44T x 130mm; routine replacement of worn aluminum FSA with stainless Surly)
Replacement cassette (SRAM PG-980 9-speed 11-34, 1 routine change)
Replacement Maxxis tires (3 routine sets)
Rear shifter cables and housing (1 routine change)
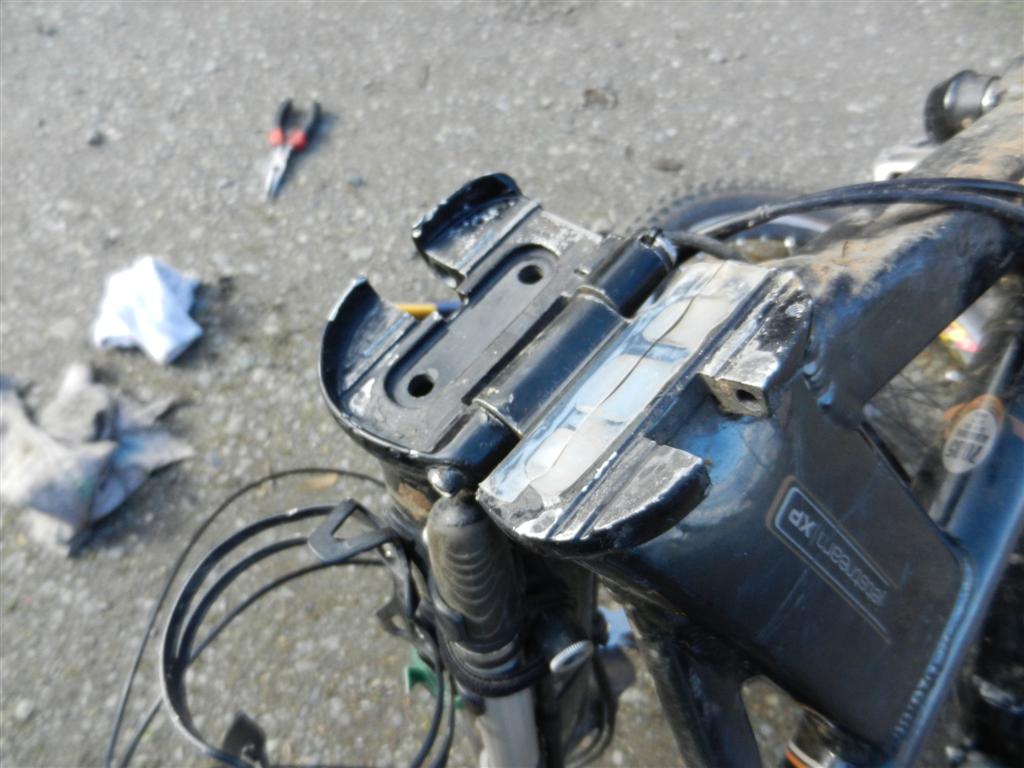
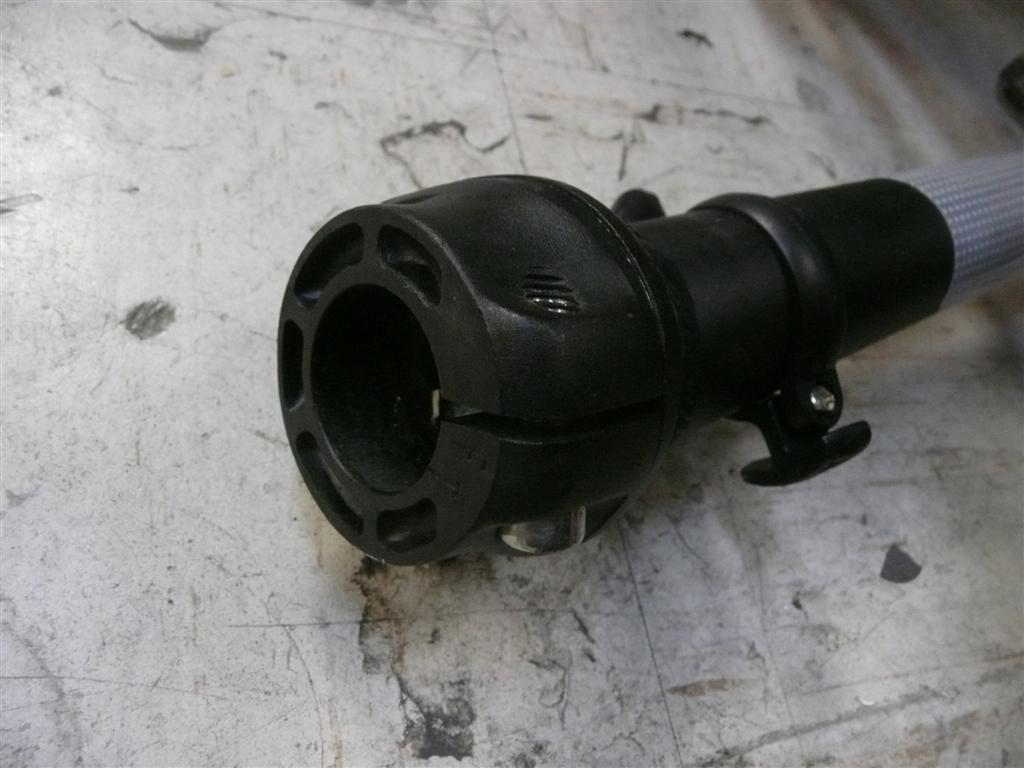
DualDrive clickbox (2 broken off covers)
Replacement Avid brake lever (1 broken tip in a crash)
Replacement rear SRAM X9 derailleur (1 broken by a stick)
Replacement SRAM X9 shifter (1 broken lever in a crash)
Replacement Topeak Bike computer sensor (broke original mount in a crash)
Several bottle cages (normal tubular types kept breaking at the welds; Specialized "Zee Cage" with no welds seems to be the trick)
The 2008 Dahon Jetstream XP was not sold in the USA, so I ordered mine from a German dealer. Below, it's fresh off the boat in September 2008 after many months of waiting and anticipation...
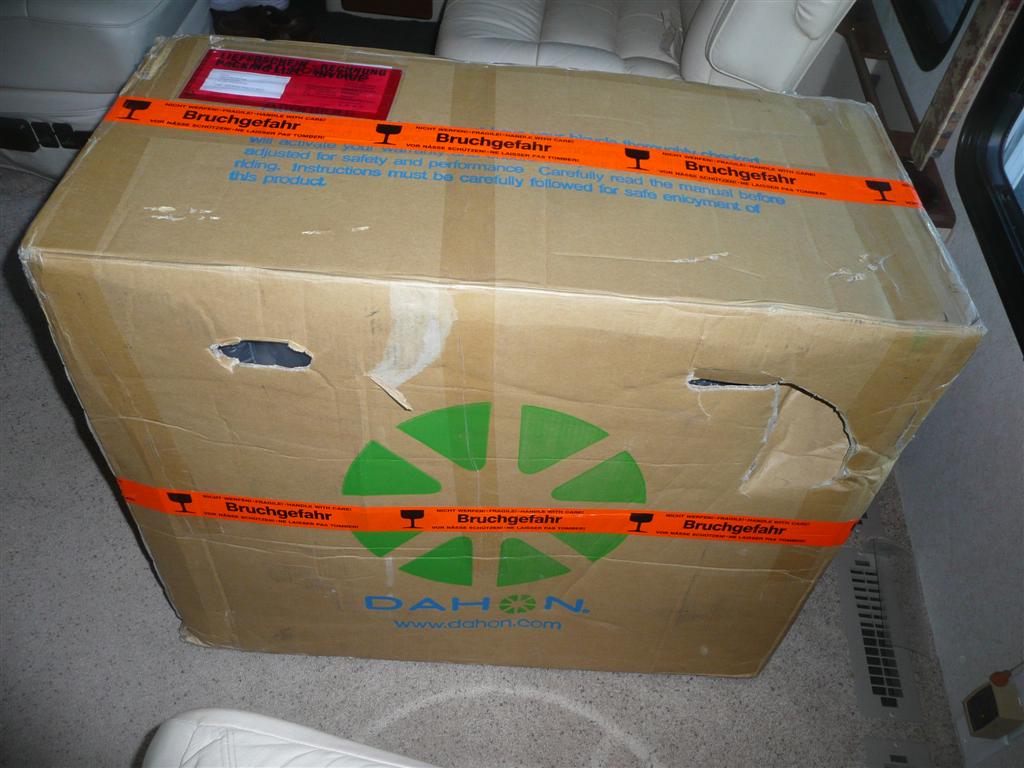


First ride was a short jaunt on pavement in stock trim. Recorded a top speed of 35 mph and felt stable as a rock. A promising start!

Had to try folding it up and carrying it inside the official El Bolso bag supplied at least once. Rather awkward and heavy to carry like this, I thought. Of course this is not really meant as a commuter model...
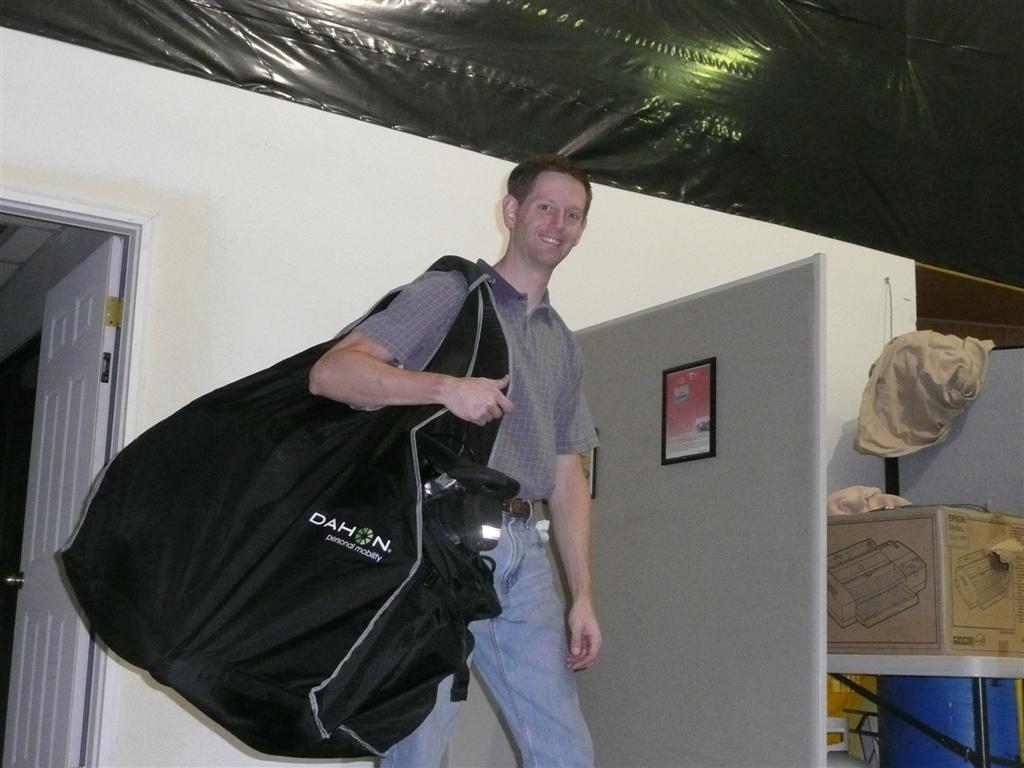
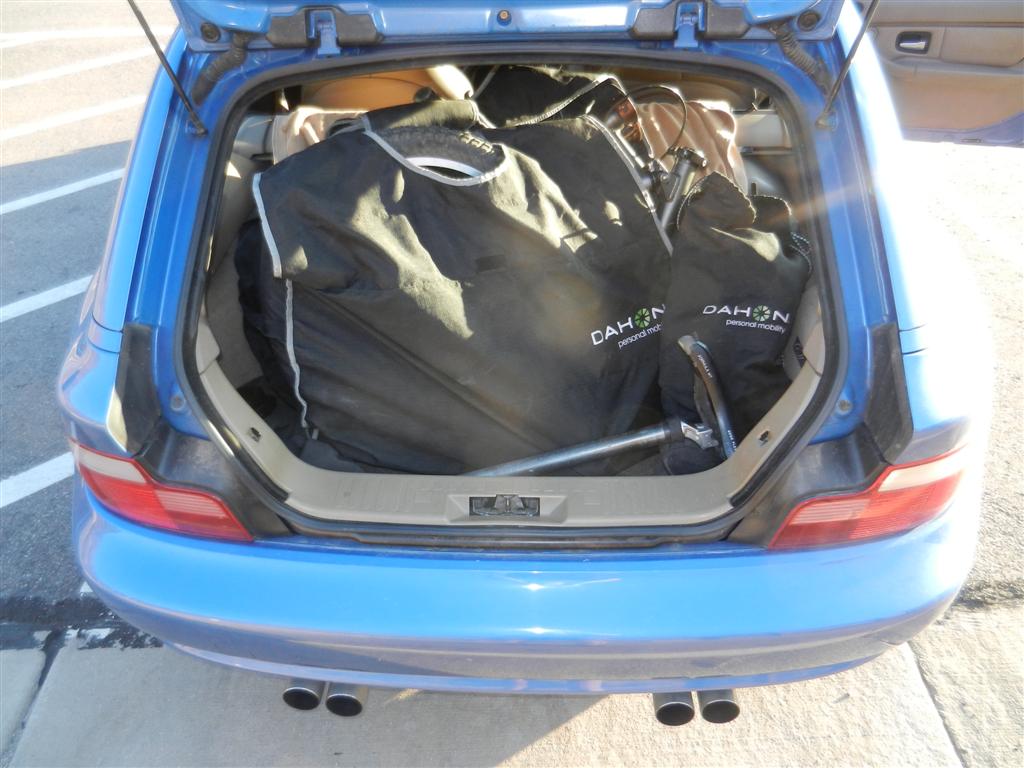
Almost 4 years later, during a long, wet, muddy winter in Seattle, it finally dawned on me that I should dig El Bolso out of storage and use it when carrying the bike home in my car after mountain-biking. Of course this worked fantastically for keeping the invariably wet, muddy bike from further ruining my hatchback interior. I really wish I had thought to do this years earlier!
INITIAL UPGRADES FOR OFF-ROAD USE
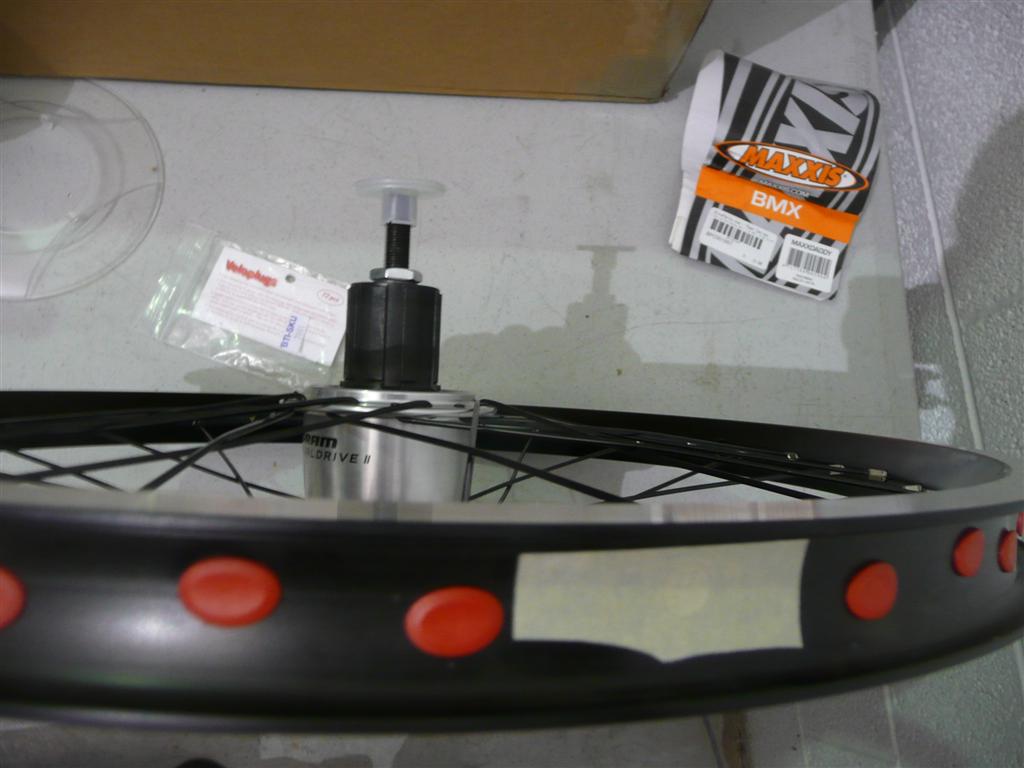
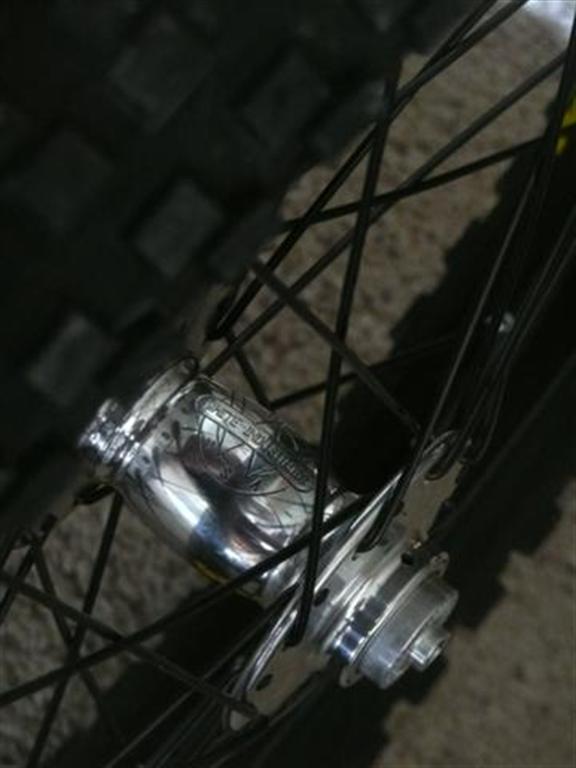
Custom Wheelset built by ProWheelBuilder.com
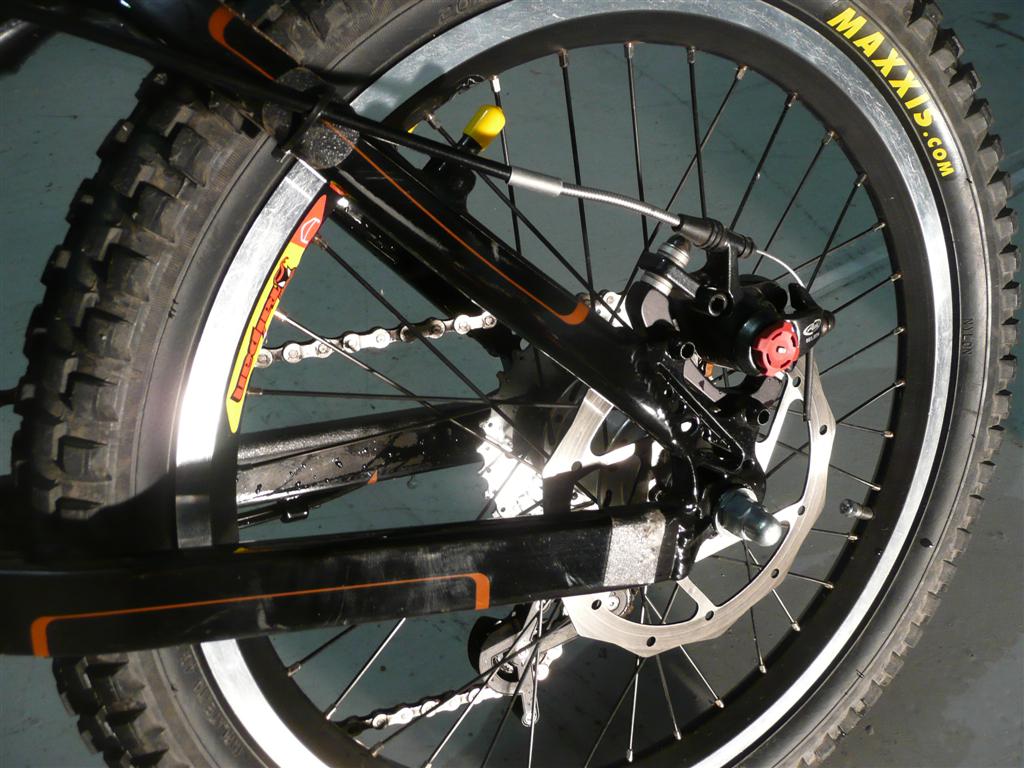
Velocity Taipan 36 hole rims, 14 gauge spokes , White Industries M16 front hub, SRAM DualDrive Disk rear hub, Veloplugs. My new wheel/tire assemblies weigh almost twice the originals--especially the cool 14-spoke Kinetix Pro (quasi-Rolf) front supplied by Dahon--but are now hella stout, can handle wide tires, and they accept disc brakes.
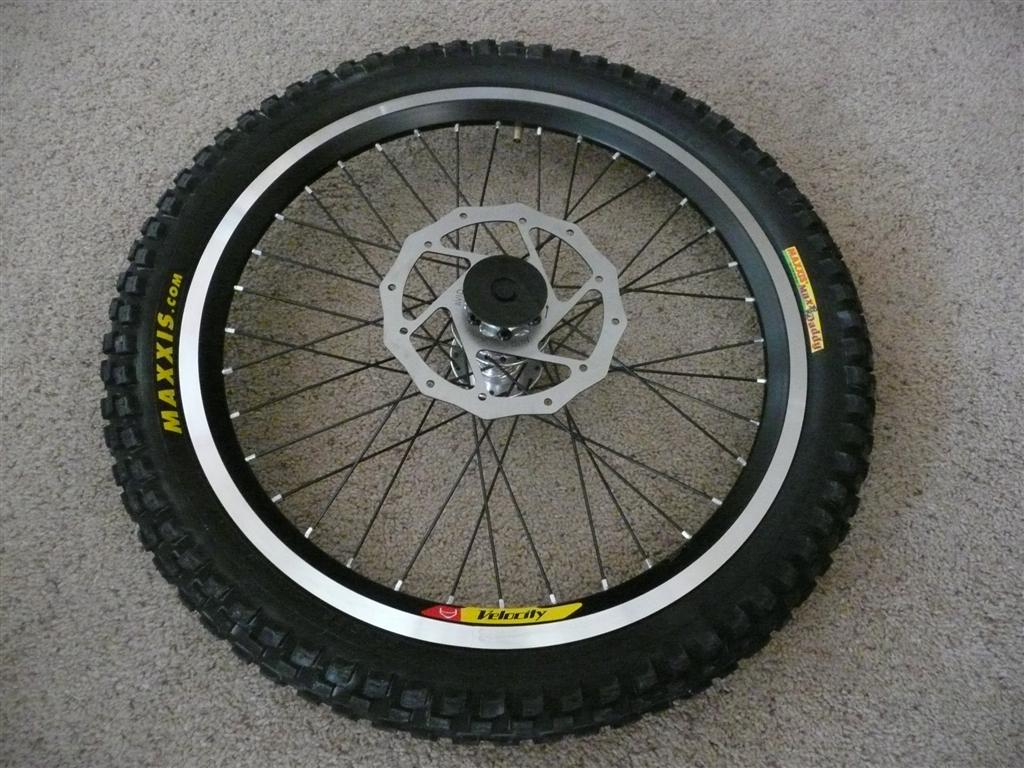

I originally fitted matching Maxxis MaxxDaddy 20-inch BMX knobby tires in 2.25" width to both ends.

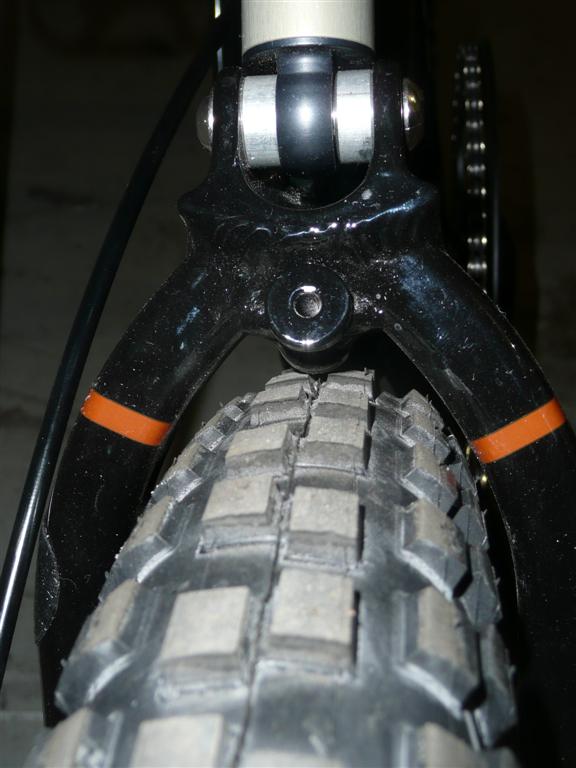
The rears did fit, but only barely (about 1/32 clearance), and so tended to collect mud and junk which could get so bad as to drag heavily on the wheel. So I later downsized to a 2.00" at the rear and kept a 2.25" up front, and have been happy with that combo for several years now.

These tires are definitely NOT fast rolling, especially on pavement (roughly 13 mph cruise versus 16 mph on the stock Marathon Racers).
But they are quite grippy and feel remarkably secure offroad. For example, I recorded a max of 37+ mph on a smooth, mildly moist, dirt road descent on these, and felt just fine doing so.
By 2013, I couldn't find any Maxx Daddys in 2.25 width so I tried a set of Odyssey Aitken knobbies. I chose 2.125" and 2.35" widths and initially was encouraged that these would be a reasonable replacement for the Maxxis tires, but as I rode more trails in more conditions it became clear the knobs on the Odysseys just weren't aggressive enough to deal with loose or wet surfaces nearly as well as the Maxxis's did. So I scrounged around and found a couple of MaxxDaddy 2.25" tires on ebay which should hold me for a while... hopefully by then Maxxis will come to their senses and start making the 2.25" model again!
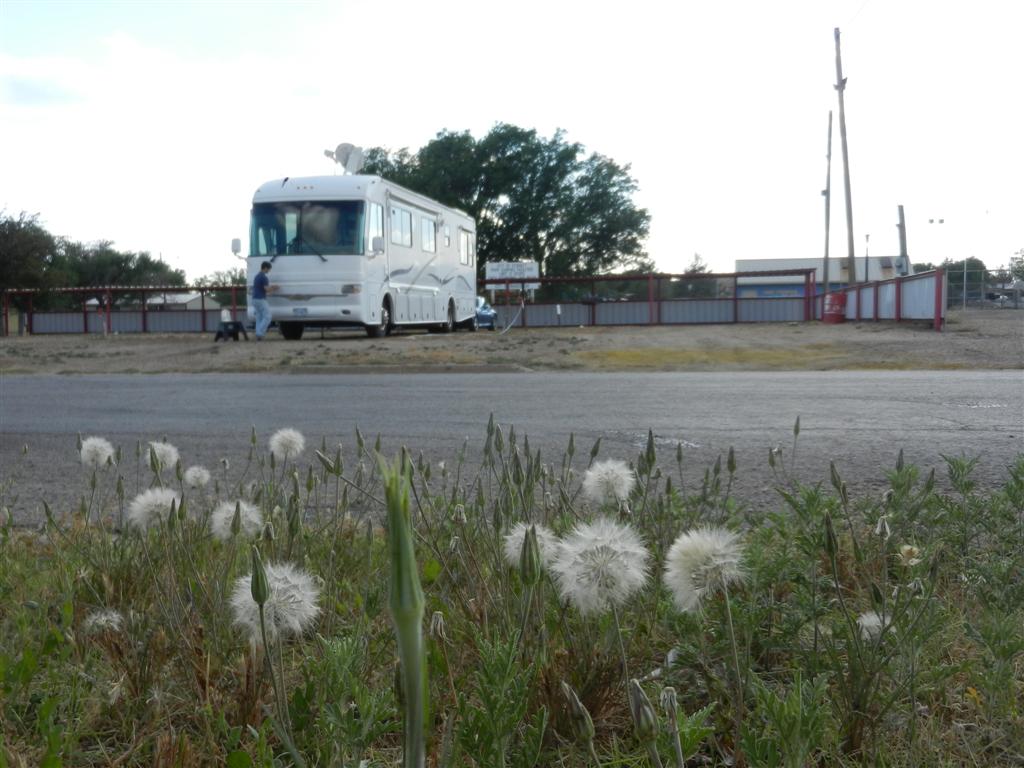
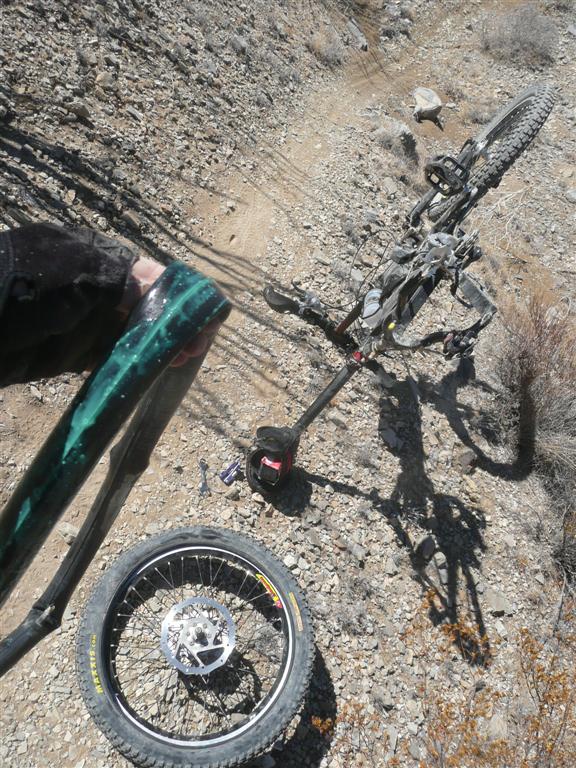
I get plenty of practice changing flats. Luckily I'm often in pretty scenic places when I have to do the job! One nifty item I found to help this is a 15mm stubby wrench, available to order from Sears, that fits nicely in the seatbag.
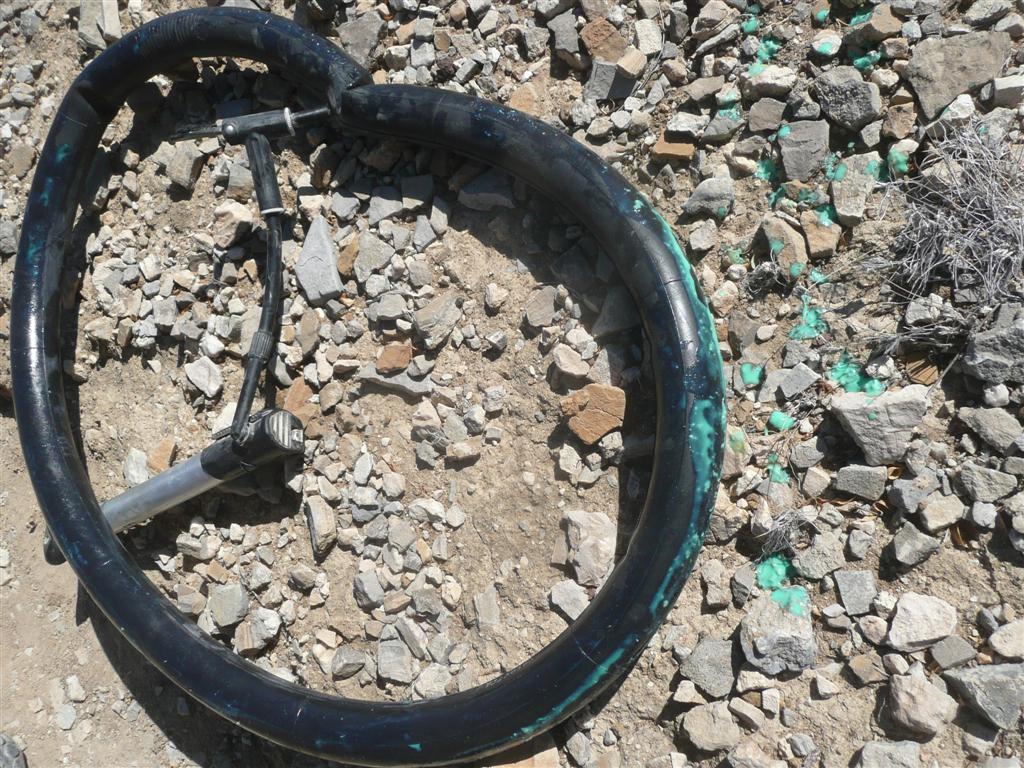
Slime (tm) tubes. I've tried 'em twice and have decided they're useless. They're heavy, messy, and don't plug leaks. Yuck.
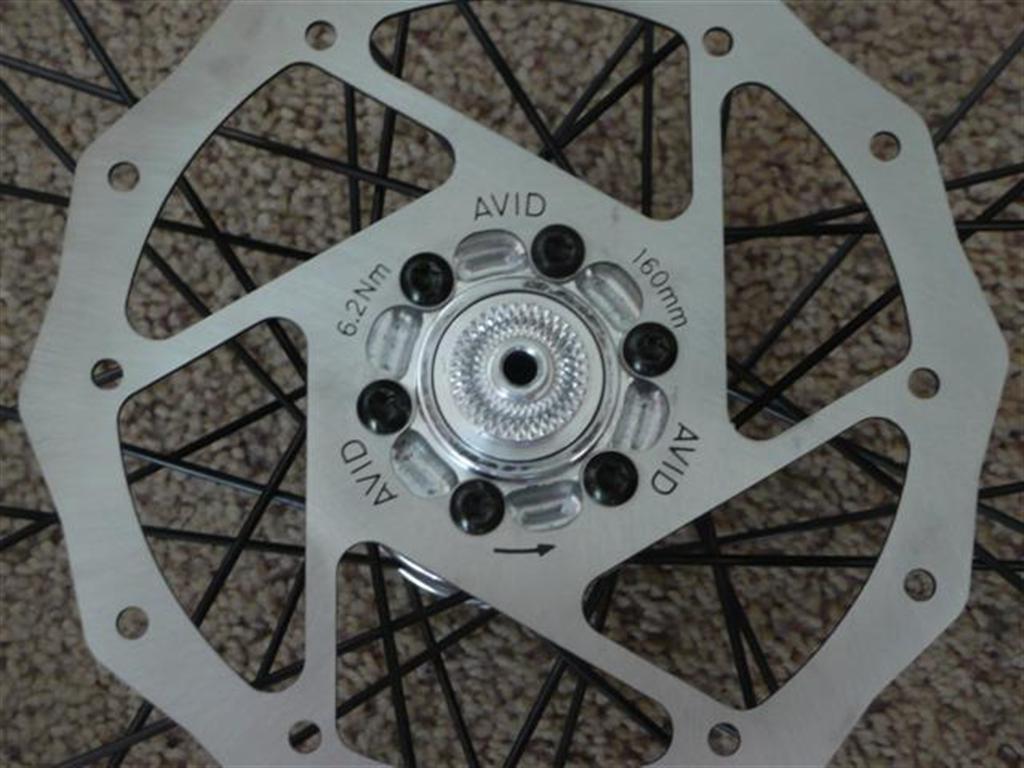
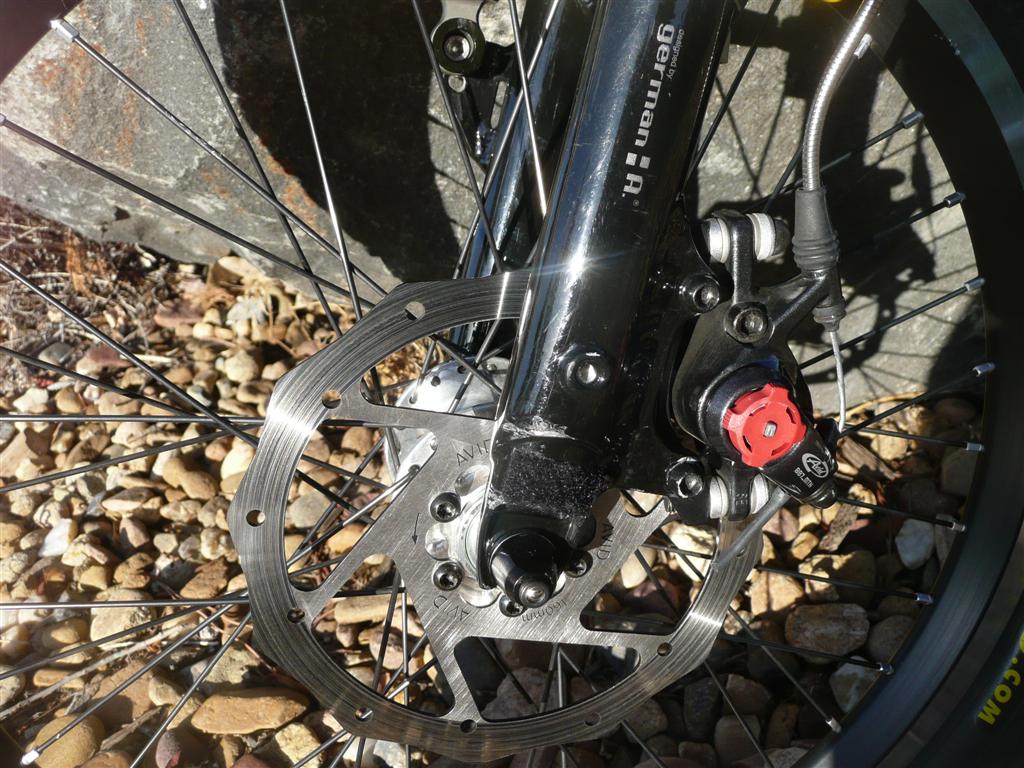
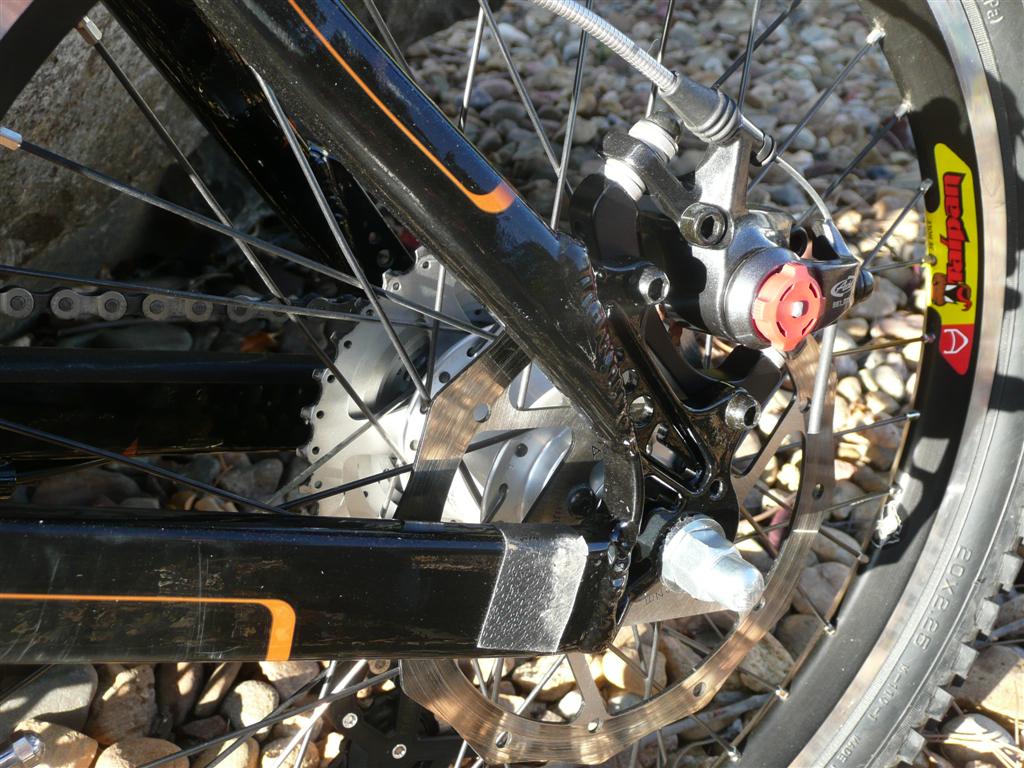
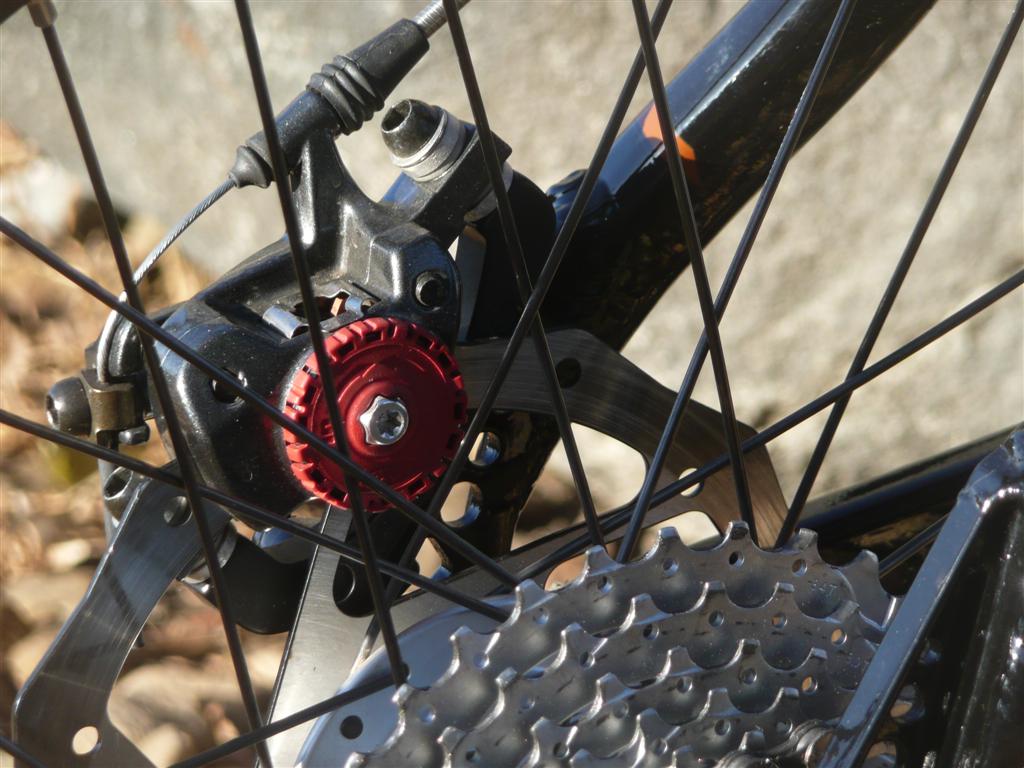
Avid BB-7 mechanical disk brakes fitted easily to the tabs on the stock fork and frame, and work perfectly with the stock Avid levers and Jagwire cables. I covered the original V-Brake bosses with blingy yellow pipe caps from Lowe's.

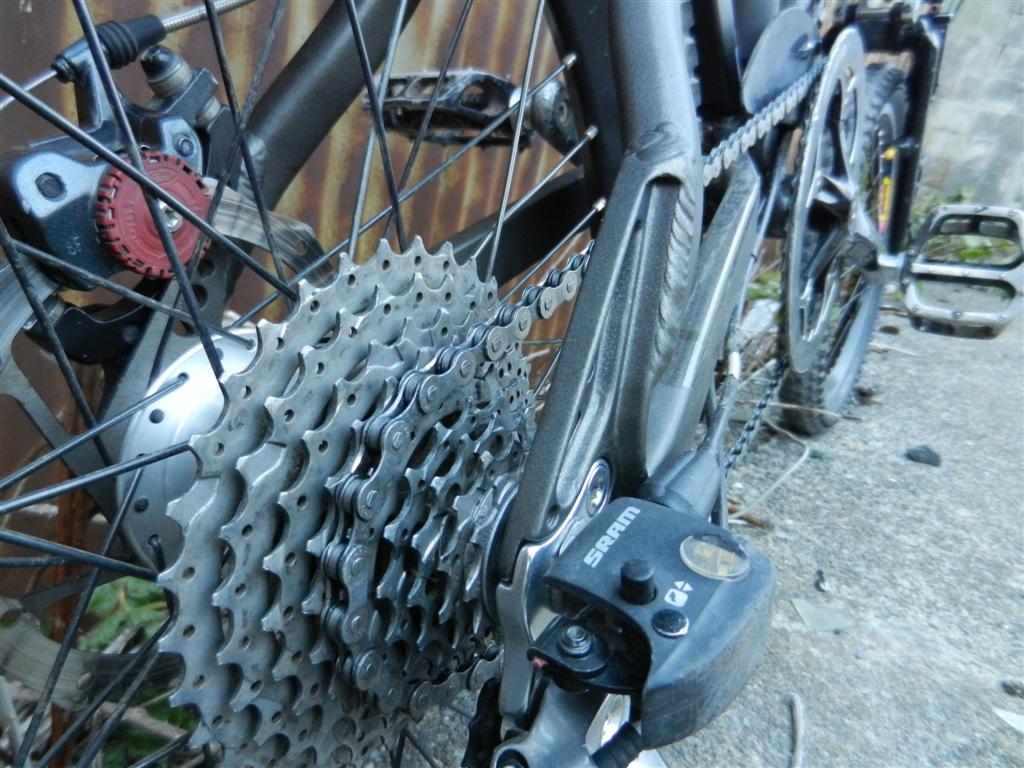
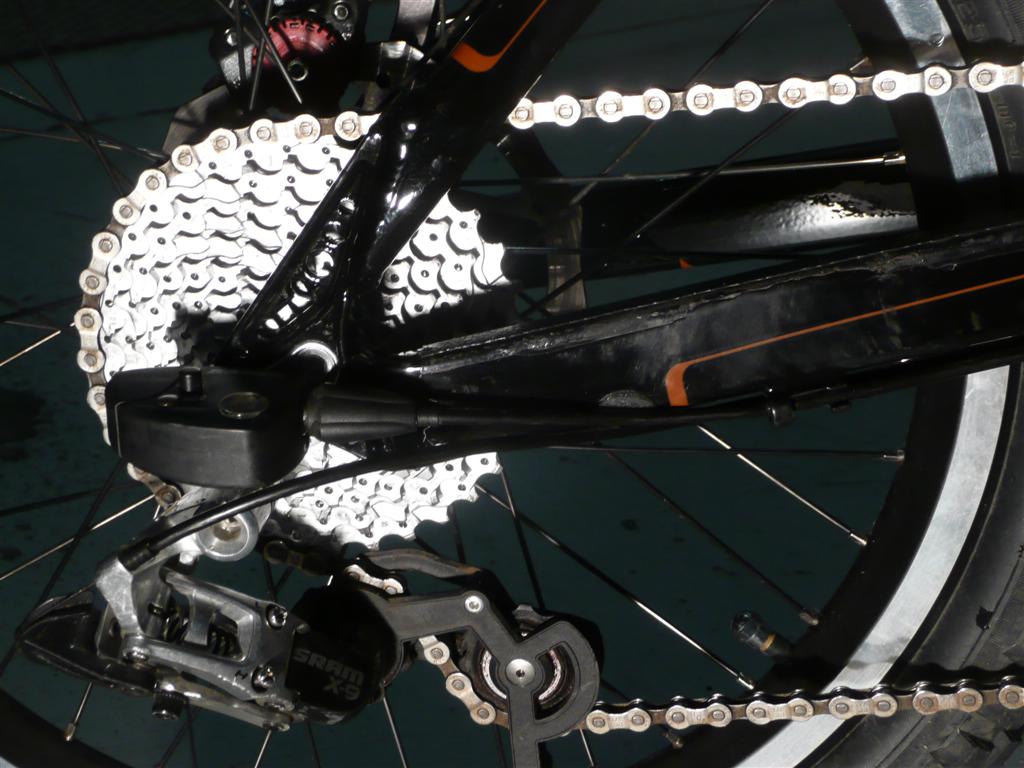
To achieve roughly the gear range of a typical mountain bike, I changed the stock front chainring from 53 to 44 teeth, replaced the original 11-28 eight-speed rear cassette with a nine-speed SRAM 970 11-34 model, and installed an SRAM X9 9-speed trigger shifter.
Stock gear range spanned 470% (27.8 to 131.1 gear-inches).
Modified gear range spans 572% (19.0 to 108.8 gear-inches). This is a healthy 32% lower at the low end, but only 17% lower at the top end.
This lets me grind up 20% grades at 3 mph, and pedal up to at least 40 mph on suitable downslopes, so I'm a happy camper. ;)

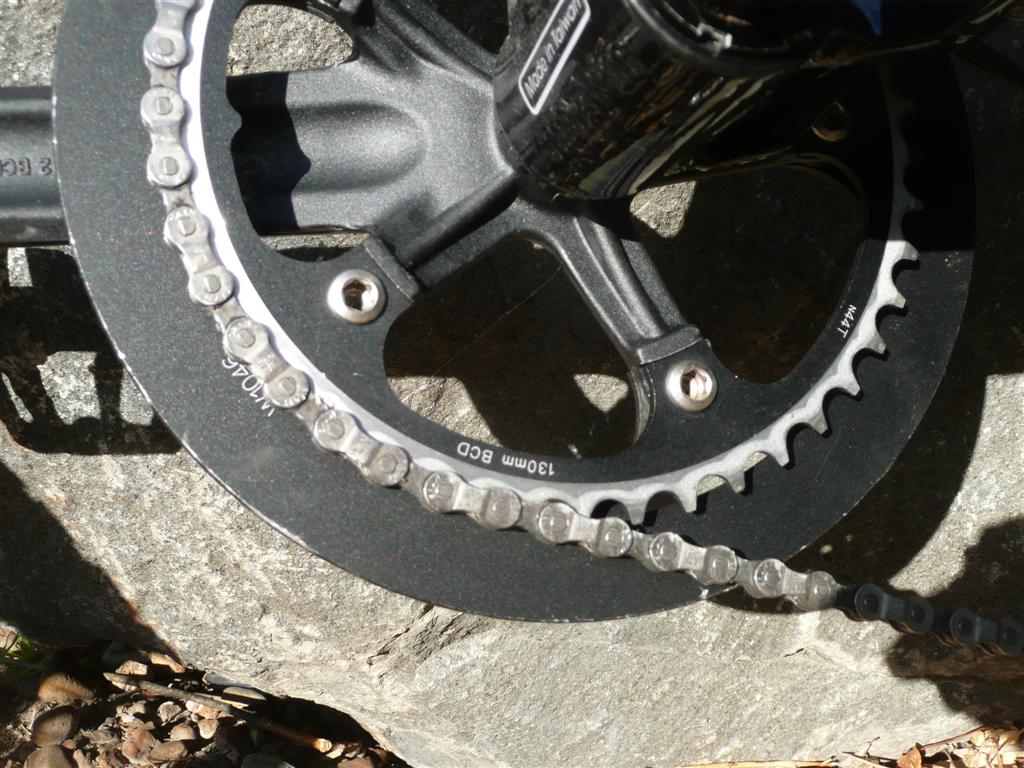
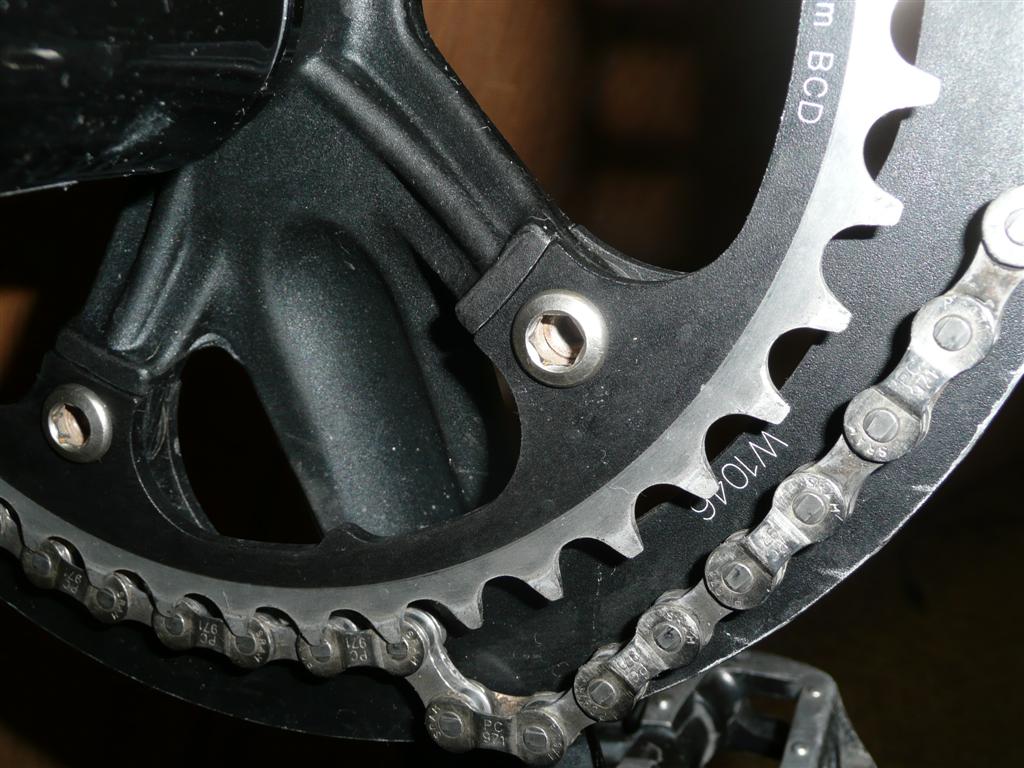
Three years later, the original aluminum ring from FSA was thoroughly worn out (see shark's teeth below), so I replaced it with a new stainless steel ring from Surly that should be a lot more durable, and, is reversible since it's designed to be used in a single-ring setup and is completely symmetrical.
.
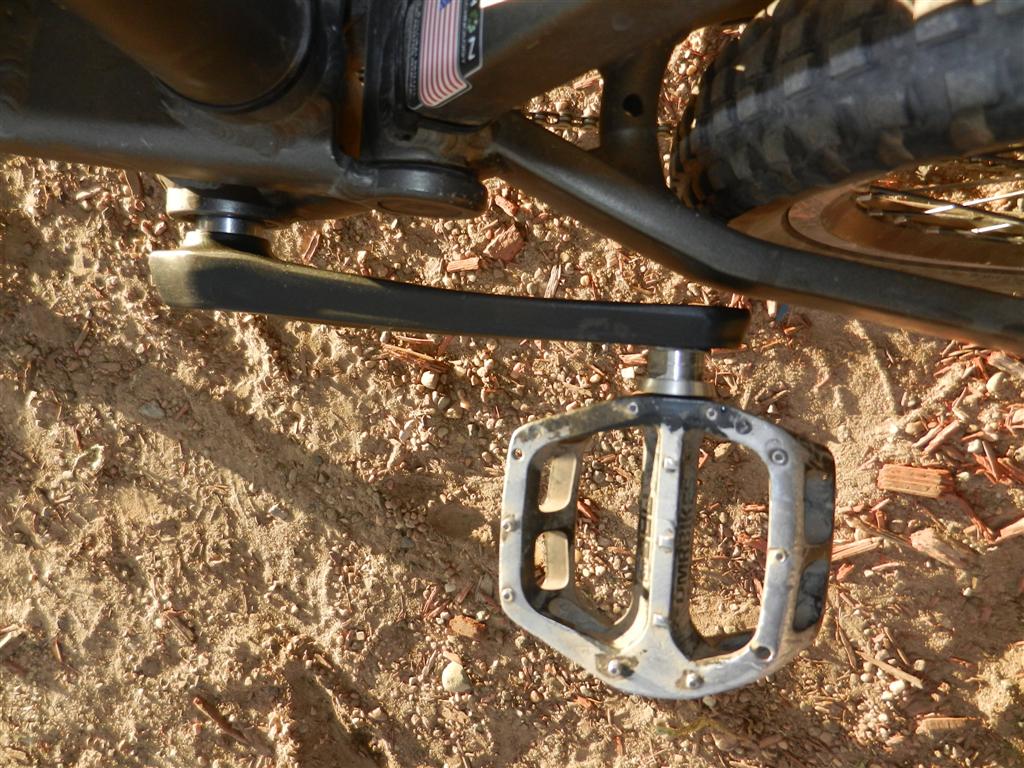
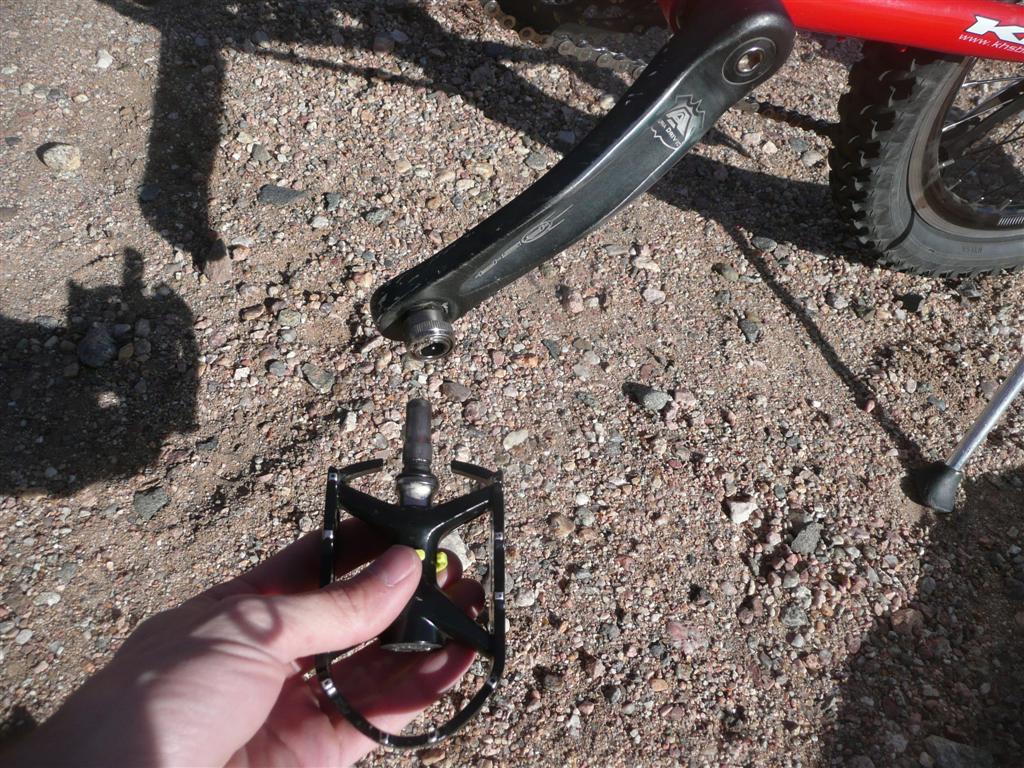
I immediately transplanted the supplied MKS EZY detachable pedals to our other folding bike which sees mostly street duty.
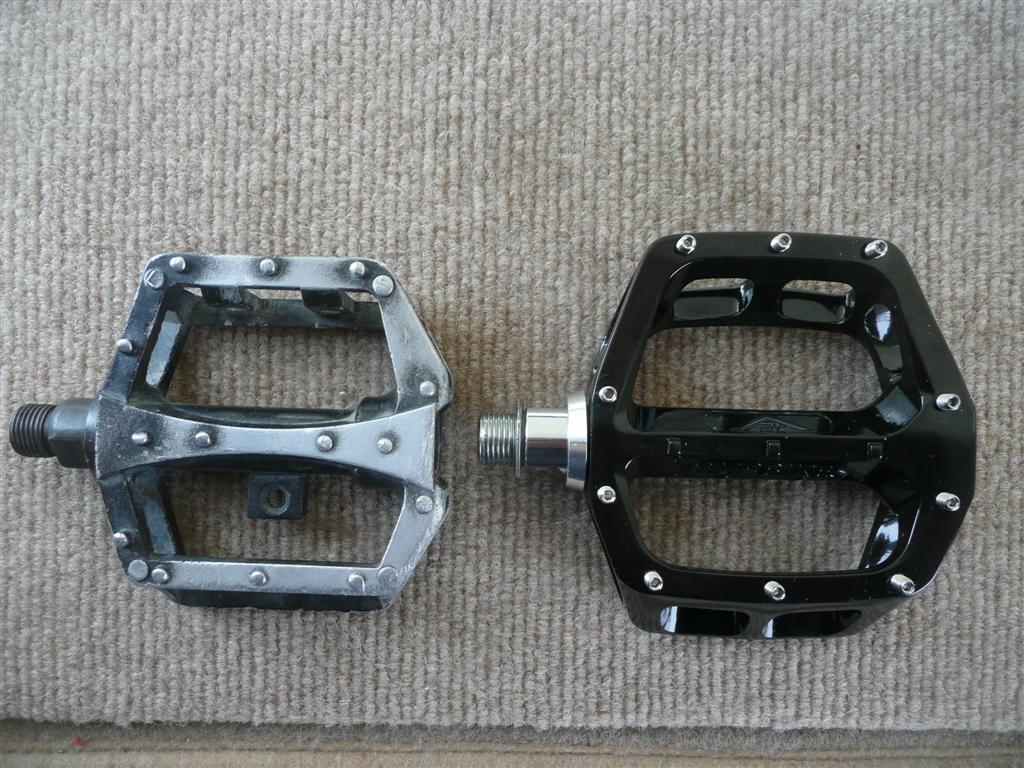
I initially installed a pair of basic Wellgo platforms from my old bike on the Dahon, but soon upgraded to an even bigger and spikier set of DMR V-12 Mag pedals. In conjunction with grippy FiveTen Impact shoes, these pedals keep me remarkably well connected to the bike over rough terrain, while permitting very easy bailouts when the inevitable sudden stops happen.
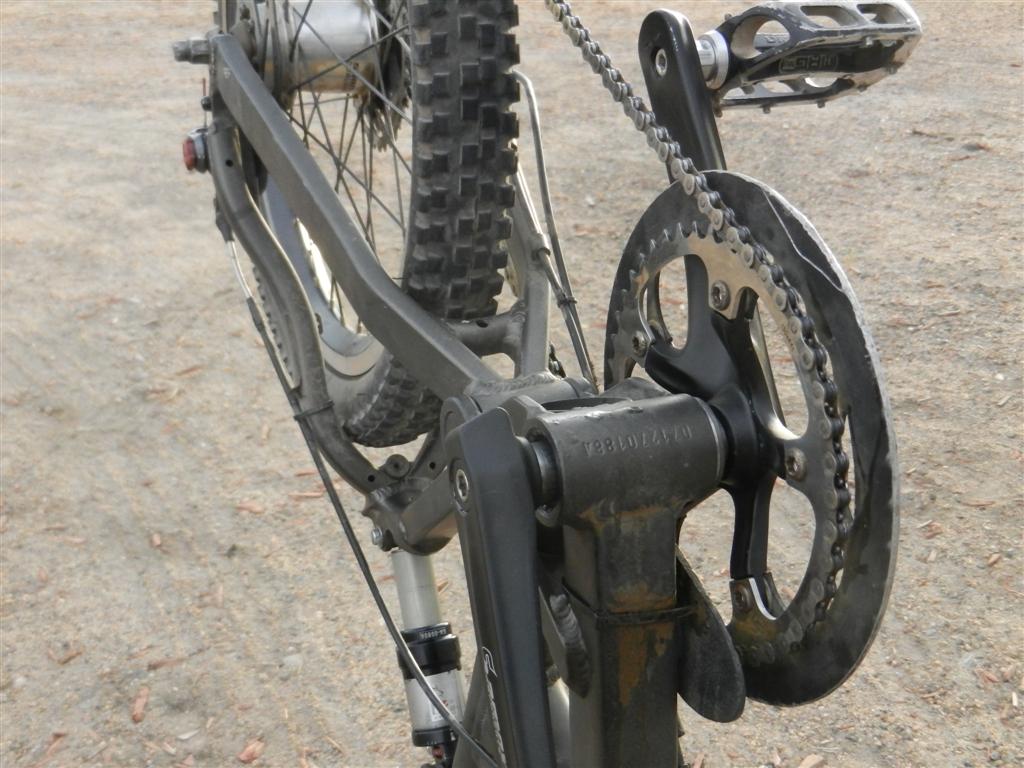
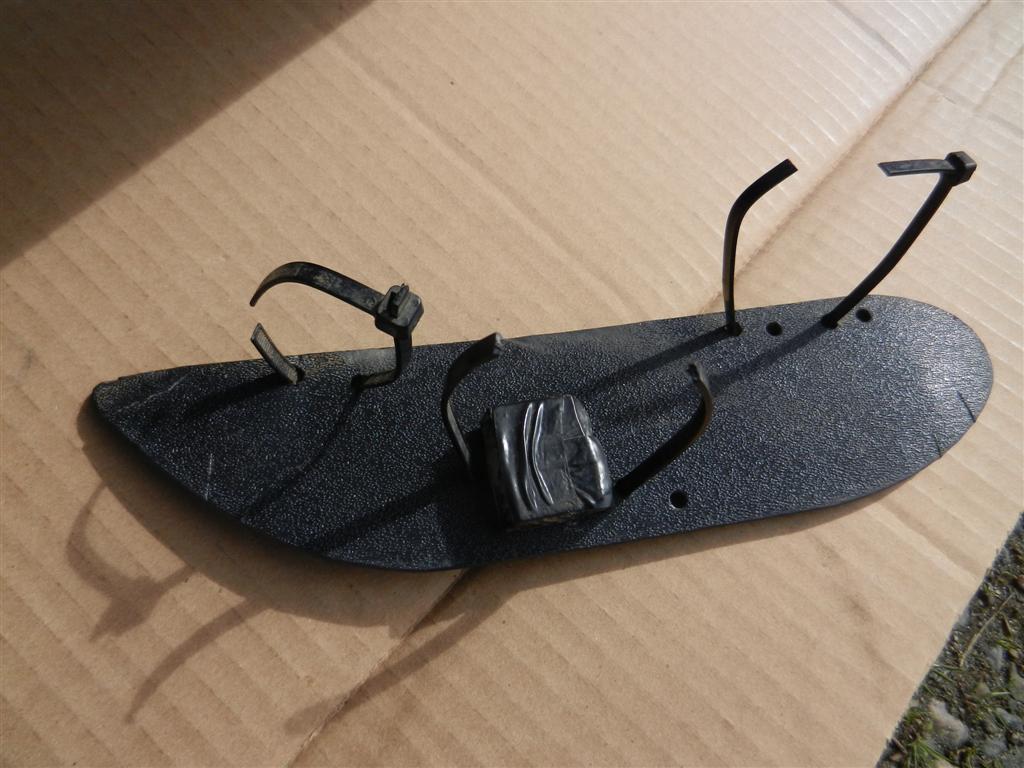
To keep the chain from bouncing off over the rough stuff, I built an inner chainguard from a piece of ABS plastic. Took a little testing and tuning of the shape and position, but eventually I virtually eliminated chain drops.
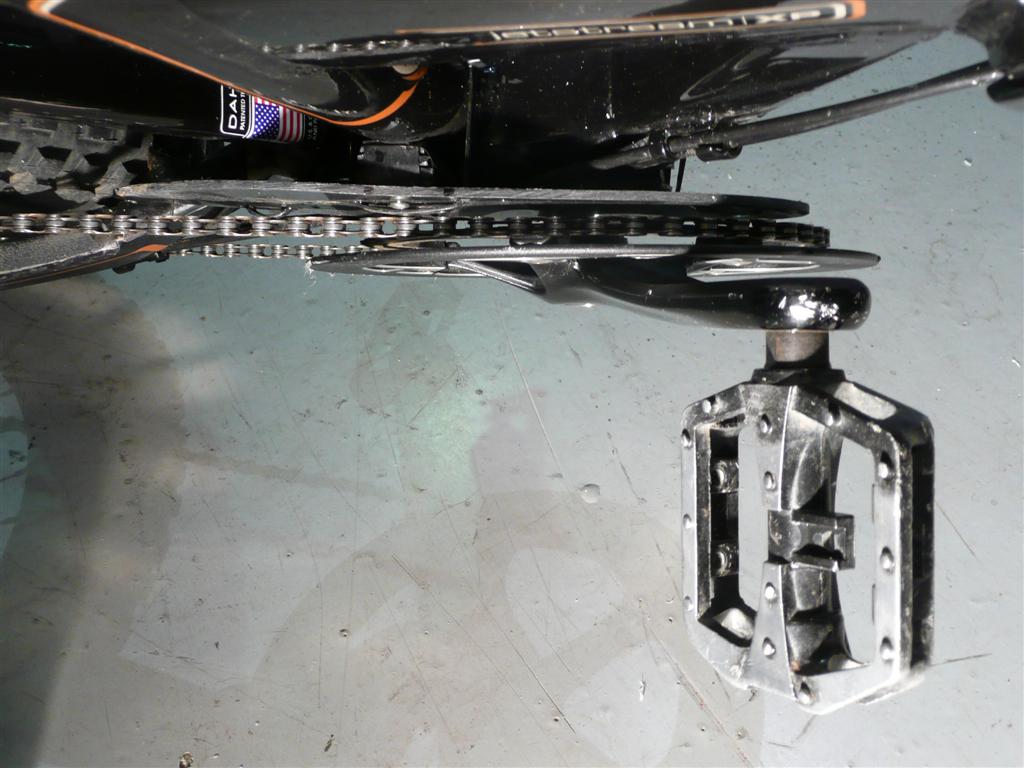
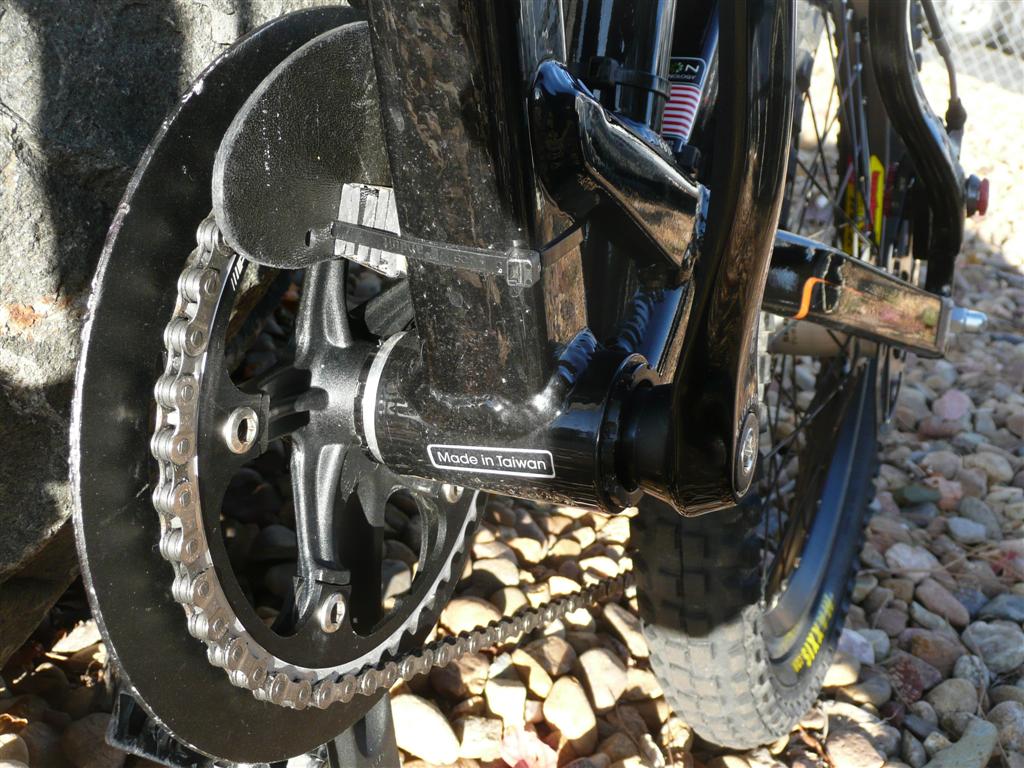


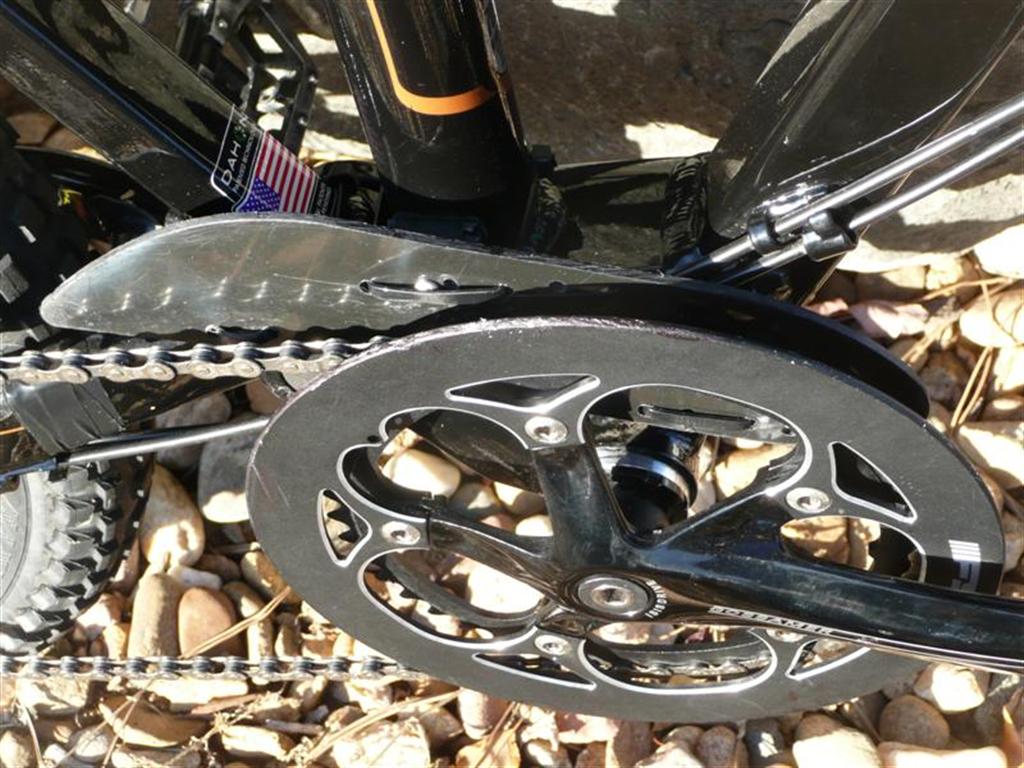
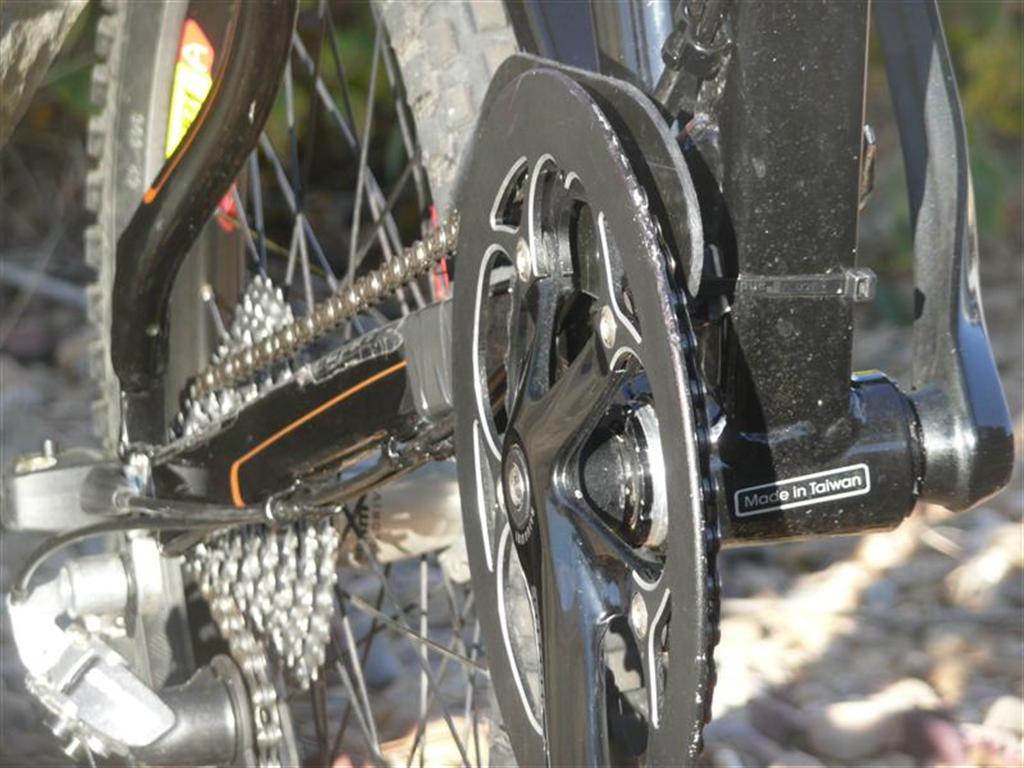
I kept the original FSA chainguard on the outside. It's oversized for the smaller ring I now use, but it does keep the chain from jumping off. It also works fine as a bash guard against rocks, even though it wasn't originally meant for that. I did have to shim this piece out slightly to provide a hair more chain clearance for my smaller chainring.
Finally, a stick-on Lizard Skin piece protects the drive-side chainstay from chain slap.
One of the plastic rails on the stock Kore saddle cracked after a couple of years and it started making a "crack crack" noise. There are not a whole lot of choices with the I-Beam system, but I replaced it with a SDG Formula MT saddle that's a little burlier and so far, so good.
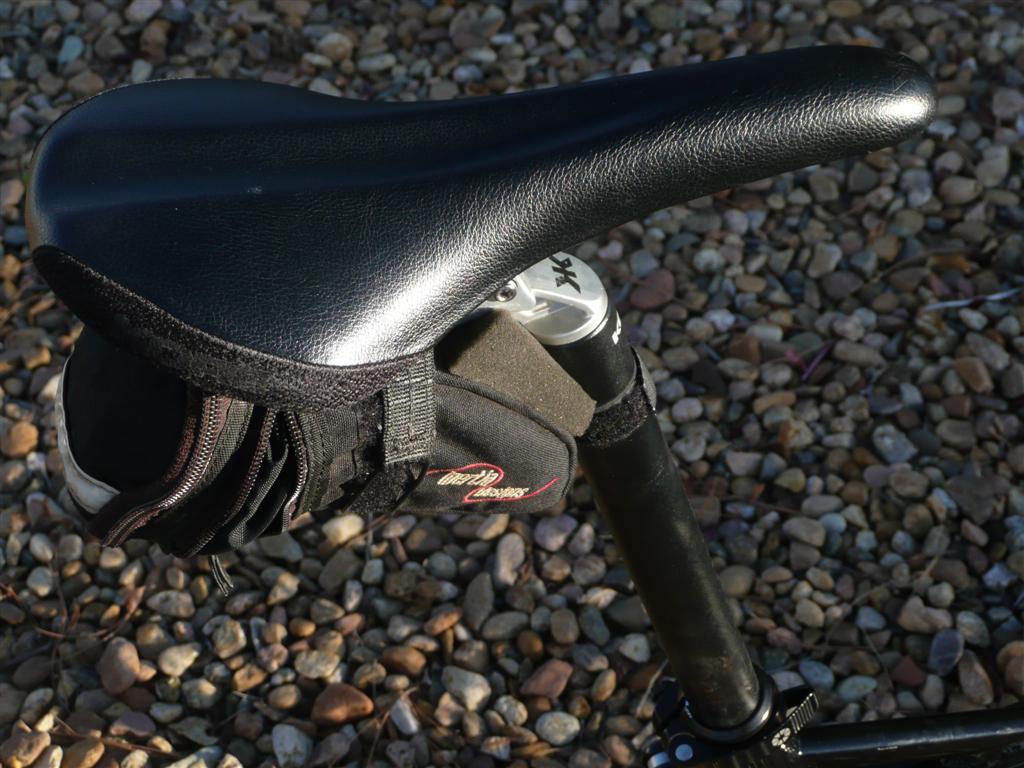

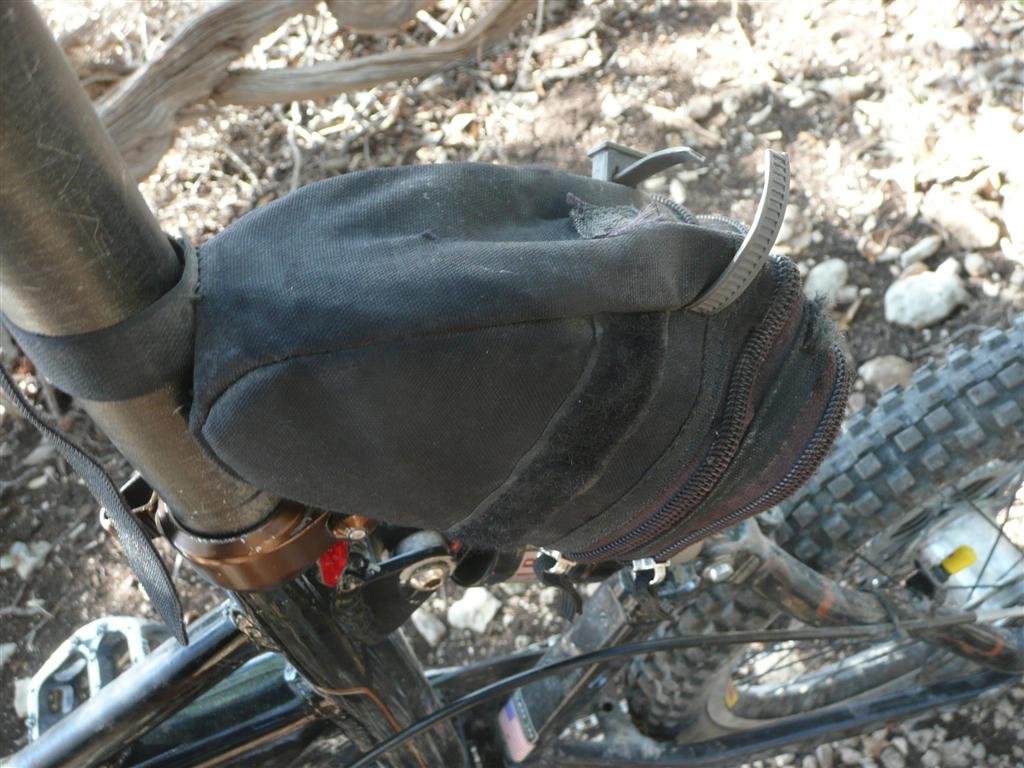
I have an expandable seat bag made by Inertia Designs. It's a nice little bag but had proven difficult to devise a method of securing it well-enough to the I-Beam seat (since it lacks the expected pair of rails) to survive mountain biking abuse. Debbie sewed on some extra velcro and I've rigged up a variety of straps, but this is still a work in progress to keep this thing stable.
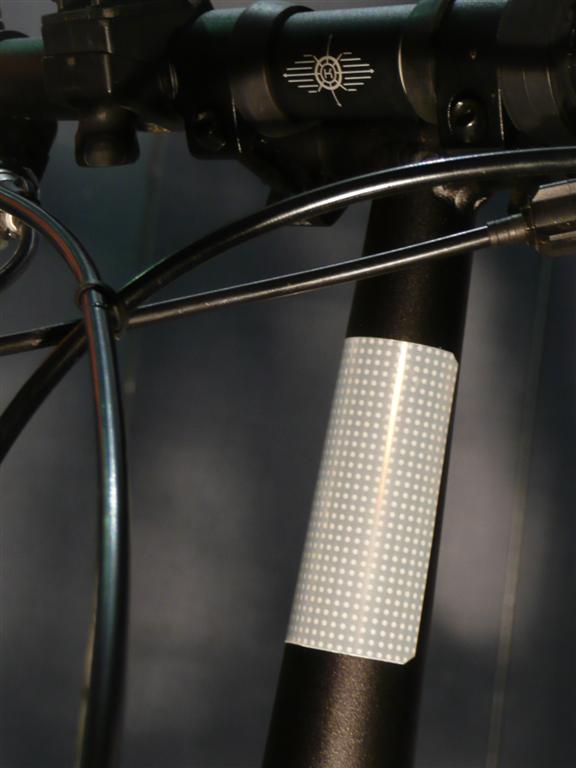
Replaced the front reflector with a big piece of 3M reflective truck tape. Reflects like the dickens and there's now nothing to break off.
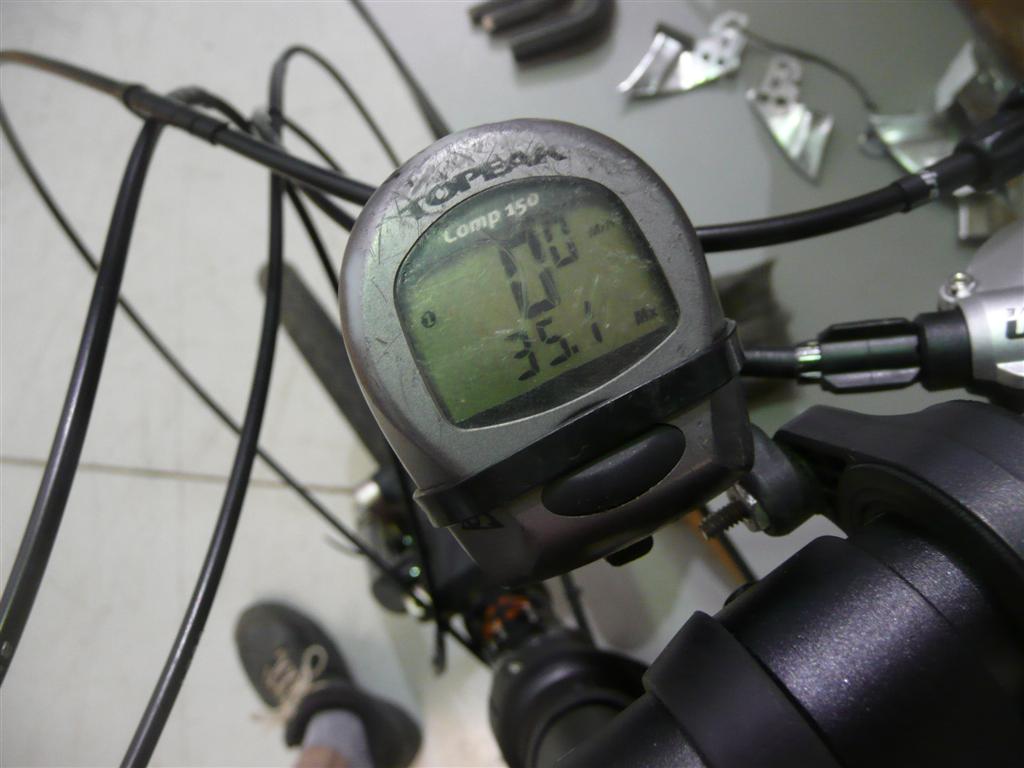
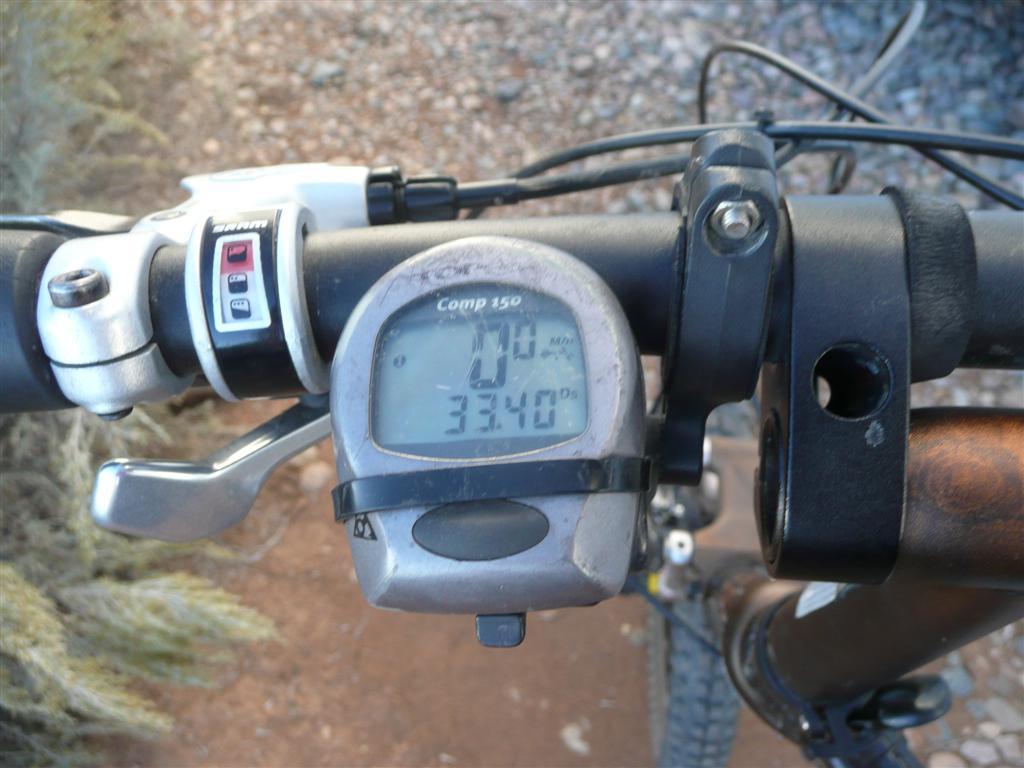
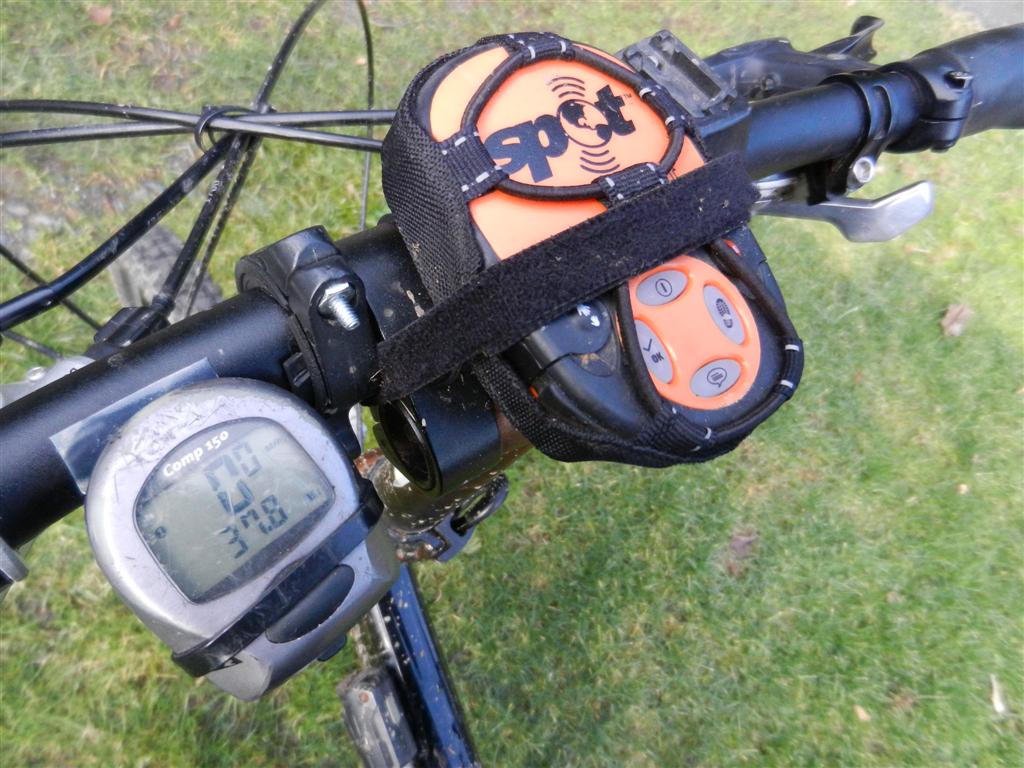
Topeak Comp 150 wireless bike computer. Nice and simple little unit.

SPOT II satellite-based GPS messenger lets Debbie keep track of me when I disappear into the backcountry (out of cell-phone range) for day-long adventure rides.
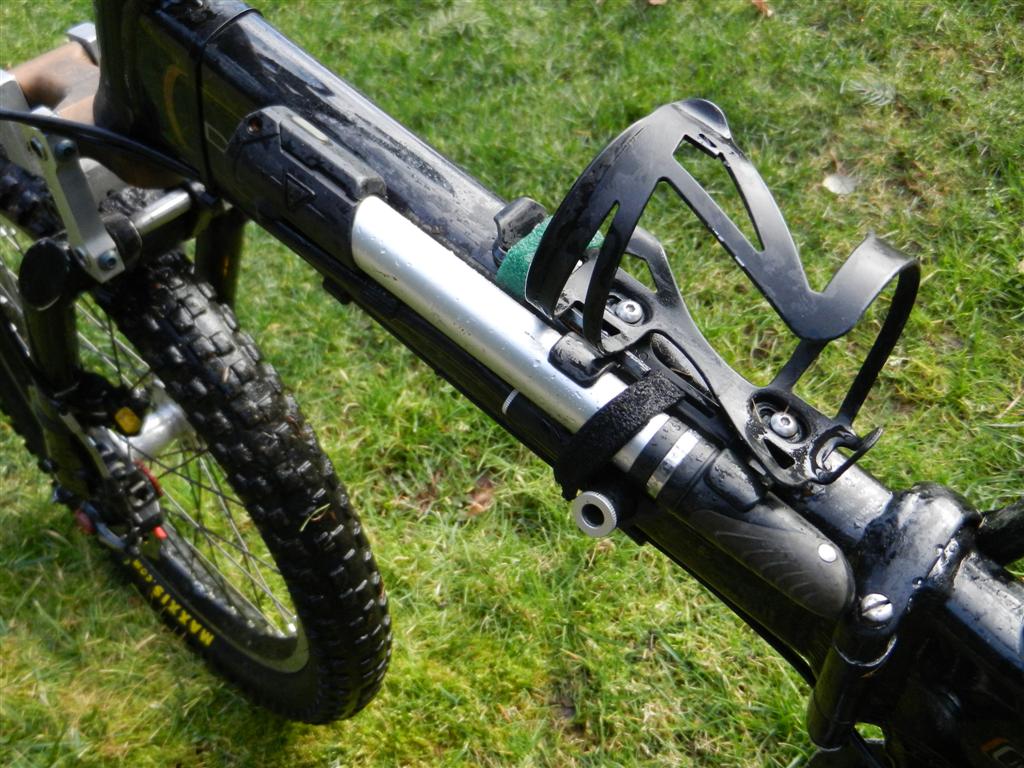
Topeak Mini Morph pump and Specialized "Zee" bottle cage. The cage below is the latest of many I've tried. This one is made from a single piece of metal--no welds to break like has plagued the others--so I'm hoping it's a keeper.
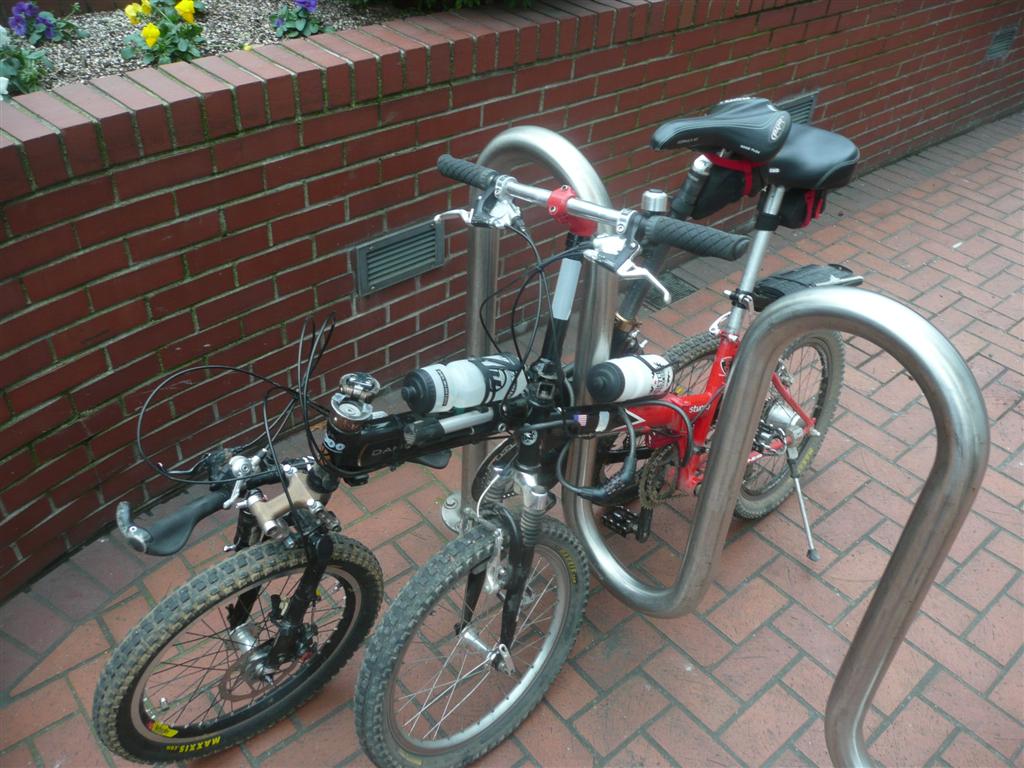
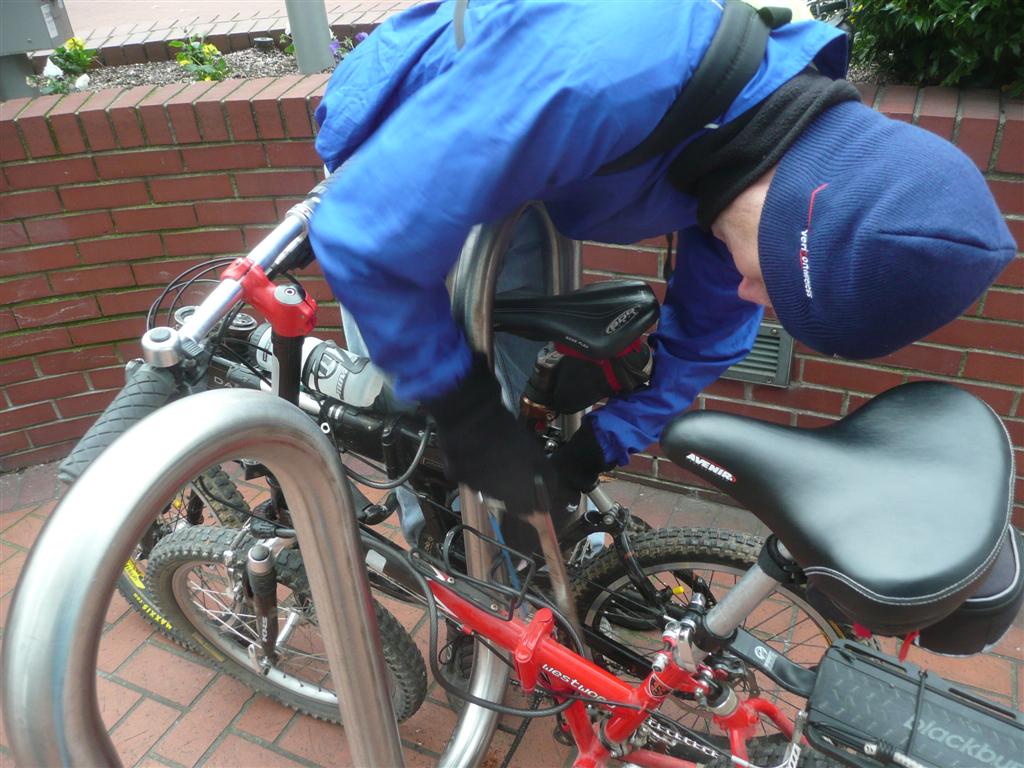
Lock Malfunction
Ye olde combination lock jammed during lunch in downtown Portland, so we had to borrow a hacksaw from a bike shop and cut it off.Turns out that spending about 10 minutes sawing through a cable lock is a good way to draw a crowd!
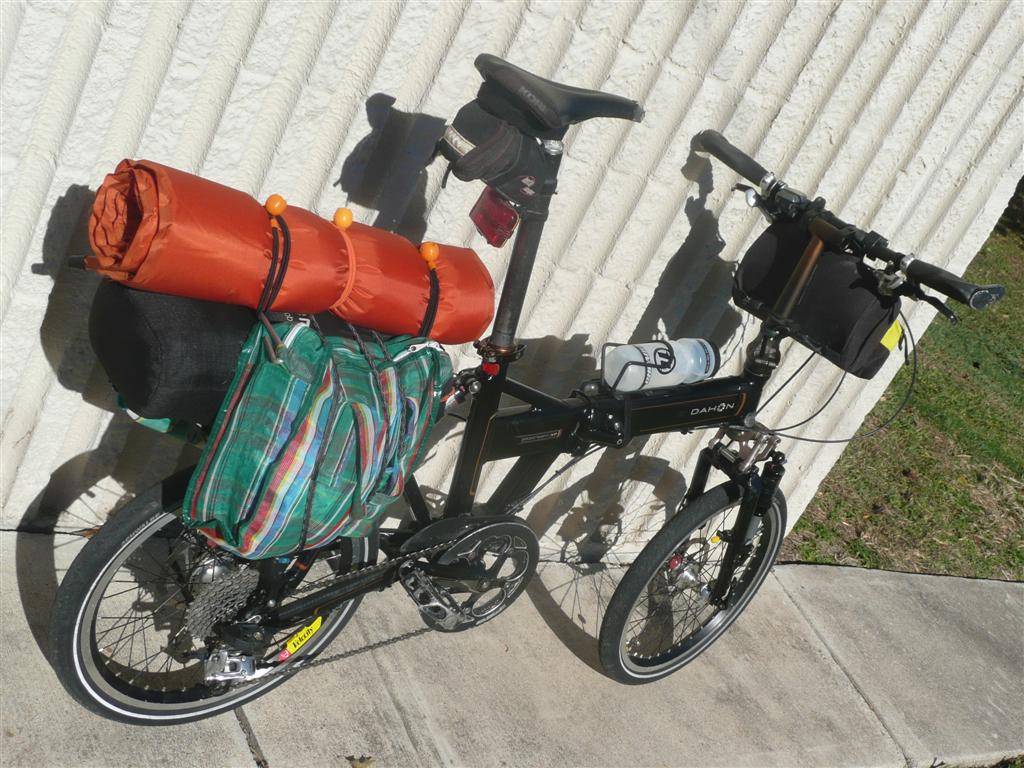
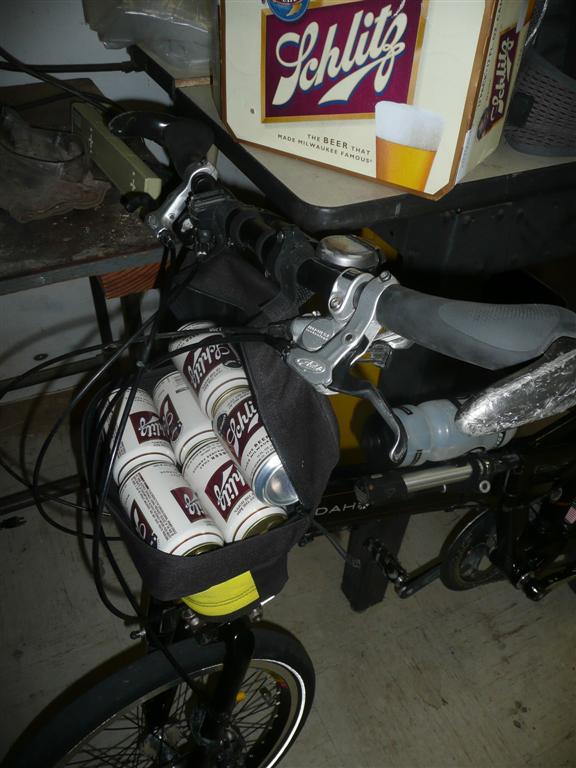
I bought a standard Arclite rear rack from ThorUSA, and fitted it with only a few small mods. Makeshift panniers plus a handlebar bag did the job during a three night bike tour in 2010 and another in 2012. Plenty of beer hauling capacity!

FIN.
Well, that's all so far... ;)
< previous story home next story >
HOME TRAVEL LOG MOUNTAIN BIKING WINDSURFING STORY ARCHIVES RV INFO PHOTOS CONTACT US